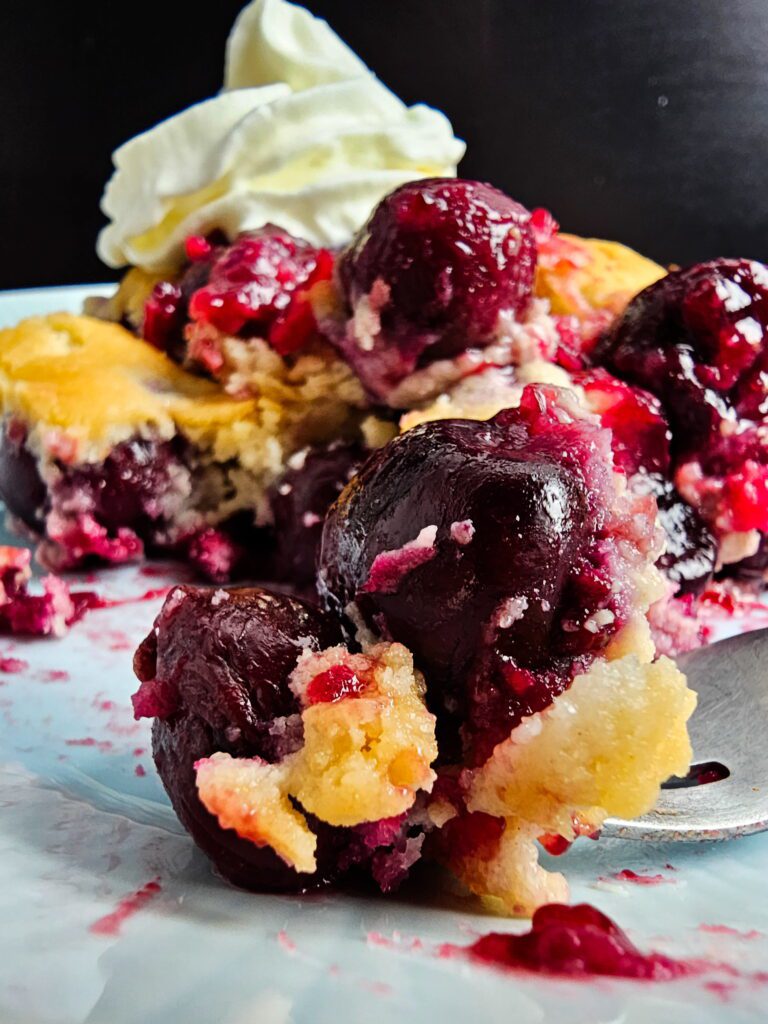
If you’ve been searching for the best fresh cherry cobbler recipe, you just found it. This homemade cherry cobbler starts with a thick, jammy cherry filling — cooked down on the stovetop until the juices are rich and glossy — then finished with a buttery, flaky drop-biscuit topping that bakes to a gorgeous golden brown. No canned filling. No box mix. Just fresh cherries and simple pantry staples.
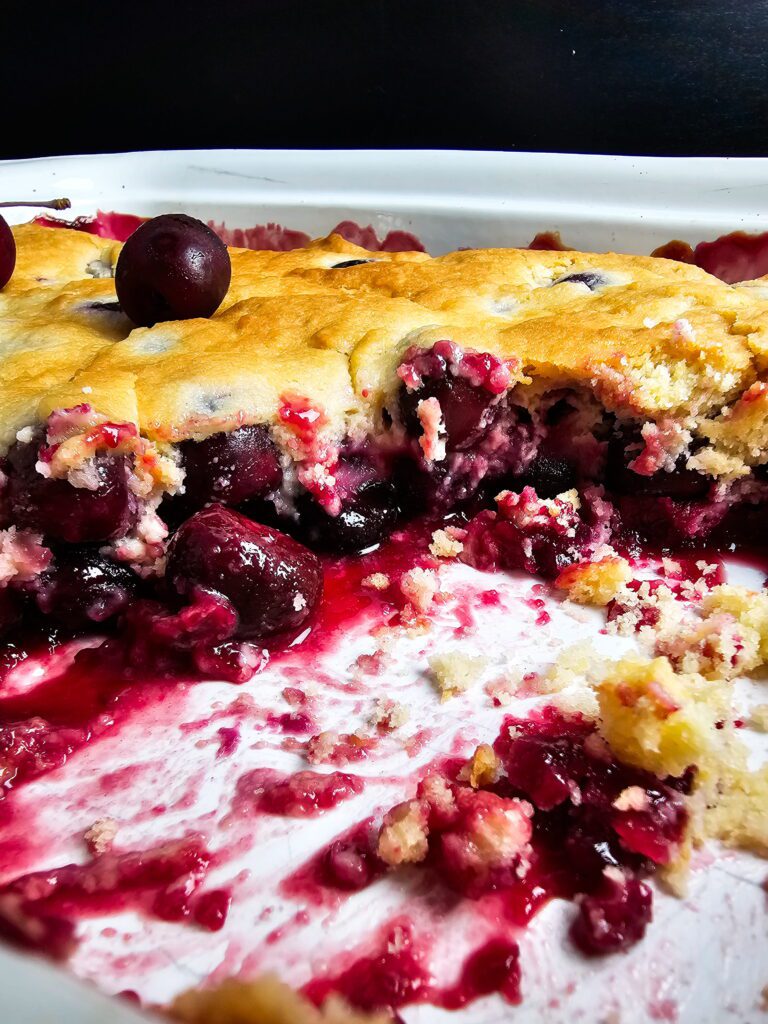
The secret to this thick cherry cobbler filling is pre-cooking the cherry filling so it’s thick and deeply flavored before it ever goes in the oven. That means no soggy bottoms and a topping that stays perfectly crisp every single time.
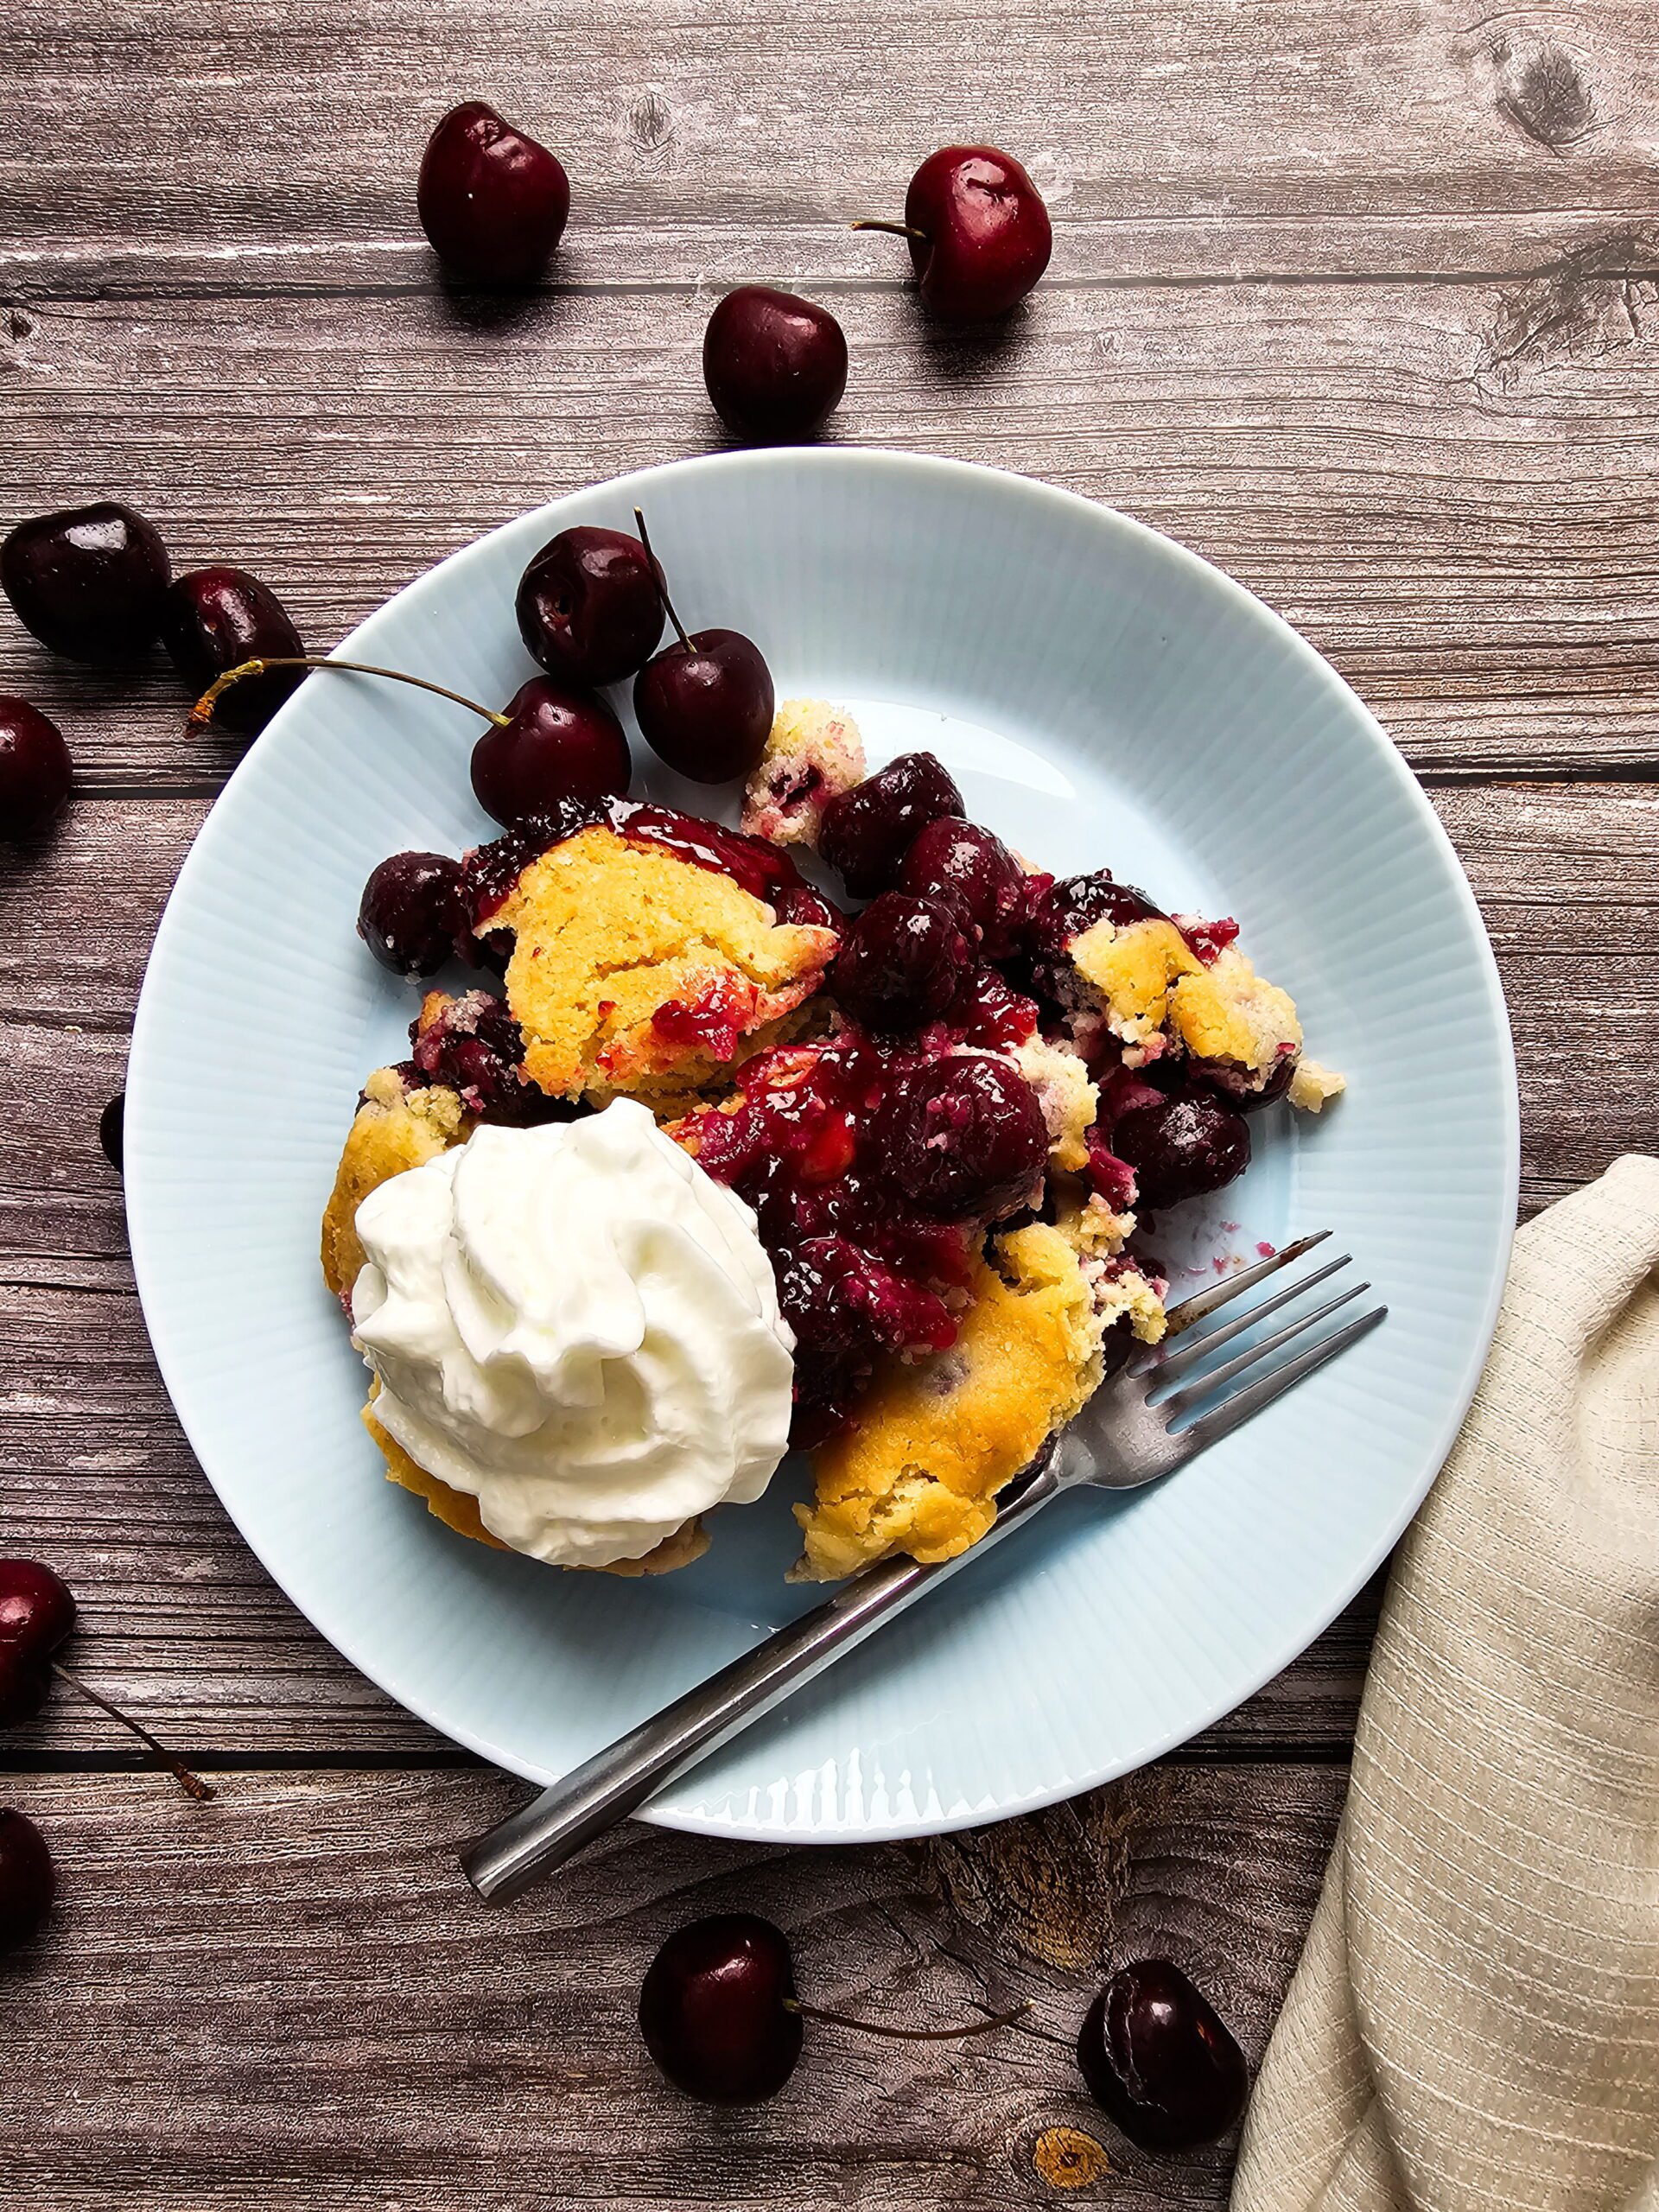
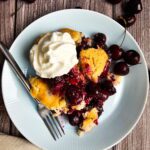
This old-fashioned cherry cobbler comes together in about an hour, feeds a crowd, and tastes best served warm with a scoop of vanilla ice cream slowly melting into the cracks.
Why This Cherry Cobbler Recipe Works
Most cobbler recipes just dump raw fruit in a dish and hope for the best. This recipe does things differently — and here’s why it works so well:
- Pre-cooked filling: Cooking the cherries on the stovetop first concentrates the flavor and thickens the juices, so you never end up with a watery cobbler.
- Cold butter topping: Cutting cold butter into the flour creates steam pockets in the oven and that’s what makes the topping flaky.
- Almond extract: Just a quarter teaspoon amplifies the natural cherry flavor dramatically. It’s the trick professional bakers use and most home recipes leave out.
- The right oven temperature: 375°F is hot enough to brown the topping beautifully, but gentle enough to keep the filling from scorching before the biscuits are done.
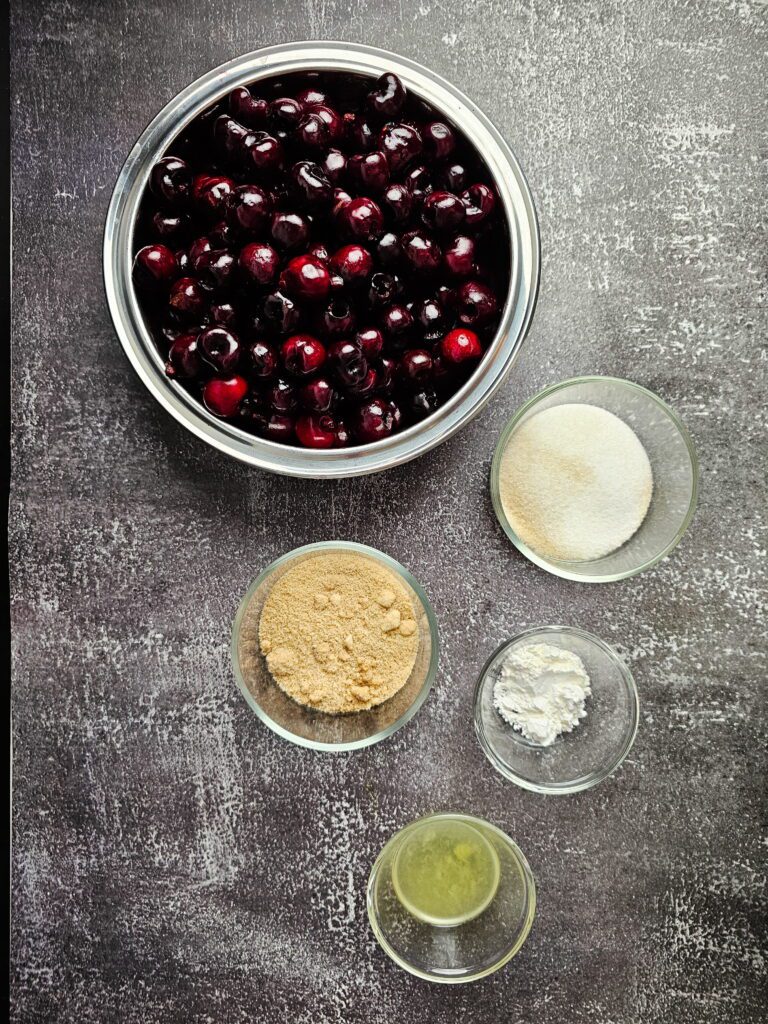
Cherry Cobbler Ingredients
For the Cherry Filling:
- 4 cups fresh cherries, pitted
- 1/2 cup granulated sugar
- 1/4 cup brown sugar
- 2 tbsp cornstarch
- 1 tsp vanilla extract
- 1/4 tsp almond extract (optional but highly recommended)
- 1/4 tsp salt
- 1/4 cup water
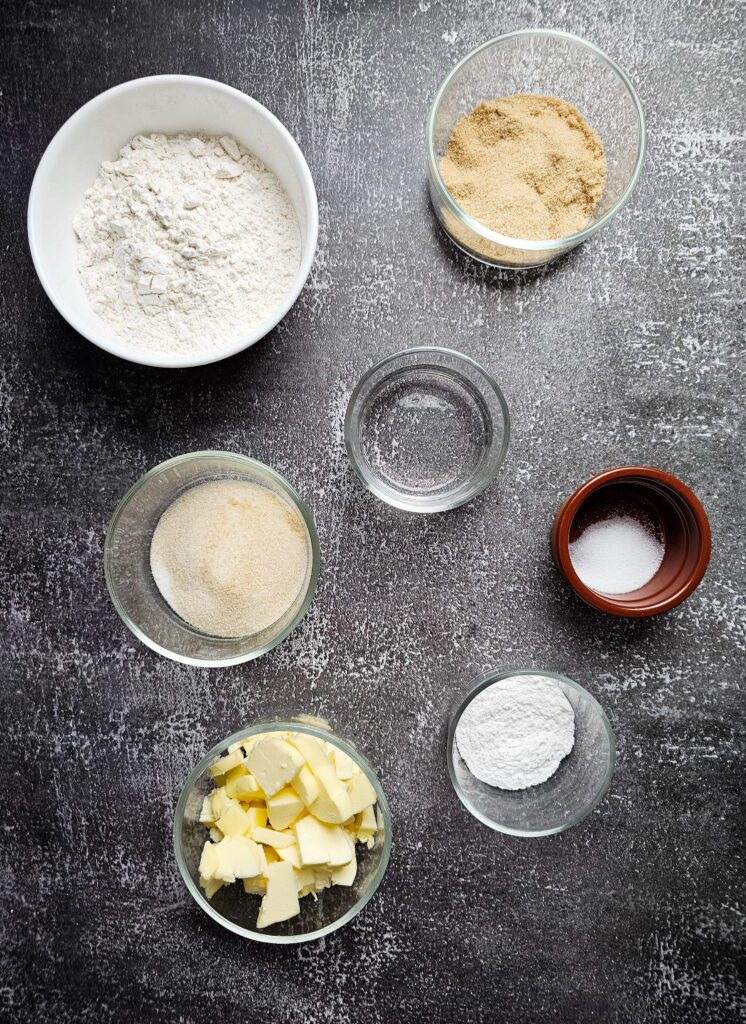
For the Cobbler Topping:
- 1 1/2 cups all-purpose flour
- 1/3 cup granulated sugar
- 1/3 cup brown sugar
- 1 tsp baking powder
- 1/2 tsp salt
- 1/2 cup unsalted butter, cold and cut into small cubes
- 1/3 to 1/2 cup whole milk or heavy cream
- 1 tsp vanilla extract
- Coarse sugar for sprinkling on top (optional)
Ingredient Notes:
Sweet dark cherries like Bing work great for a rich, deep-flavored cobbler. Sour cherries like Montmorency give a brighter, tangier result — just add an extra 2 to 3 tablespoons of sugar. A mix of both is arguably the best version of all. You’ll need about 1.5 to 2 pounds of whole unpitted cherries to get 4 cups pitted.
How to Make Fresh Cherry Cobbler
Time needed: 1 hour and 5 minutes
- Prepare the Cherry Filling:
In a medium saucepan over medium heat, combine the pitted cherries, granulated sugar, brown sugar, cornstarch, salt, and water. Cook, stirring occasionally, until the cherries have softened and the mixture has thickened — about 8 to 10 minutes. The filling is ready when it coats the back of a spoon and looks glossy, not watery.
Remove from heat and stir in the vanilla extract and almond extract. Set aside to cool slightly while you make the topping.
Tip: If the filling still looks thin after 10 minutes, cook for another 1 to 2 minutes. It will also thicken a little more as it cools, so don’t worry if it seems slightly looser than you expect straight off the heat. - Make the Cobbler Topping:
Preheat your oven to 375°F (190°C) and grease a 9×13-inch baking dish.
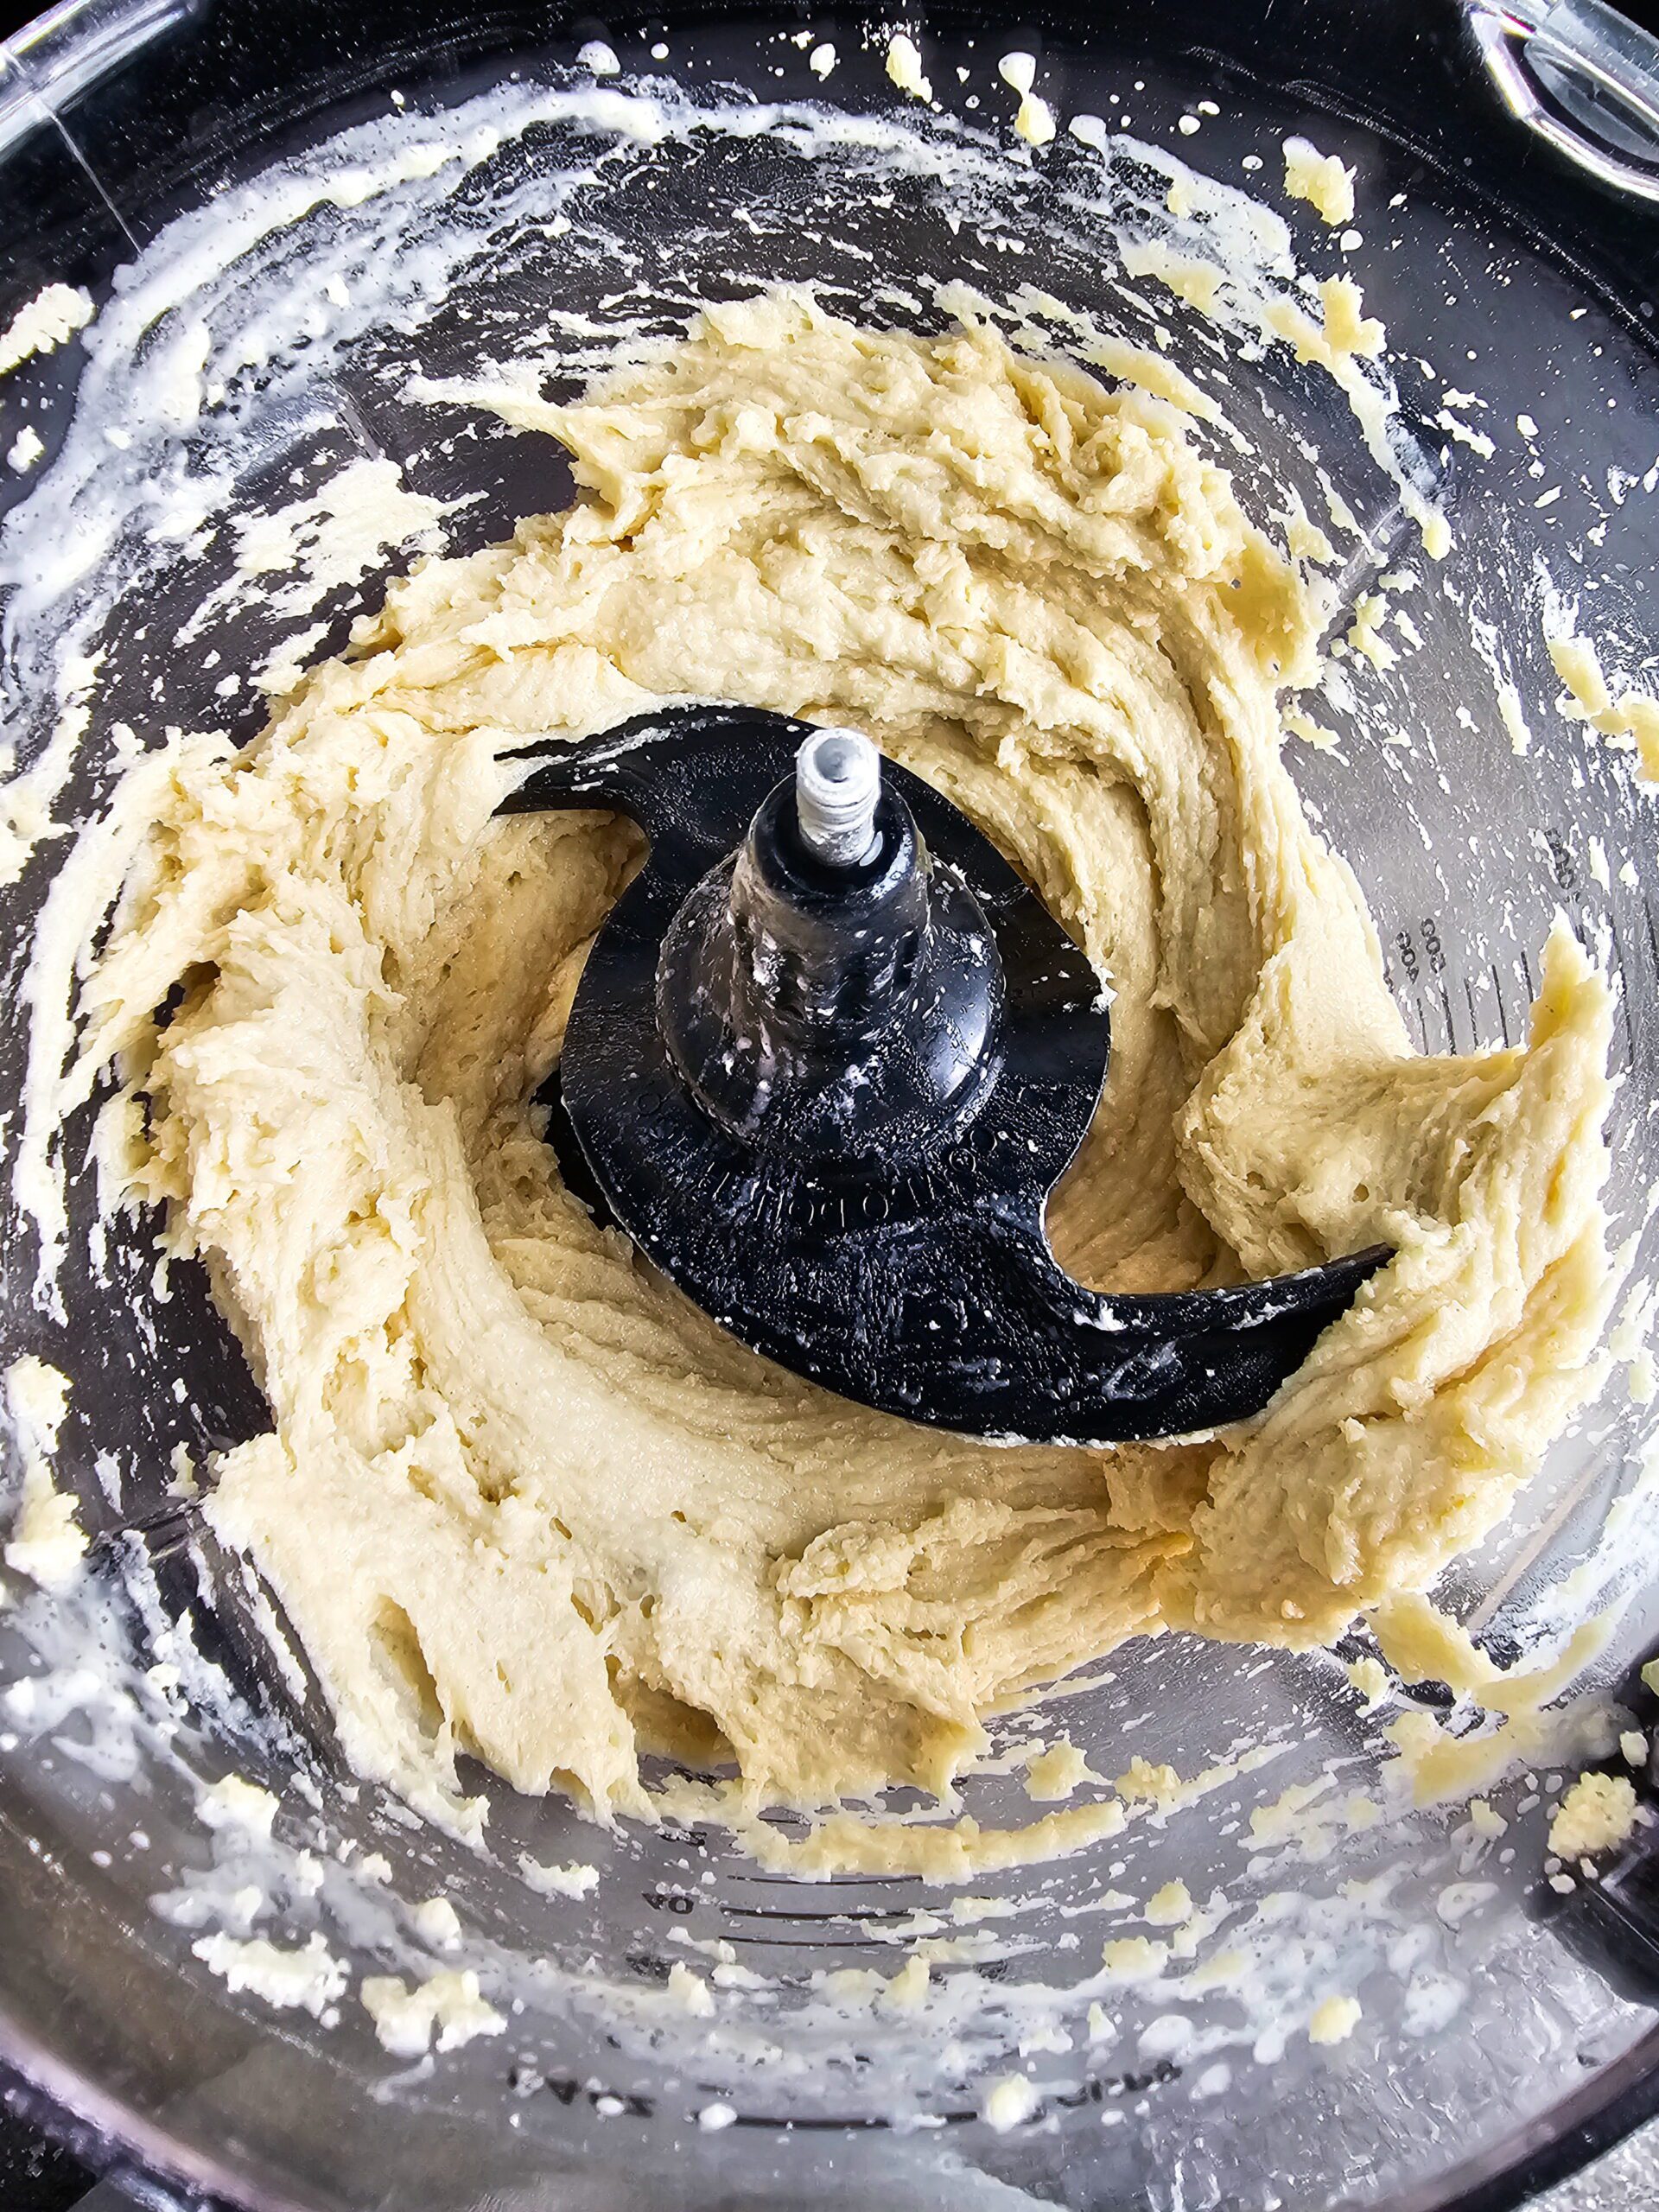
In a large bowl, whisk together the flour, granulated sugar, brown sugar, baking powder, and salt. Add the cold cubed butter. Using a pastry cutter, two forks, or your fingertips, cut the butter into the flour until the mixture looks like coarse crumbs with some pea-sized butter pieces still visible.
Drizzle in the milk (or heavy cream) and vanilla extract. Stir with a fork until just combined — stop as soon as no dry flour remains. Do not overmix.
Tip: Lumps in the dough are a good sign. Overmixing develops gluten, which turns a flaky topping into a dense, bready one. Shaggy and rough is exactly what you want.
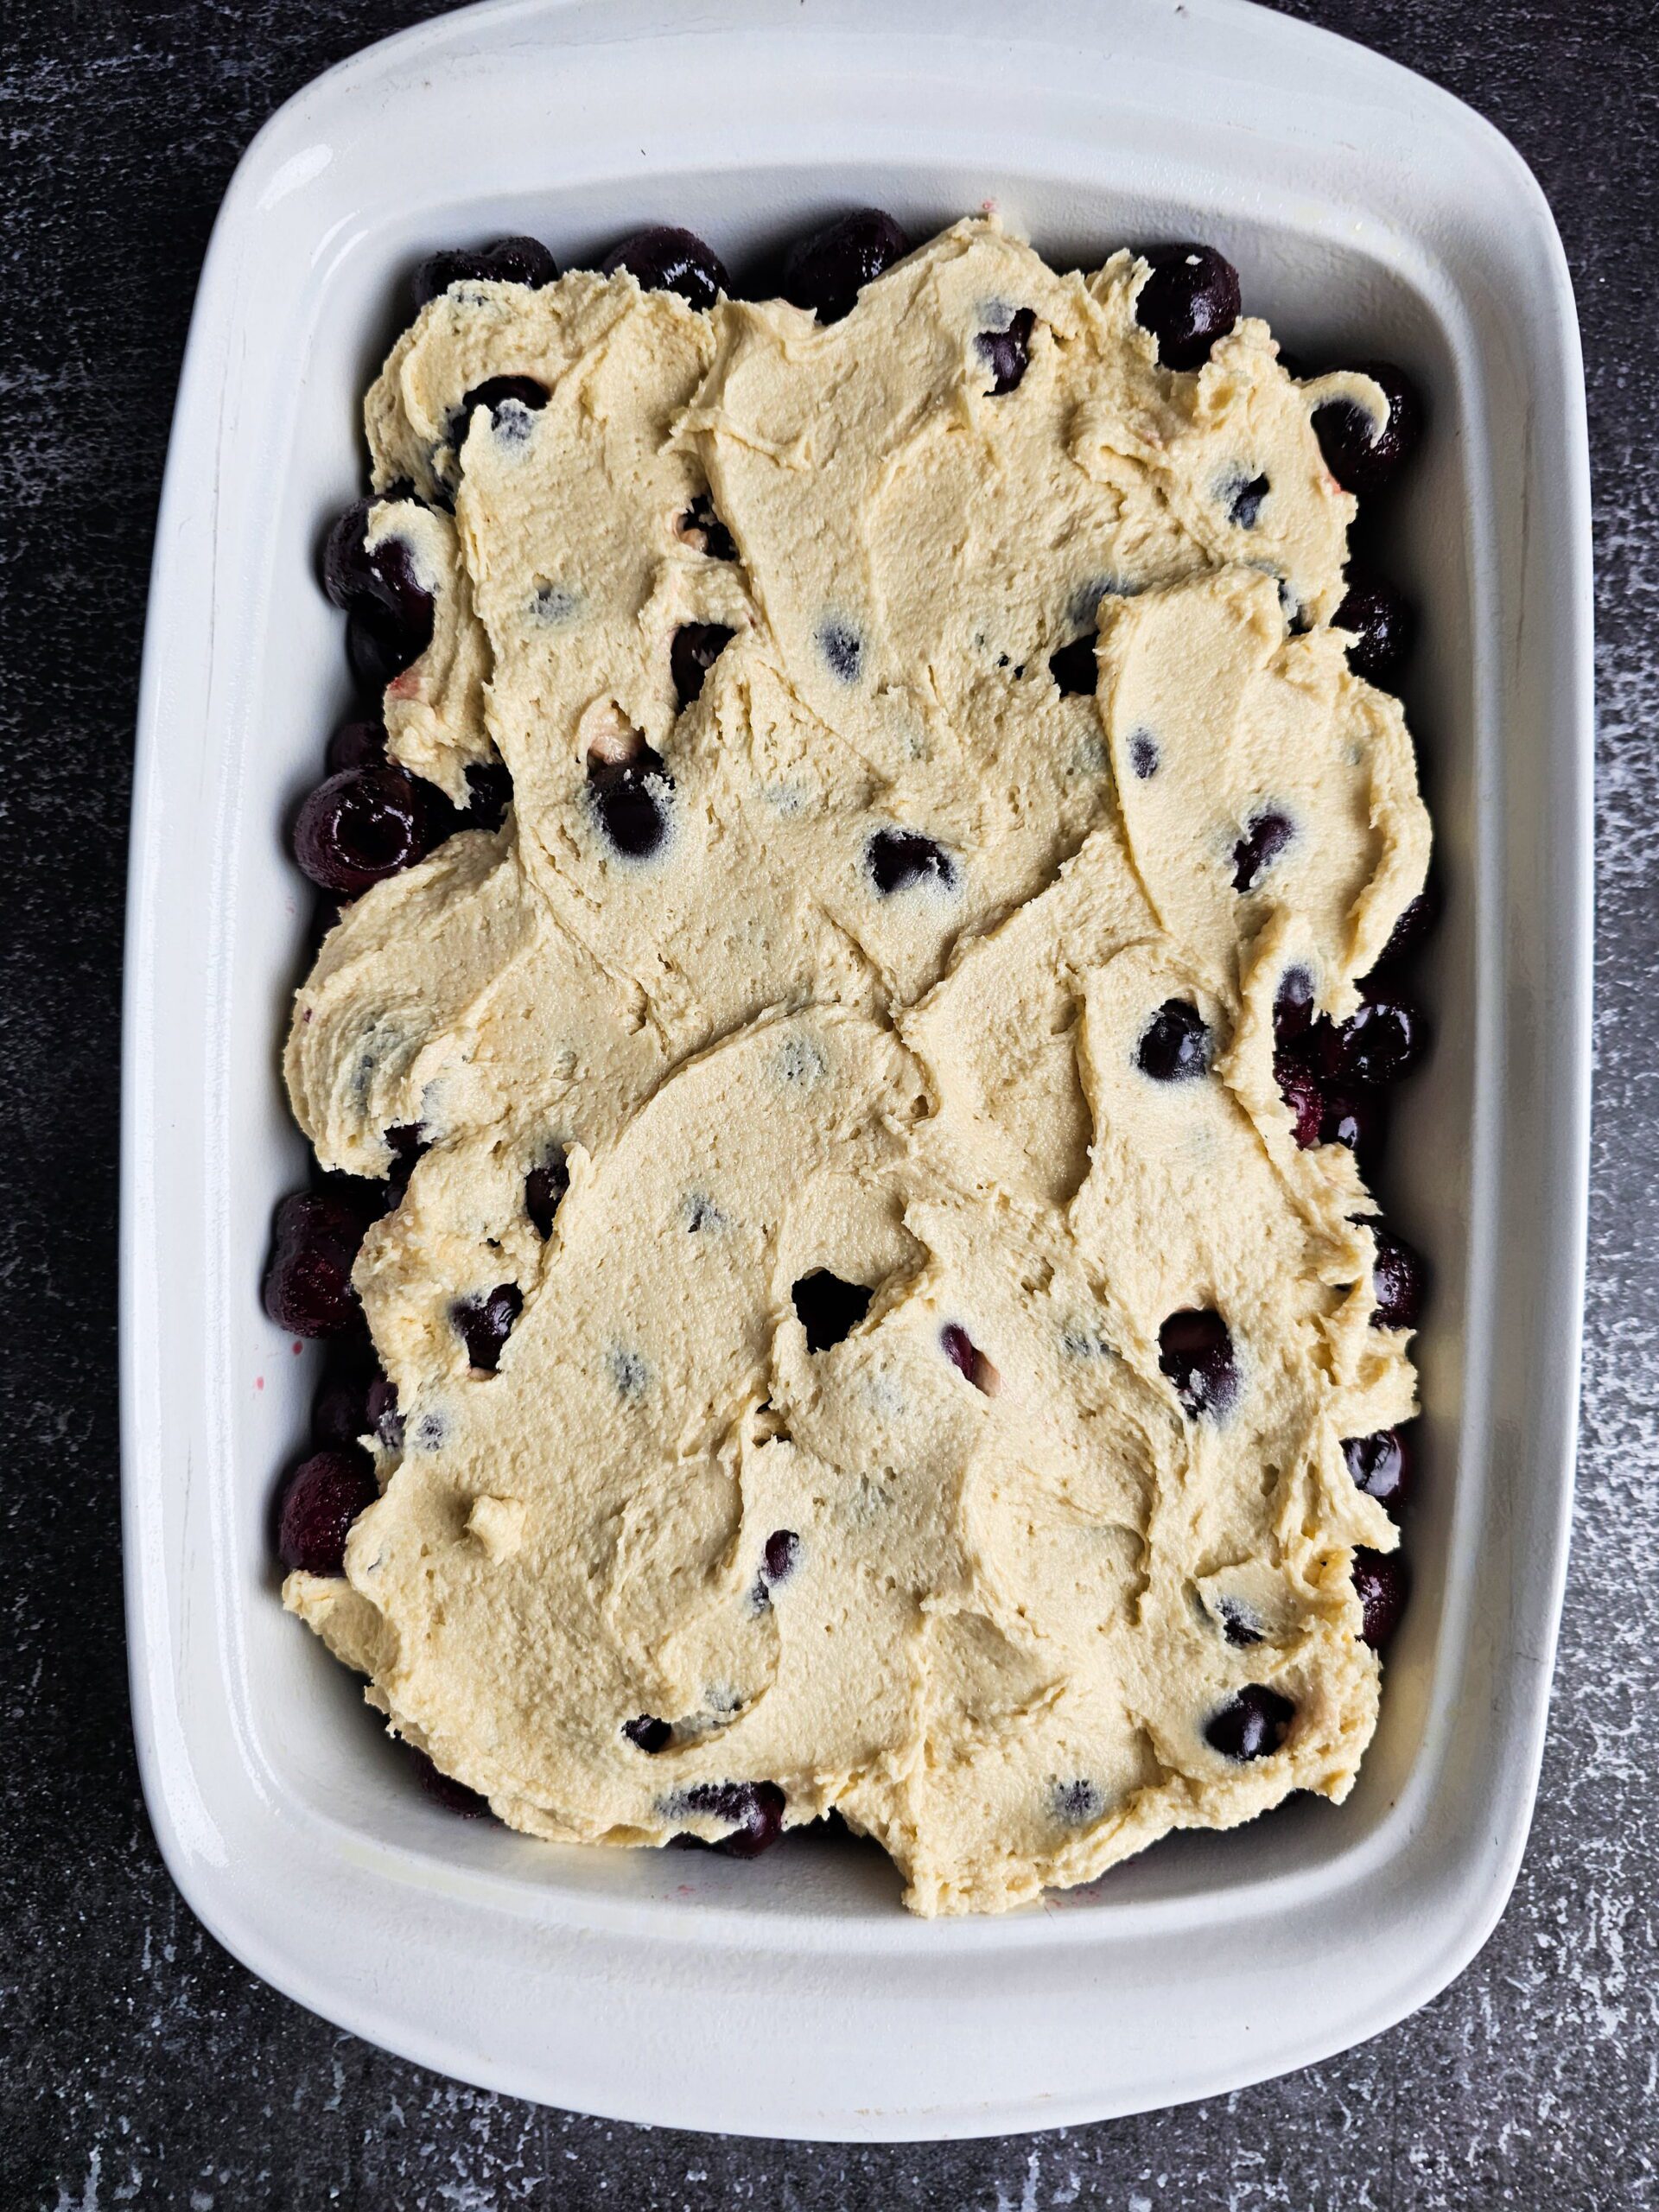
- Assemble:
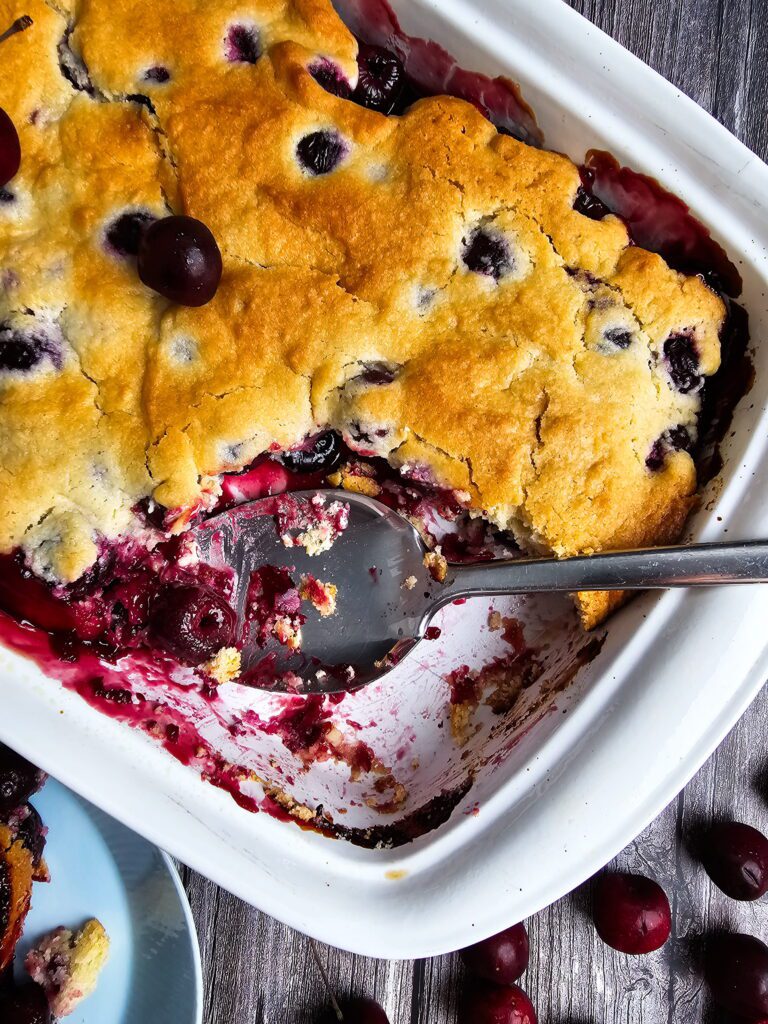
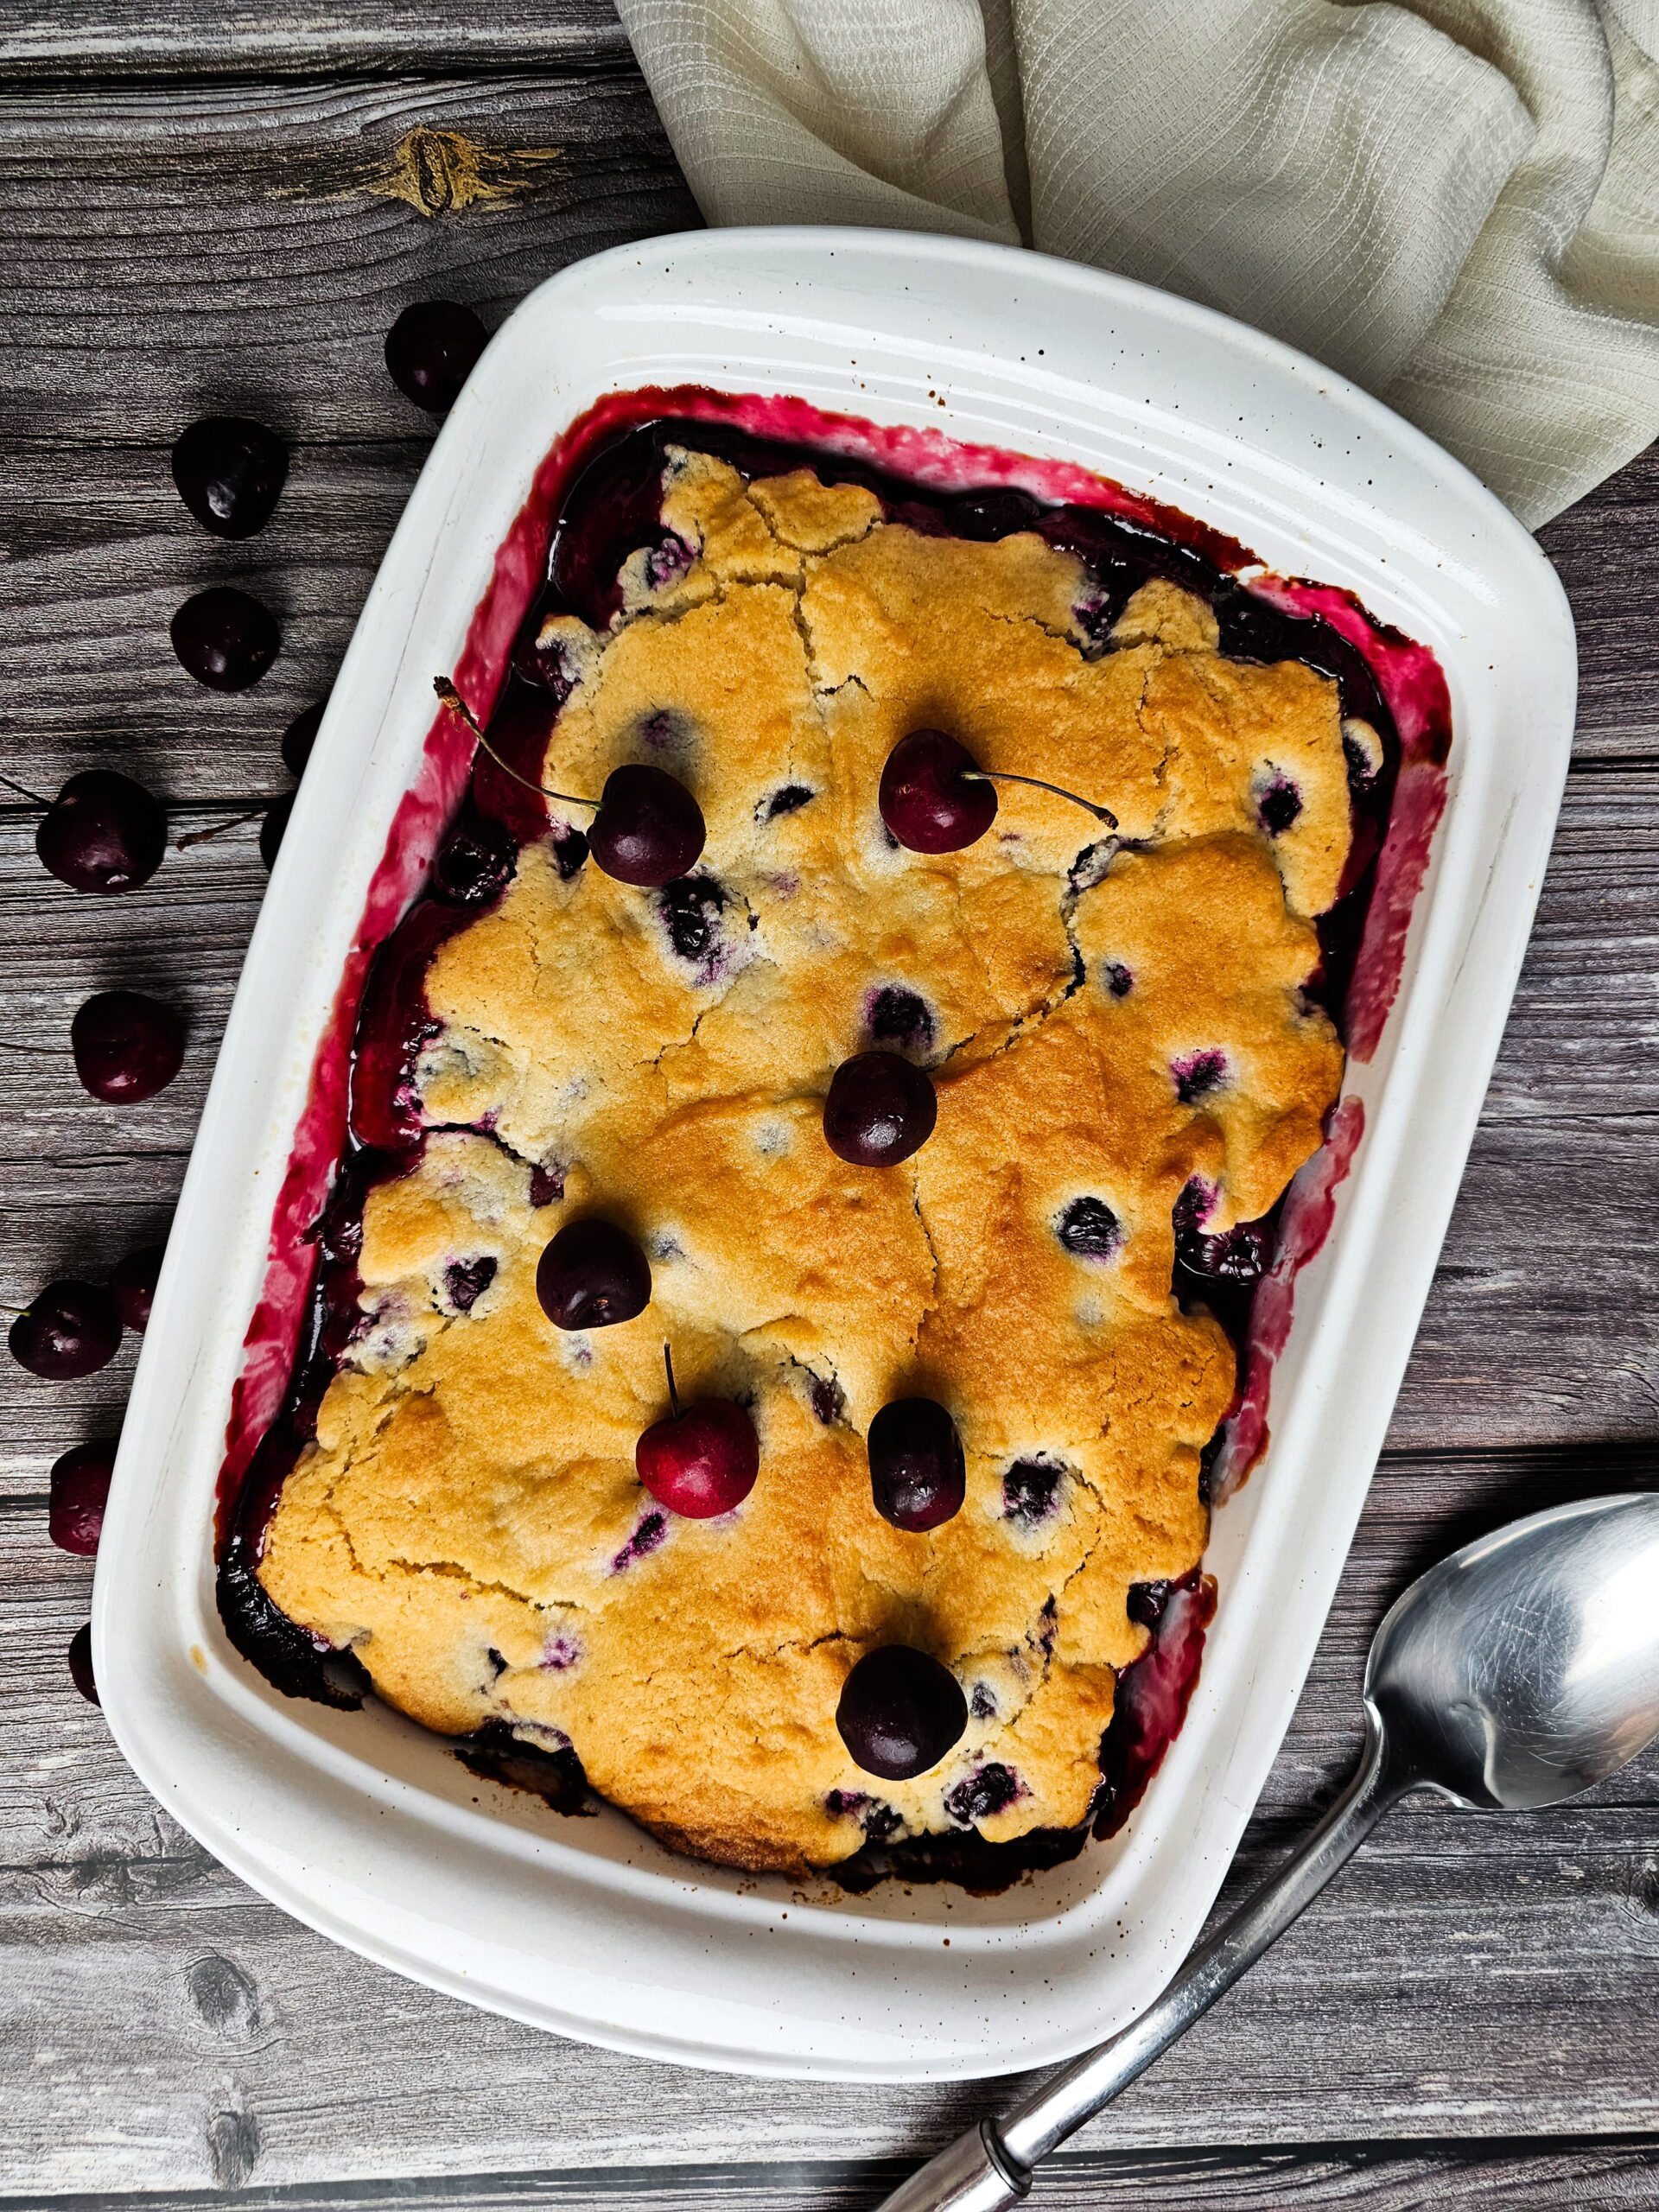
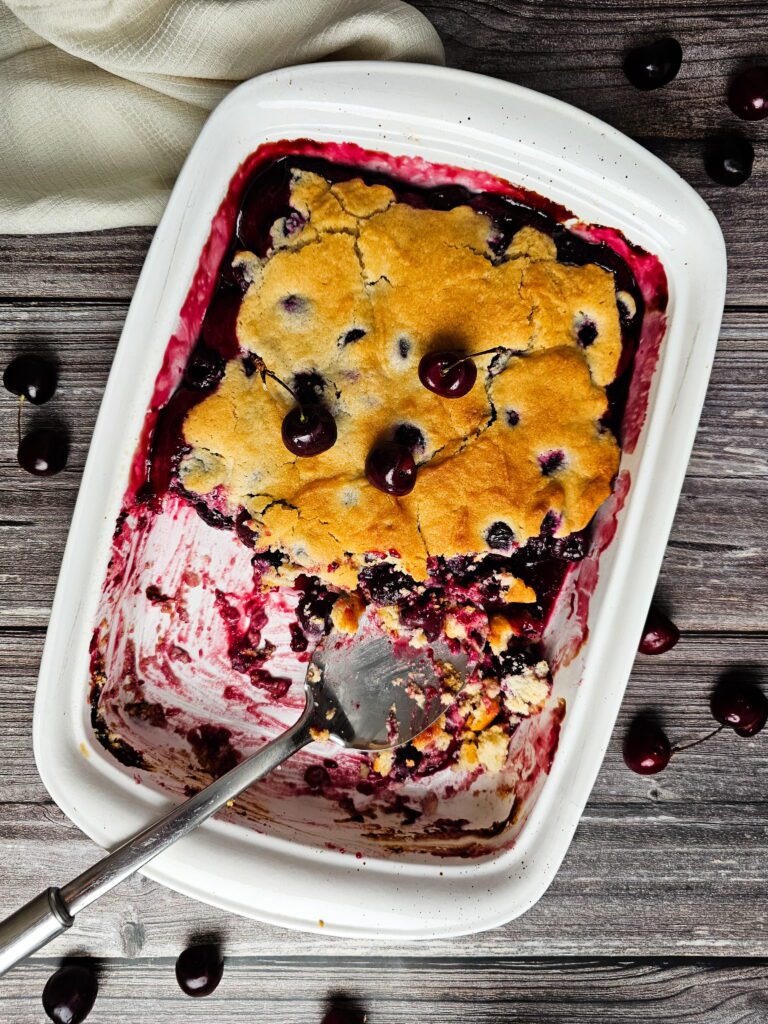
Pour the cherry filling into your prepared baking dish and spread it into an even layer. Drop the topping by heaping spoonfuls over the cherry filling. Don’t try to spread it smooth — the rustic, uneven drops look beautiful and bake up perfectly. Gaps between the topping are totally fine and allow steam to escape. Sprinkle with coarse sugar if using. - Bake
Bake at 375°F for 35 to 45 minutes. The cobbler is done when the topping is deep golden brown and the cherry filling is visibly bubbling around the edges. If the topping browns before the filling bubbles, loosely tent the dish with foil and keep baking until you see those bubbles.
Tip: The bubbling at the edges is your most important doneness signal. It tells you the filling is hot enough that the cornstarch has fully activated. An underbaked cobbler will be runny when you serve it. - Cool and Serve
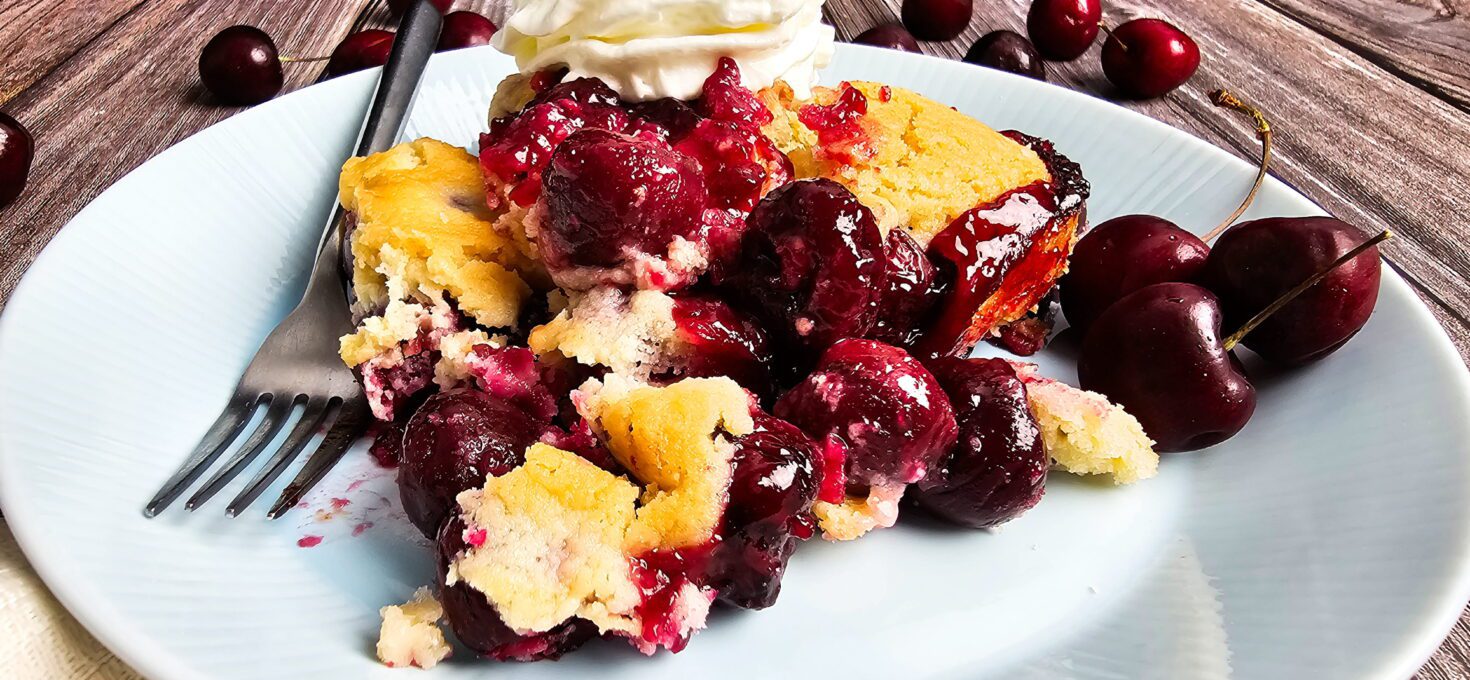
Let the cherry cobbler from scratch rest on a wire rack for 10 to 15 minutes before serving. This resting time lets the filling thicken up slightly so it doesn’t run all over the plate. Serve warm with vanilla ice cream or fresh whipped cream.
Best Cherry Cobbler Tips
This fresh cherry cobbler recipe turns out perfect every time:
- I keep my butter cold because that’s what makes the topping flaky. If my kitchen is warm, I pop the butter in the freezer for 10 minutes first.
- This method of pre-cooking the filling is used in many professional baking recipes because it guarantees a thick, jammy texture. I don’t skip cooking the filling on the stove. It helps the cherries soften and keeps the cobbler from turning watery.
- I bake it until the filling is bubbling around the edges. I don’t take it out too early—35 minutes is the minimum.
- I let it rest for 10–15 minutes before serving so the filling thickens up.
- I like to add coarse sugar on top for a little crunch, but that part is optional.
Best Cherry Cobbler Recipe Variations
- Frozen cherries: I thaw them completely, drain off the extra liquid, and add an extra teaspoon of cornstarch so the filling isn’t runny. Cooking the filling on the stove is especially important when I use frozen fruit.
- Gluten-free: I swap in a 1:1 gluten-free flour blend for the topping. The filling is already naturally gluten-free.
- Dairy-free: I use plant-based butter (and keep it cold) and swap the milk for oat milk or full-fat coconut milk.
- Different fruit: I switch things up with peaches, nectarines, plums, blueberries, blackberries, or a mix. I just adjust the sugar depending on how sweet the fruit is.
- Individual cobblers: I divide the filling into ramekins, add the topping, and bake them for about 25 to 30 minutes.
FAQ – Frequently Asked Questions
A cobbler has a biscuit-style dough topping — like this recipe. A crisp has a streusel topping made with oats, butter, flour, and sugar. Cobblers are softer and more biscuit-like on top; crisps are crunchier.
Three likely reasons: the filling wasn’t cooked long enough on the stovetop, the cobbler didn’t bake long enough in the oven (look for bubbling at the edges), or you didn’t let it rest after baking. All three are easy fixes.
Yes — always pit your cherries before baking. A cheap cherry pitter makes this fast and easy. If you don’t have one, a metal straw or chopstick pushed through the stem end will pop the pit out cleanly.
You can make the cherry filling up to 2 days ahead and refrigerate it. Prepare and add the topping right before baking for the best texture. You can also bake the cobbler fully and reheat it in a 325°F oven for 15 to 20 minutes.
You can in a pinch, but the flavor will be much less fresh and noticeably sweeter. If fresh or frozen cherries are available, use those instead.
Storage and Reheating
- Room temperature: Cover loosely and leave out for up to 2 hours.
- Refrigerator: Cover tightly and refrigerate for up to 4 days. The topping softens a little after day one but still tastes great.
- Freezer: Wrap tightly and freeze for up to 3 months. Thaw overnight in the refrigerator before reheating.
- To reheat: The oven is best — 325°F for 15 to 20 minutes keeps the topping crisp. The microwave works too (60 to 90 seconds) but softens the topping.
Looking for more fruit desserts and cobbler recipes?
If you love this cherry cobbler recipe, try my Easy and Irresistible Peach Cobbler Bake.
Easy Plum Crisp – Sweet and Perfectly Crunchy
Easy Homemade Apple Crisp Bliss
Warm Cinnamon Pear Crisp (Easy Fall Dessert Recipe)
Final Thoughts
There is nothing quite like a warm cherry cobbler fresh out of the oven. The filling is thick and jammy, the topping is golden and buttery, and the whole thing comes together with ingredients you probably already have on hand. Whether you are making this for a summer cookout, a family dinner, or just because fresh cherries are at the market and you cannot resist, this recipe is going to deliver every single time.
The best part? Once you make it once, you will have it memorized. It is that simple and that good.
If you tried this fresh cherry cobbler recipe I would love to hear how it turned out! Drop a comment below and let me know — did you use sweet or sour cherries? Did you add the almond extract? And most importantly, did you go for the vanilla ice cream or the whipped cream? I read every single comment and I love hearing from you.
If you loved this recipe, please consider leaving a star rating — it helps other home bakers find it and means the world to this little corner of the internet. And if you made any fun twists or substitutions, share those too! This community is full of great ideas and your version might inspire someone else.
Happy baking! 🍒
Fresh Cherry Cobbler Recipe
Equipment
- 9×13 baking dish
Ingredients
Cherry Filling:
- 4 cups cherries (fresh)(pitted)
- ½ cup granulated sugar
- ¼ cup brown sugar
- 2 tbsp cornstarch
- 1 tsp vanilla extract
- ¼ tsp almond extract
- ¼ tsp salt
- ¼ cup water
Cobbler Topping:
- 1½ cups all-purpose flour
- ⅓ cup granulated sugar
- ⅓ cup brown sugar
- 1 tsp baking powder
- ½ tsp salt
- ½ cup unsalted butter (cold and cubed)
- ⅓ cup whole milk (or heavy cream)
- 1 tsp vanilla extract
- Coarse sugar for topping (optional)
Instructions
- Make the filling: Combine cherries, sugars, cornstarch, salt, and water in a saucepan over medium heat. Cook, stirring occasionally, until thick and glossy, about 8 to 10 minutes. Remove from heat and stir in vanilla and almond extract.
- Make the topping: Preheat oven to 375°F (190°C). Grease a 9×13-inch baking dish. In a large bowl, whisk together flour, sugars, baking powder, and salt. Cut in cold butter until mixture resembles coarse crumbs. Stir in milk and vanilla until just combined — do not overmix.
- Assemble: Pour cherry filling into the baking dish. Drop topping by heaping spoonfuls over the filling. Sprinkle with coarse sugar if desired.
- Bake: Bake for 35 to 45 minutes until the topping is golden brown and the filling is bubbling at the edges.
- Cool and serve: Rest for 10 to 15 minutes before serving. Serve warm with vanilla ice cream or whipped cream.