

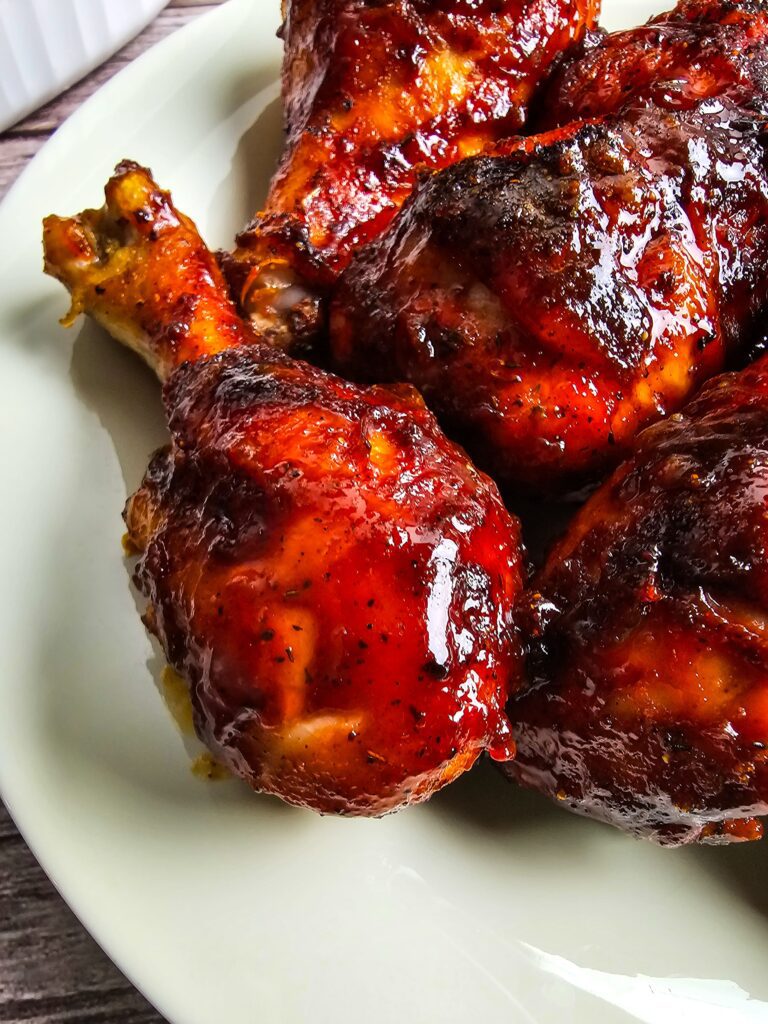
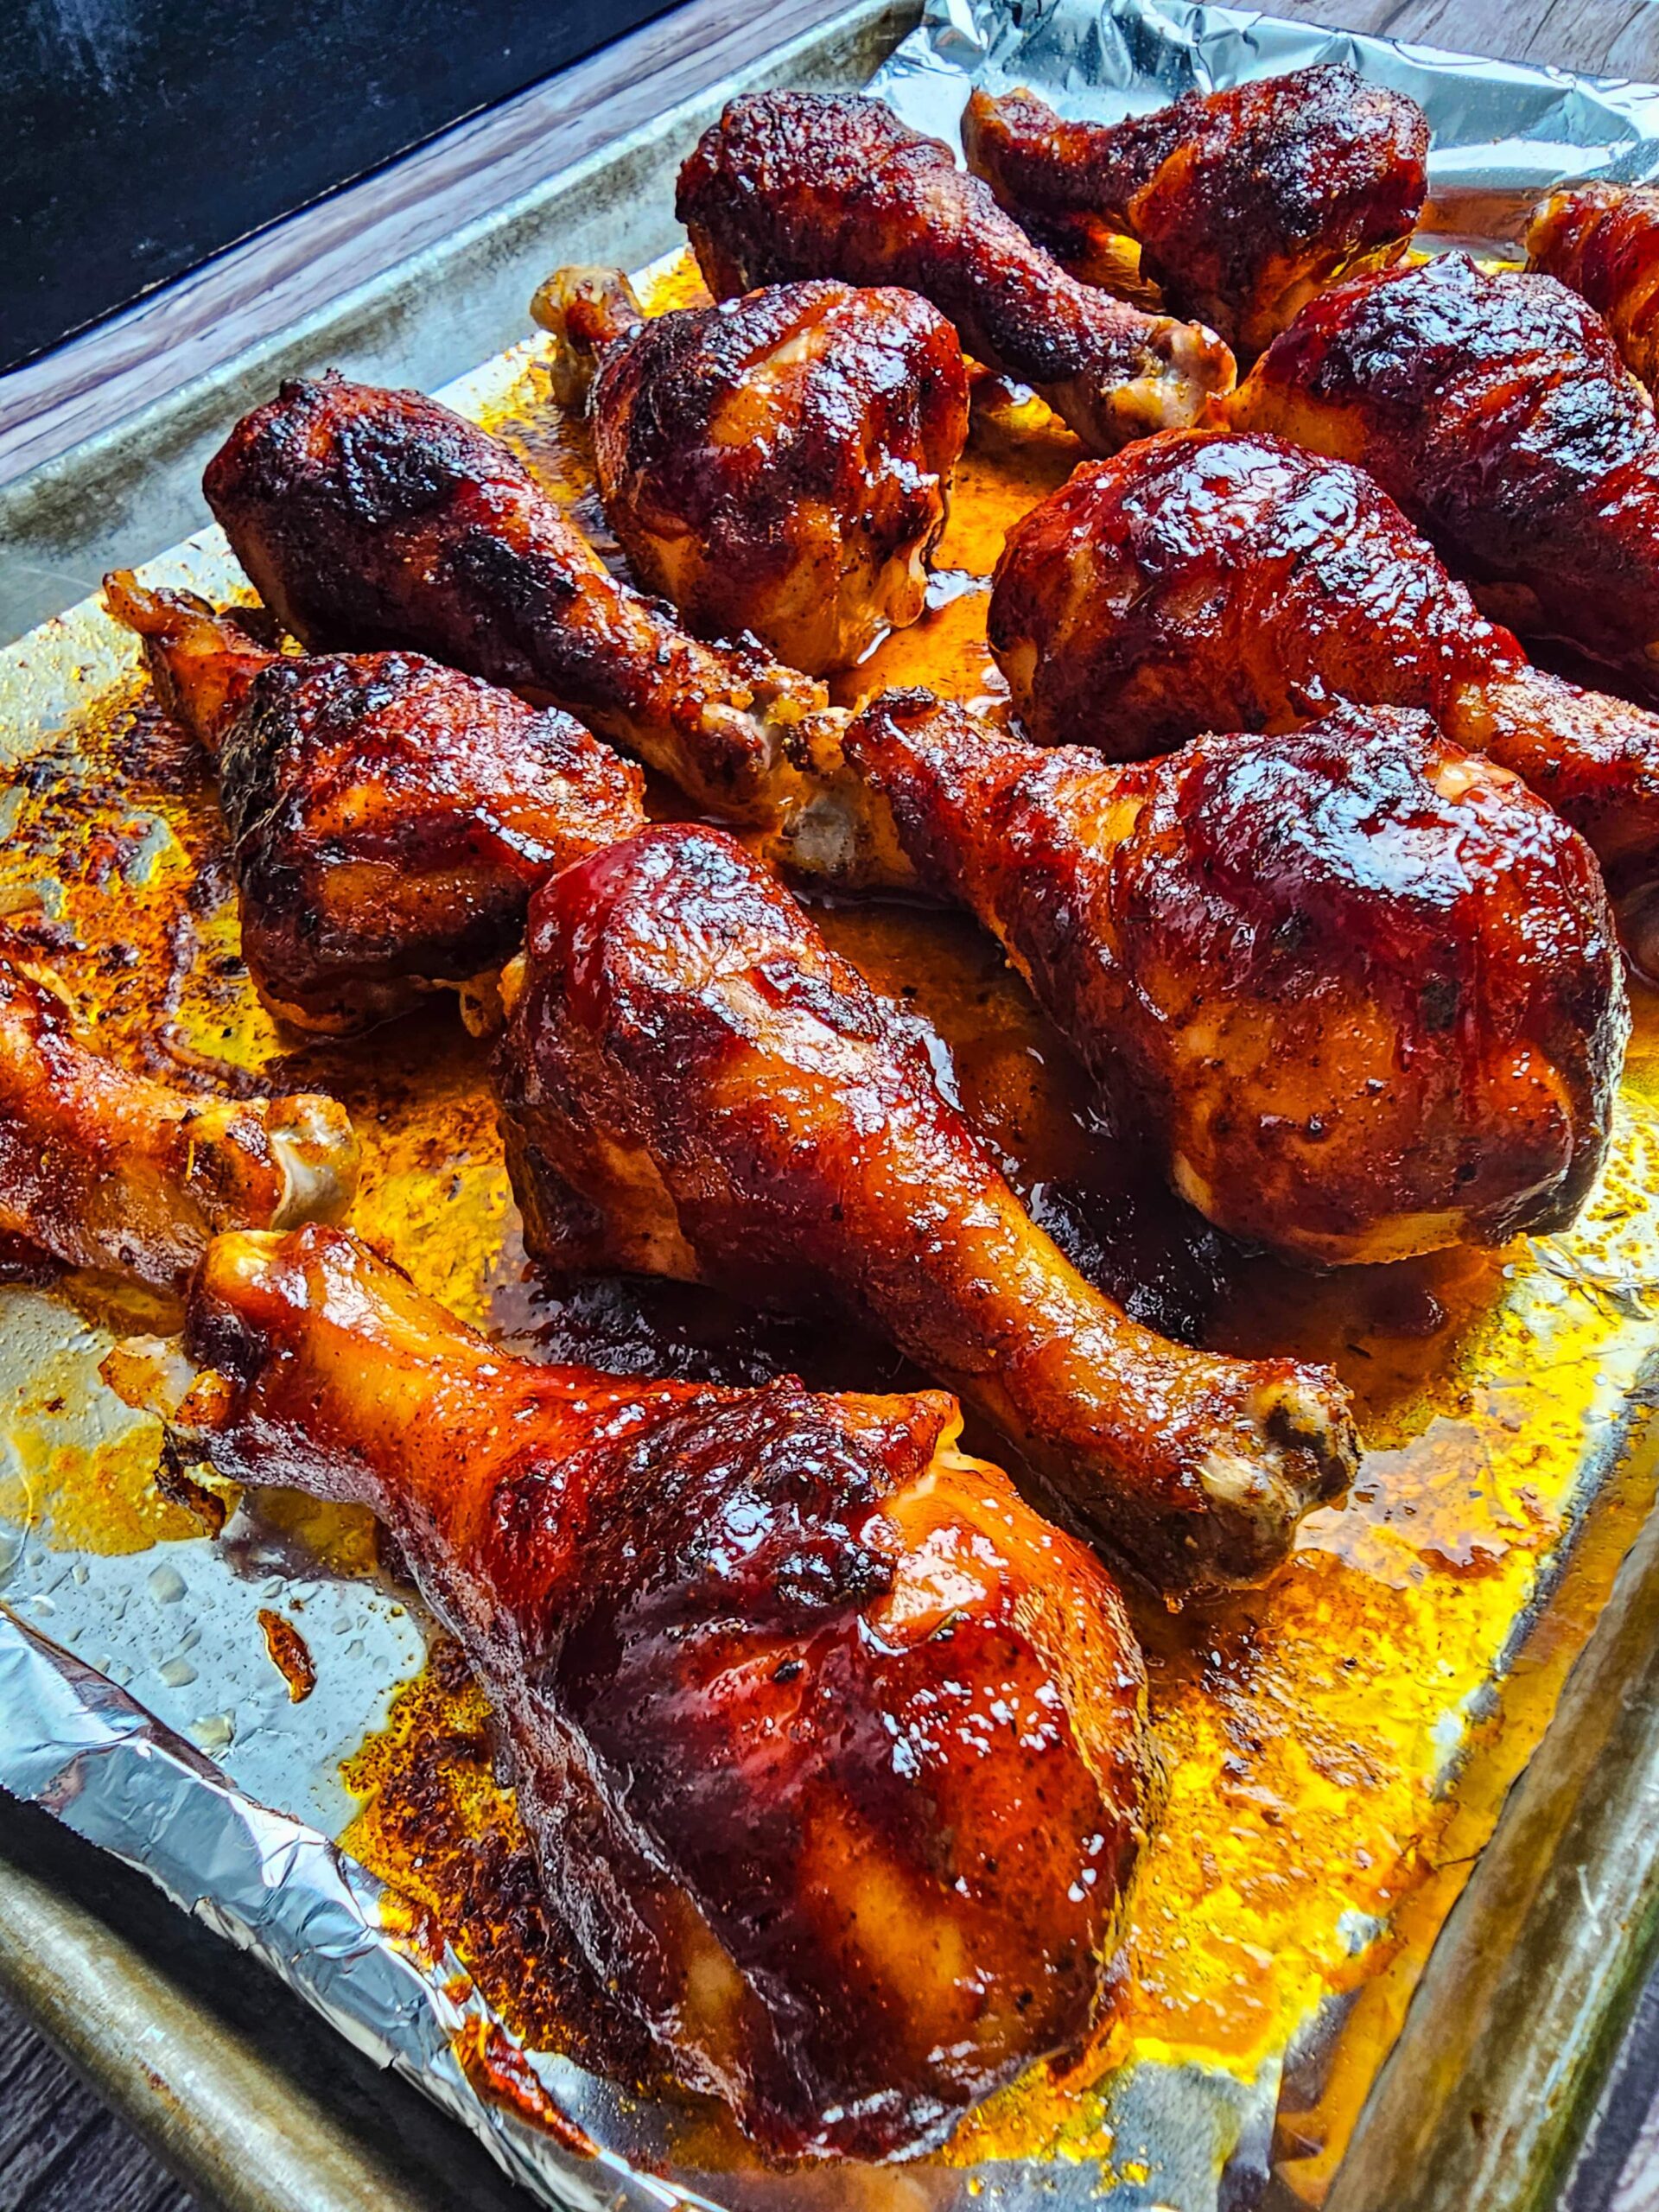
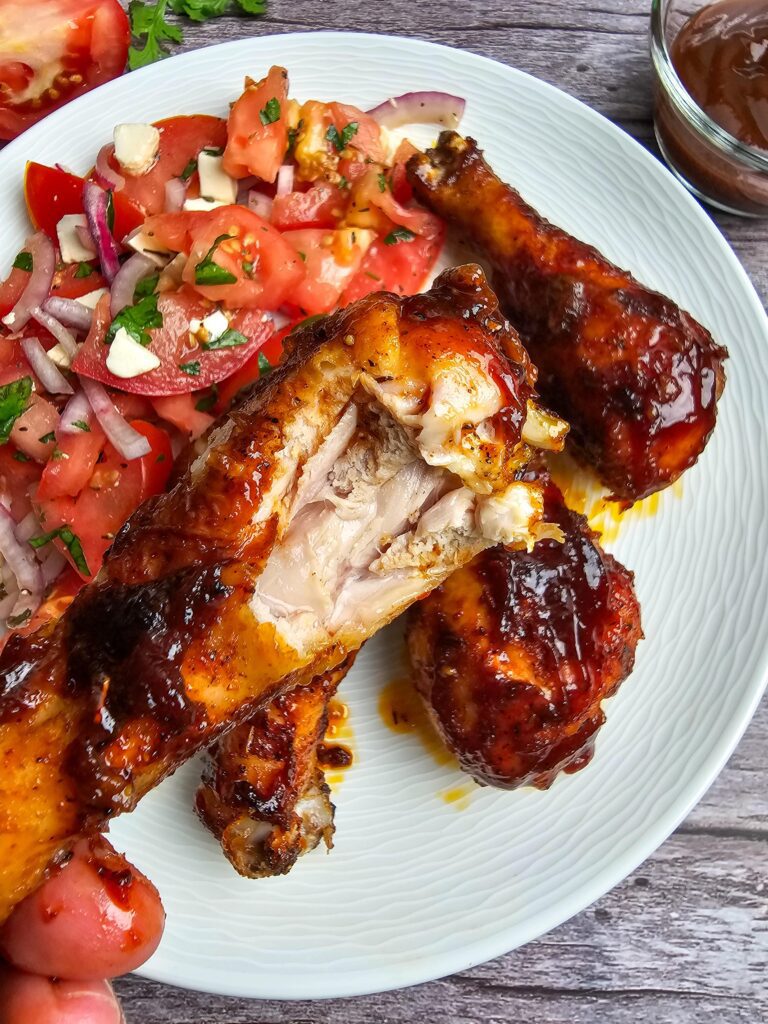
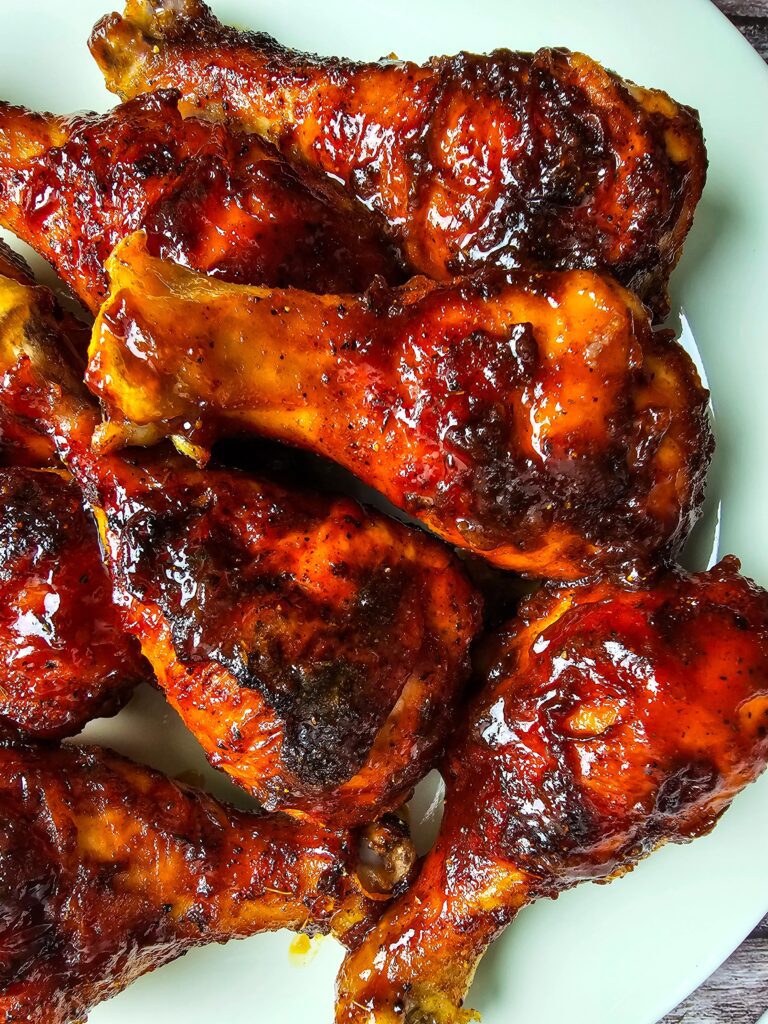
These sticky oven baked BBQ chicken drumsticks come out of the oven with crispy skin, juicy fall-off-the-bone meat, and a caramelized glaze that tastes like they came off the grill — no grill required. A smoky 7-spice dry rub goes on first to build deep flavor from the inside, then a generous coat of BBQ sauce goes on in the final stretch so it bubbles, thickens, and sticks to every inch of the chicken without burning.
This is the recipe you make when you want something that looks impressive, feeds a crowd, and costs almost nothing. A 5-pound family pack of drumsticks, one bowl for the rub, and under an hour in the oven is all it takes.
Why These Sticky Oven Baked BBQ Chicken Drumsticks Work Every Time
The most important step in this recipe happens before the oven even turns on — patting the chicken completely dry with paper towels. Moisture on the surface of the skin creates steam in the oven, which softens the skin instead of crisping it. A dry surface allows the heat to work directly on the skin and render the fat underneath. That rendered fat is what produces the golden, slightly crispy exterior that holds the BBQ sauce so well.
The 7-spice rub does more than add flavor. Smoked paprika gives the chicken its grilled appearance and a deep smokiness that carries through the whole dish. Chili powder adds warmth without heat. Thyme adds a subtle herby note that rounds out the BBQ sweetness at the end. Together they create a crust on the chicken during the first bake that the sauce then clings to instead of sliding off.
The two-stage cooking method is the other key. The chicken bakes plain with the dry rub for 35 to 40 minutes first, which lets the skin crisp and the fat render properly. Adding it in the last 10 minutes gives it just enough time to bubble, caramelize, and turn into a sticky glaze without scorching. Professional BBQ cooks use this exact same two-stage method. It is why these drumsticks look and taste like they came off a grill. This is the same method professional BBQ cooks use and it is the reason these drumsticks look and taste like they came off a grill.
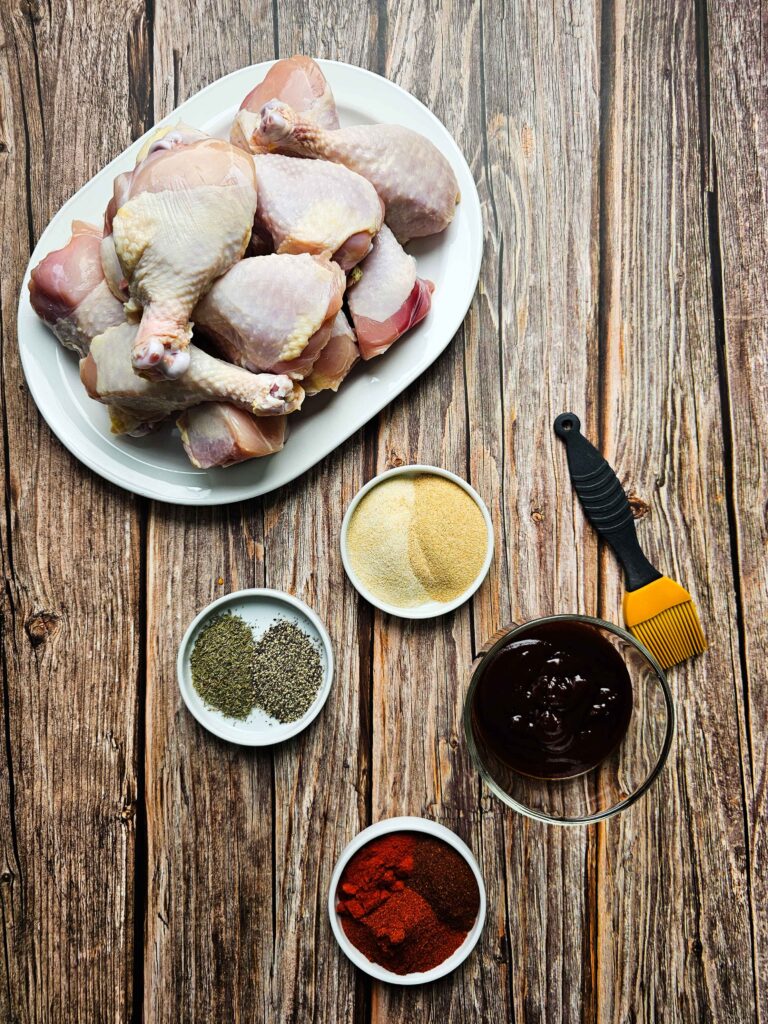
Ingredients for Sticky BBQ Baked Chicken Legs:
- 5 lbs chicken legs – I use a big family pack, usually 10 to 12 drumsticks. They’re super affordable and perfect for baking.
- 3 tablespoons avocado oil – I rub this all over the chicken so the seasoning sticks and the skin gets nice and crisp.
- 1 tablespoon paprika – Adds a nice warm color and a mild flavor to the rub.
- 1 tablespoon chili powder – Gives it a little kick without being too spicy.
- 2 teaspoons smoked paprika – I love this stuff—it gives the chicken that smoky flavor like it came off the grill.
- 2 teaspoons garlic powder – Adds a good garlicky base to the seasoning.
- 2 teaspoons onion powder – This gives the rub more flavor and a little sweetness.
- 2 teaspoons dried thyme – I sprinkle this in for a nice herby touch.
- Salt and black pepper to taste – I just season until it looks right—about a teaspoon of each usually does it for me.
- 1 cup barbecue sauce – I use Sweet Baby Ray’s because it’s sweet, tangy, and sticks perfectly when baked.
How to Make Sticky Oven Baked BBQ Chicken Drumsticks?
Time needed: 1 hour
- Prep the Chicken:
Preheat your oven to 400°F and line a large baking sheet with foil or parchment paper for easy cleanup. Place a wire rack on top if you want crispier skin.
Pat the 5 lbs. of chicken legs dry with paper towels to help the skin get crispy. Place them in a large bowl or on a tray. Drizzle 3 tablespoons of avocado oil over the chicken legs and rub it all over to coat them evenly. - Mix the Rub:
In a small bowl, mix together– 1 tbsp paprika, 1 tbsp chili powder, 2 tsp smoked paprika, 2 tsp garlic powder, 2 tsp onion powder, 2 tsp dried thyme, Salt and fresh ground black pepper to taste
Sprinkle the seasoning mix all over the oiled chicken legs. Rub it in with your hands to make sure every piece is coated well.
**Pro Tip: I like to pour the spices into an empty spice shaker. This way no spices are wasted and can be used another day if anything is left over.
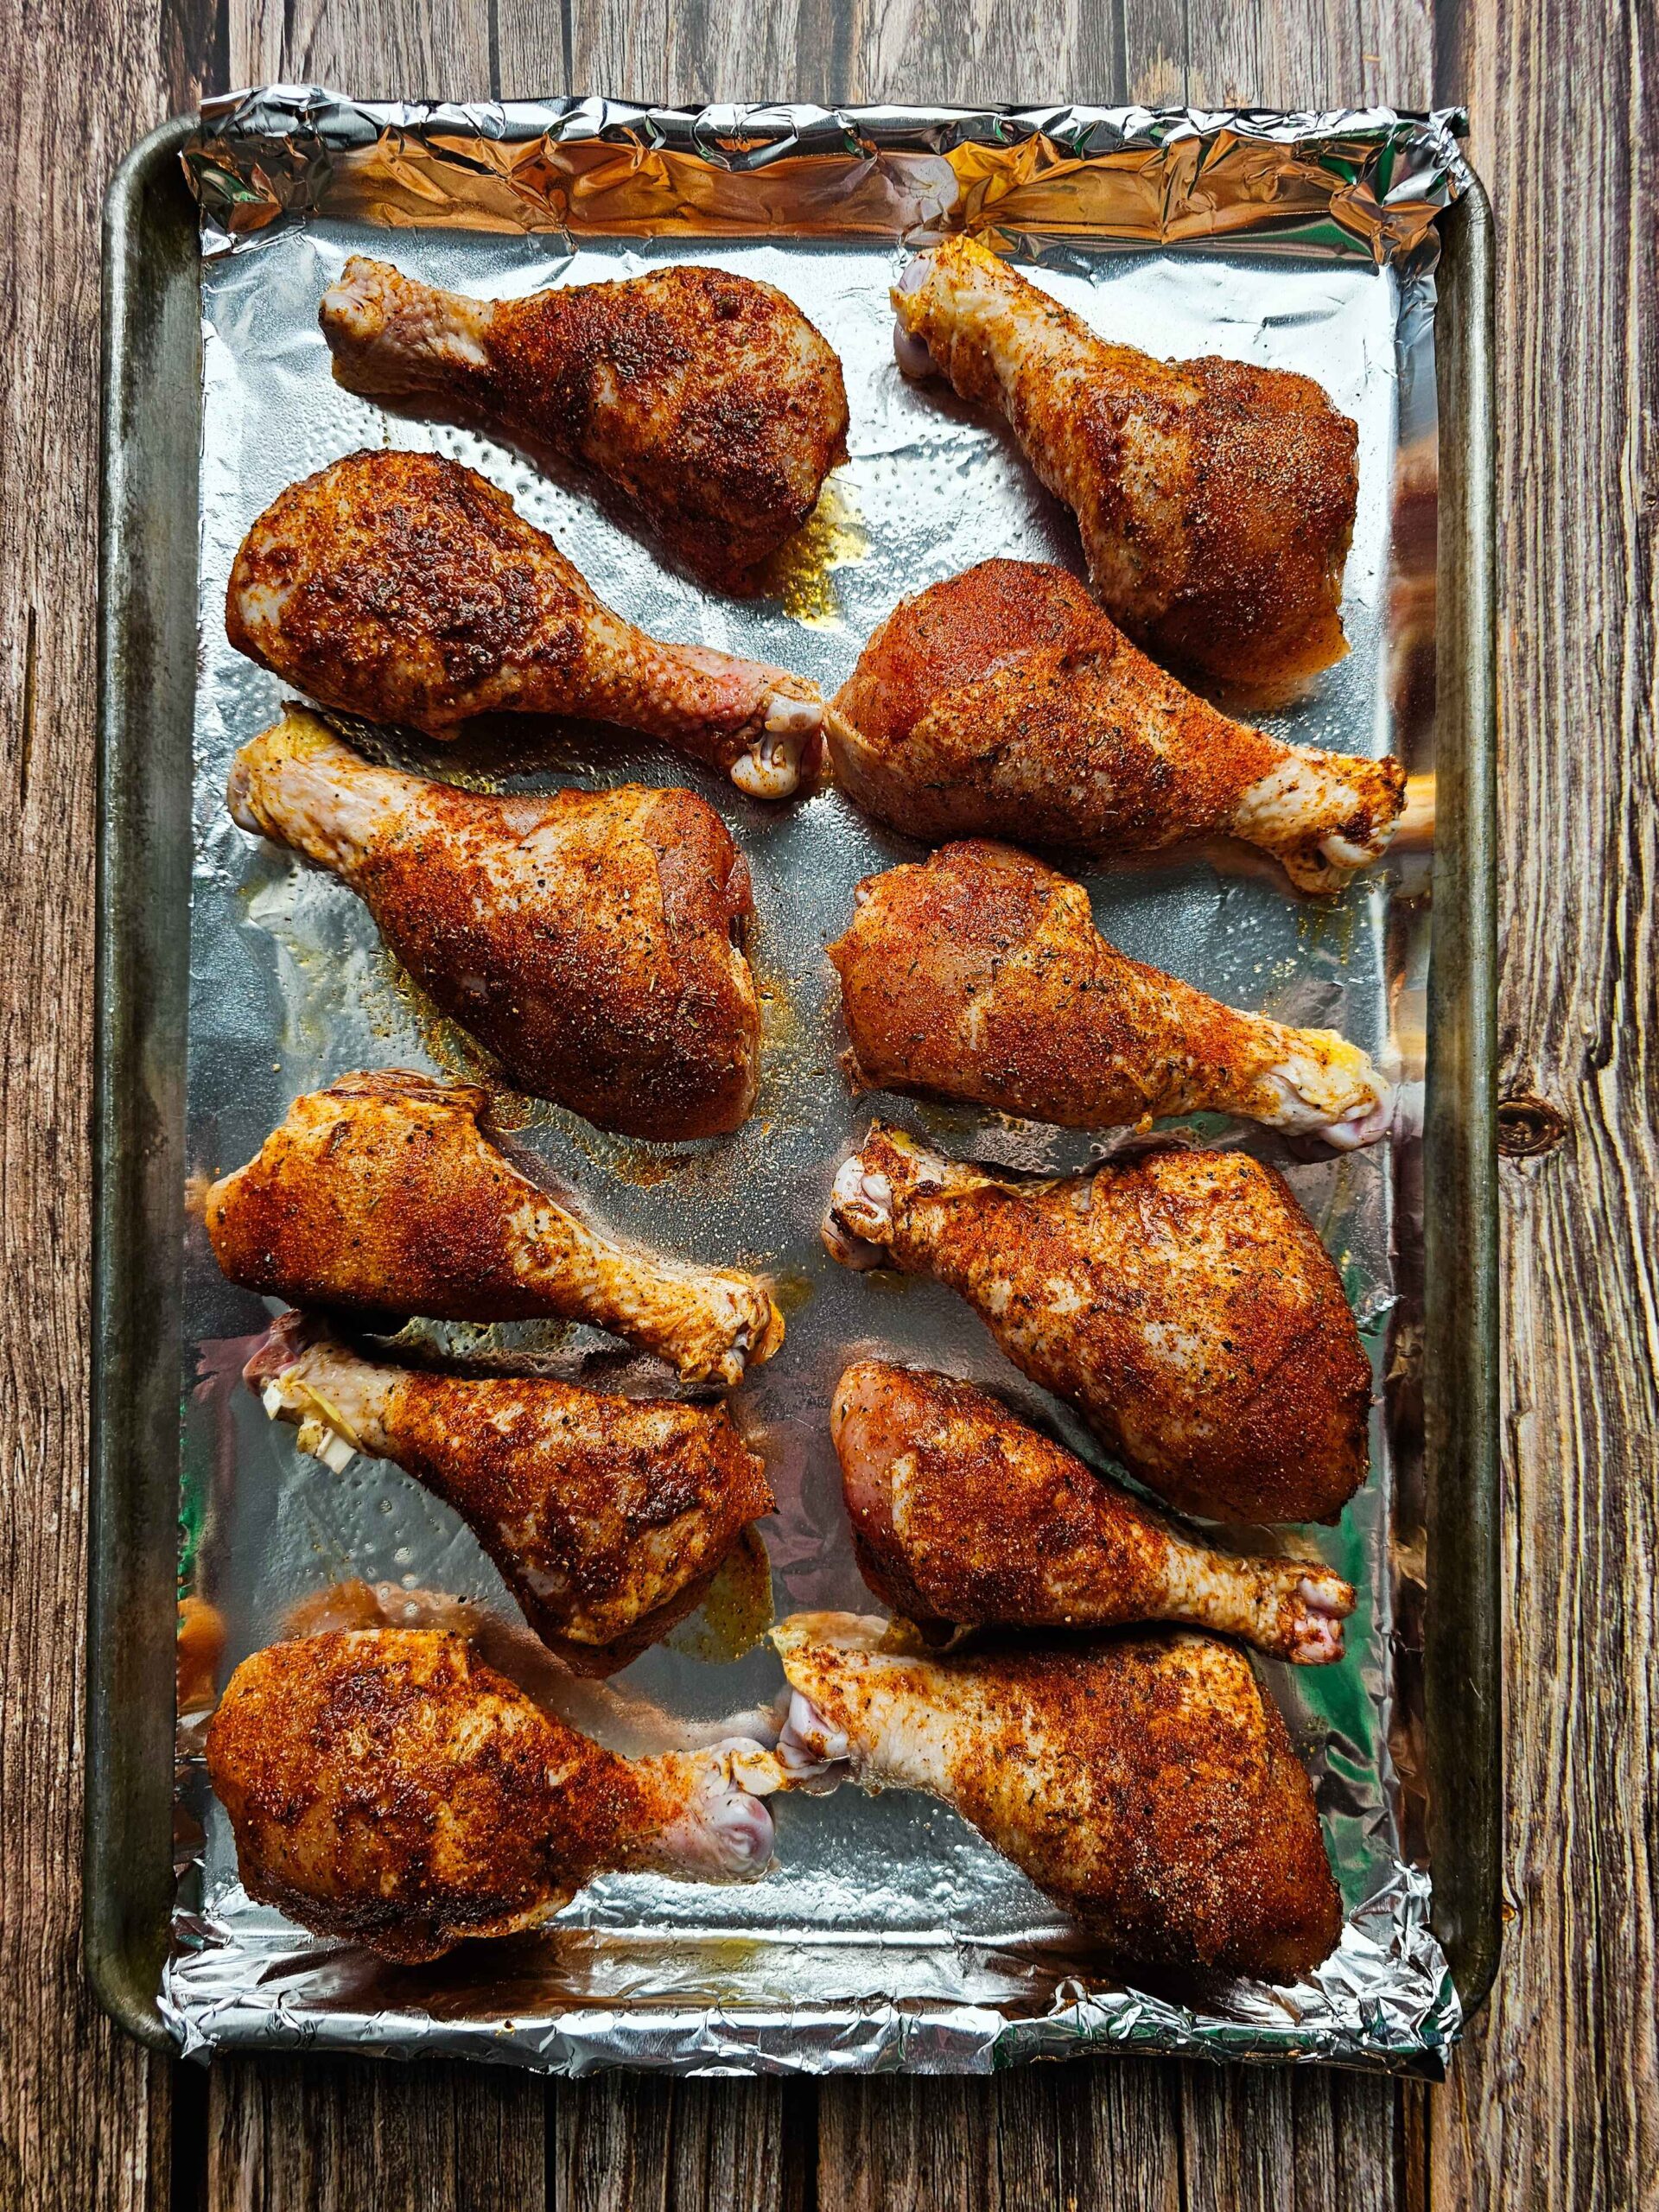
- Bake the Chicken
Arrange the seasoned chicken legs on the prepared baking sheet. Bake in the oven at 400°F for 35–40 minutes, or until the chicken reaches 165°F inside and the skin is crisp.
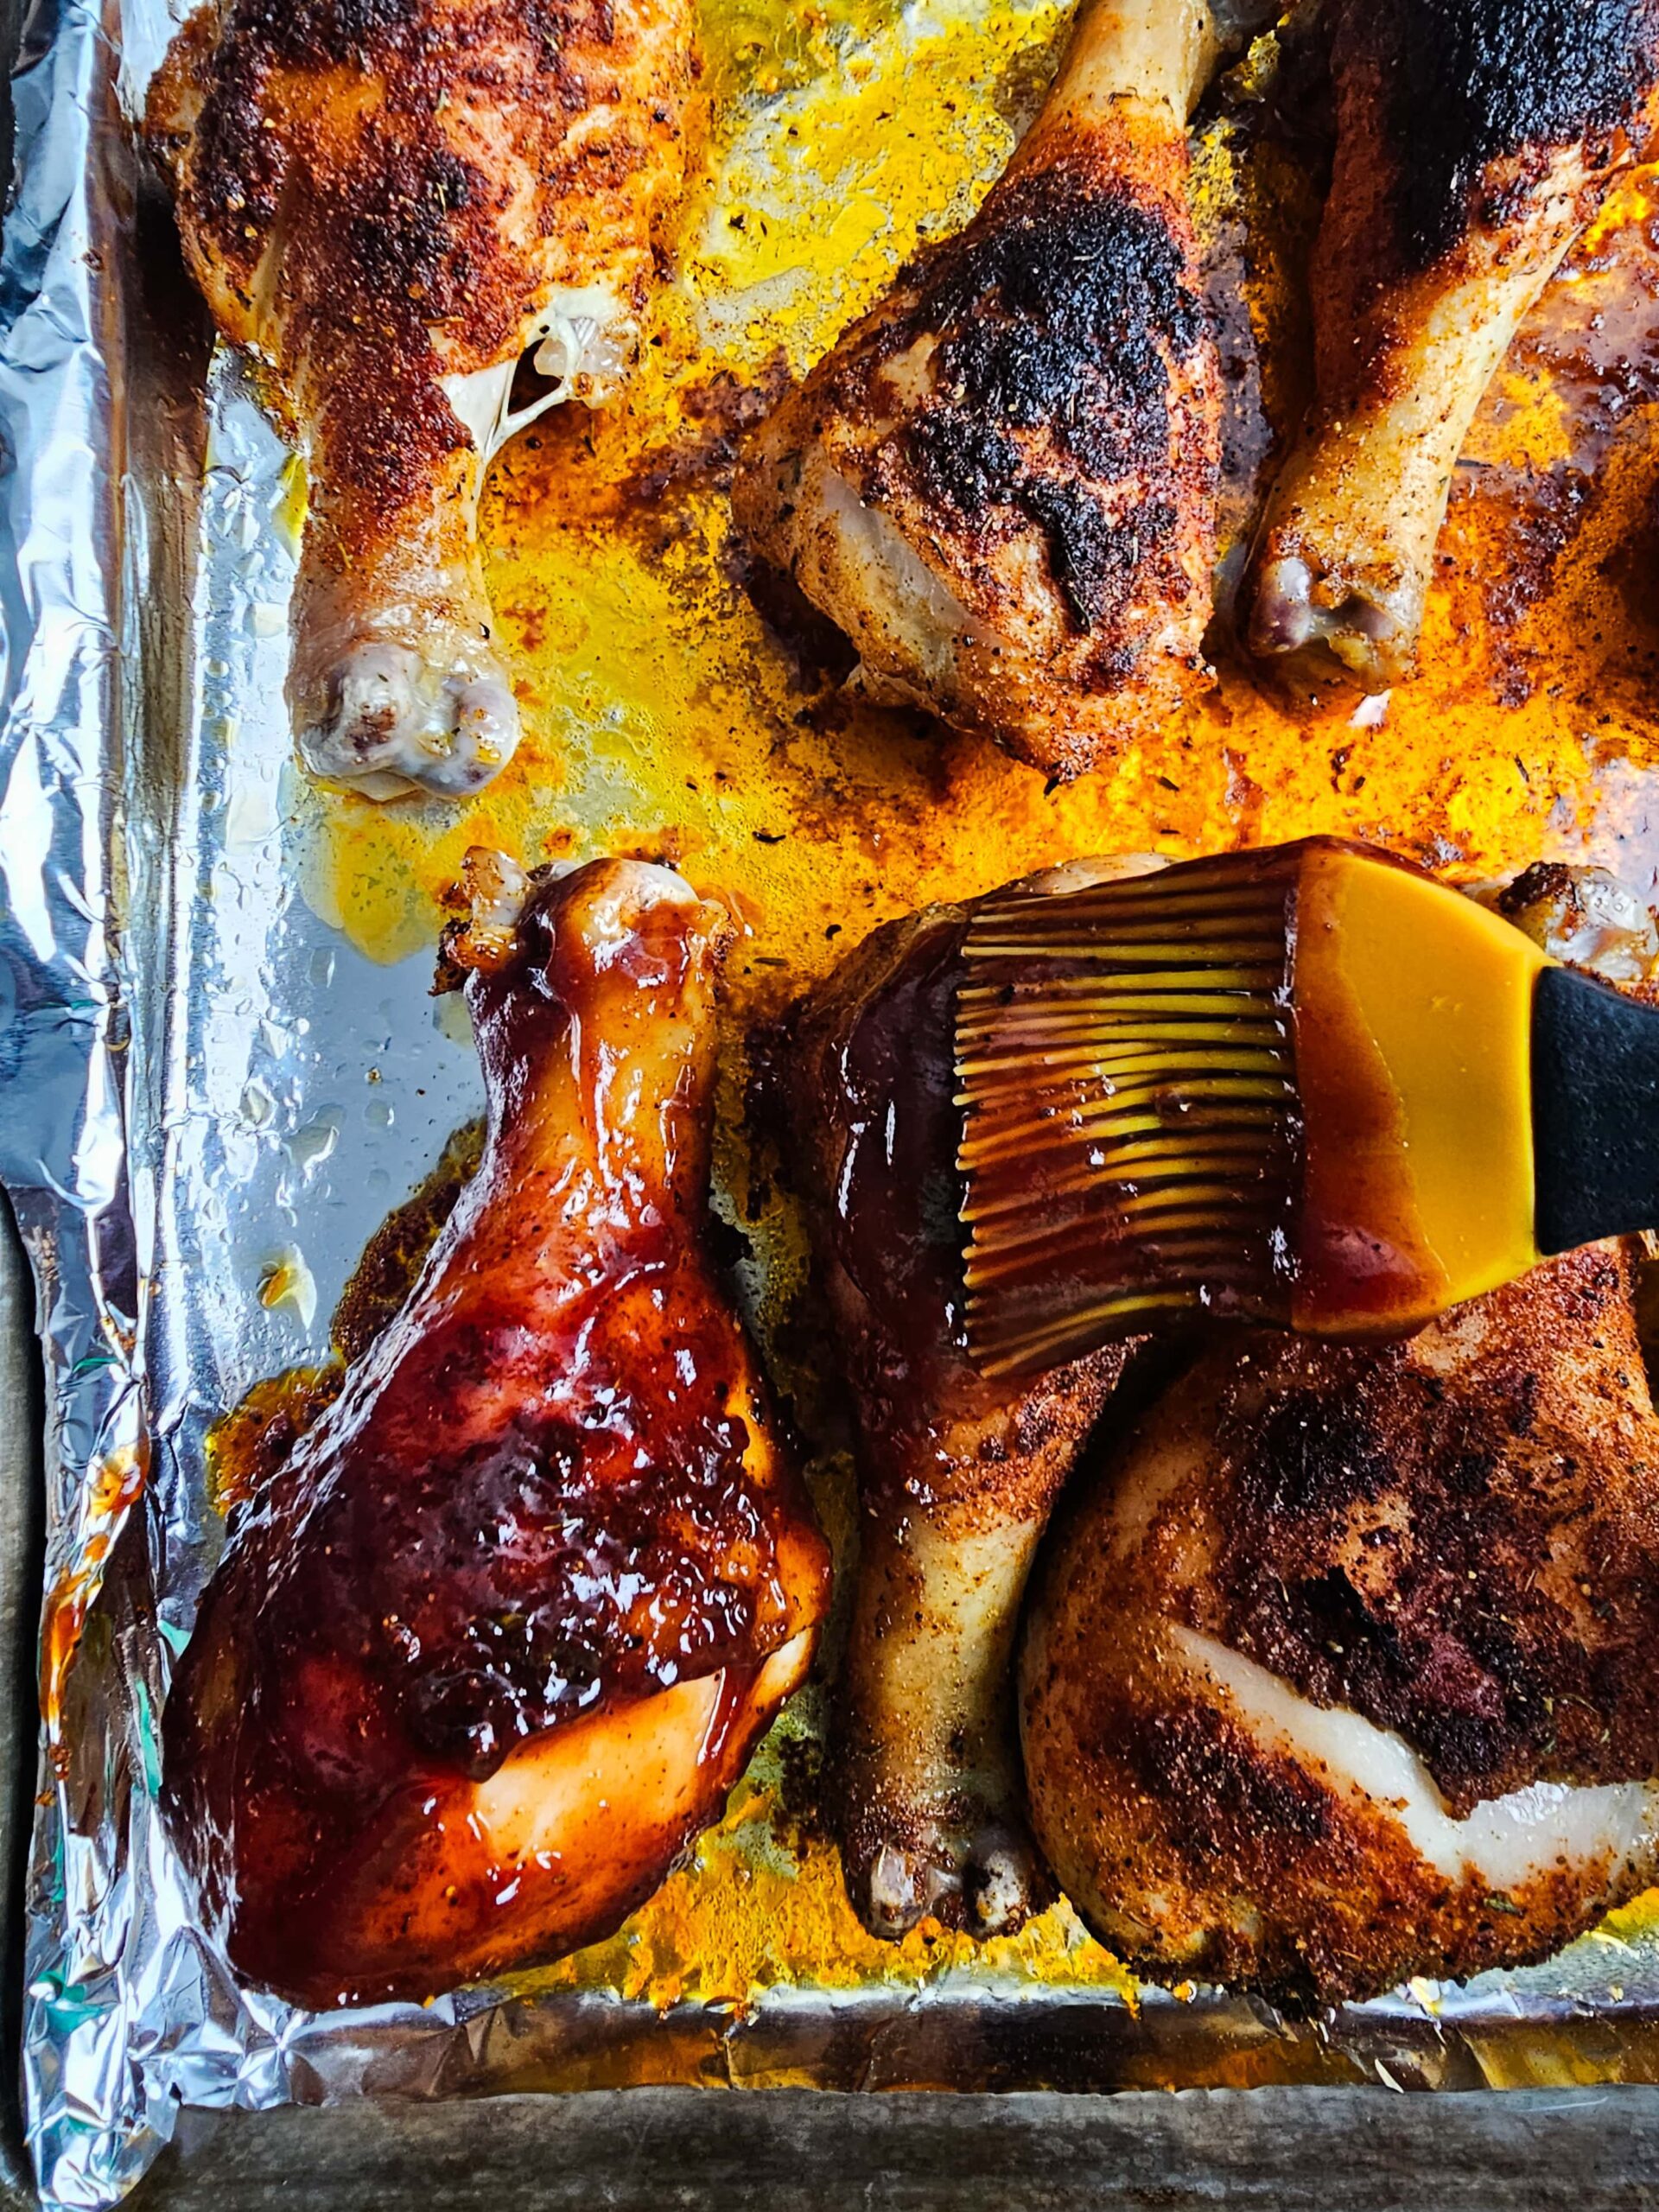
- Add BBQ Sauce and Return to Oven:
Take the chicken out of the oven and brush each piece with Sweet Baby Ray’s BBQ sauce (or your favorite kind). Be generous—it should be nice and saucy!
Pop the chicken back in the oven for 10 more minutes, or until the BBQ sauce is bubbly and caramelized. - Rest and Serve:
Let the chicken rest for a few minutes before serving. Grab some napkins and dig in—these are sticky, juicy, and packed with flavor!
FAQ – FREQUENTLY ASKED QUESTIONS:
BBQ sauce contains sugar that burns if it spends too long in a hot oven. Baking the drumsticks with just the dry rub for the first 35 to 40 minutes allows the skin to crisp and the fat to render properly. Adding the sauce only in the last 10 minutes gives it just enough time to caramelize into a sticky glaze without burning or turning bitter.
The three keys are patting the chicken completely dry before seasoning, using a wire rack so air circulates under the drumsticks, and making sure your oven is fully preheated to 400°F before the chicken goes in. Any surface moisture on the skin creates steam in the oven which softens rather than crisps the skin. For extra crispiness, leave the seasoned drumsticks uncovered in the fridge for 30 to 60 minutes before baking.
The USDA safe minimum internal temperature for chicken is 165°F. Check the temperature at the thickest part of the drumstick without touching the bone, which reads hotter than the meat. Many cooks prefer to take drumsticks to 175°F to 185°F because the higher temperature melts more connective tissue and produces that fall-off-the-bone tenderness that makes drumsticks so satisfying.
Always thaw completely before baking. Cooking from frozen produces uneven results — the outside overcooks before the inside reaches a safe temperature. Thaw overnight in the refrigerator or use the cold water method, changing the water every 30 minutes. Once fully thawed, pat completely dry and follow the recipe as written.
Yes. Season the drumsticks with the full dry rub up to 24 hours in advance, cover and refrigerate. The longer the rub sits the more the flavors penetrate the meat, so overnight seasoned drumsticks actually taste better. You can also fully cook them ahead and reheat in a 375°F oven for 12 to 15 minutes, brushing with fresh BBQ sauce before reheating.
Use a meat thermometer inserted into the thickest part of the drumstick, not touching the bone. You are looking for 165°F minimum for food safety, and 175°F to 185°F for fall-off-the-bone tenderness. Visual cues alone are not reliable — a thermometer is the only way to know for certain.
Yes. Boneless chicken thighs cook faster — check at 25 to 30 minutes. Bone-in thighs follow the same timing as drumsticks. Chicken wings work well at the same temperature but check at 30 minutes. Chicken breasts are the trickiest because they dry out easily — bake at 400°F for 20 to 25 minutes depending on thickness and add BBQ sauce at the 15-minute mark.
Yes. Line your baking sheet with foil or parchment and place the drumsticks directly on it. They will not be quite as crispy on the underside because they sit in any rendered fat, but they still come out delicious with crispy skin on top. If you want the crispiest possible result all the way around, a wire rack is worth using.
Sweet Baby Ray’s Original is the most popular choice because its sweetness caramelizes beautifully in the oven. For a smokier result, try a hickory or mesquite variety. For heat lovers, a chipotle or spicy BBQ sauce works well with the smoked paprika in the dry rub. Honey BBQ adds extra sweetness and a beautiful glaze. The key is choosing a sauce you love the flavor of straight from the bottle — it concentrates as it bakes.
You can bake directly on an unlined pan but cleanup becomes difficult because the BBQ sauce bakes onto the pan and is very hard to remove. Foil or parchment paper under the rack or directly under the chicken makes cleanup much easier. The chicken quality is the same either way — the liner is purely for your convenience.

Tips for the Best Sticky Oven Baked BBQ Chicken Drumsticks
Always Pat the Chicken Completely Dry
This is the step most people skip and the one that makes the biggest difference. Use paper towels and press firmly on all sides of each drumstick. Even a small amount of surface moisture will steam the skin in the oven instead of crisping it. If you have time, place the patted-dry drumsticks uncovered in the fridge for 30 to 60 minutes before cooking. The air drying takes the crispiness even further.
Do Not Add BBQ Sauce Too Early
BBQ sauce is loaded with sugar and it will burn if it spends too long in a hot oven. The first 35 to 40 minutes is for the dry rub and the skin — that is when the fat renders and the crust forms. Add the sauce only in the last 10 minutes so it has just enough time to caramelize into a sticky glaze rather than turning black and bitter. Make sure the chicken legs reach 165°F safe internal temperature.
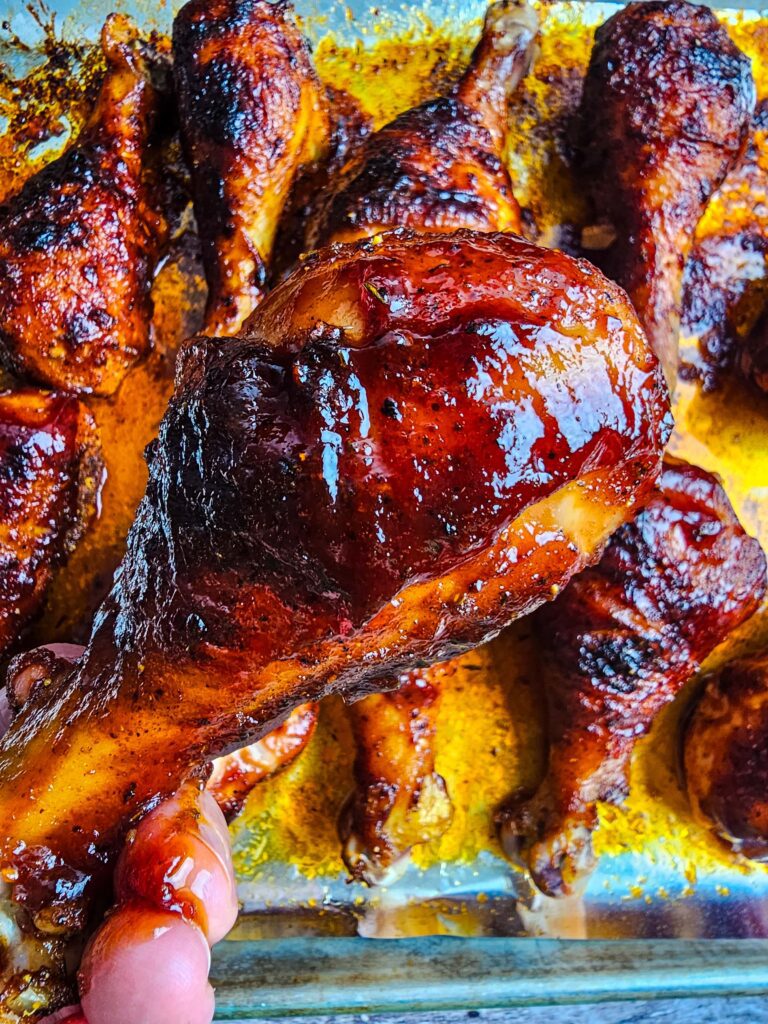
Use the Broiler for Extra Caramelization
After the final 10 minutes with the BBQ sauce, switch your oven to broil for 2 to 3 minutes to get that slightly charred, crispy-edged finish that looks exactly like grilled chicken. Watch it closely — the sugar in the sauce can go from perfectly caramelized to burned in under a minute under a broiler. This optional step makes a noticeable visual and flavor difference.
The Spice Shaker Trick
Mix your 7-spice blend and pour it into an empty spice shaker before seasoning. This gives you even coverage across all the drumsticks without clumping, and any leftover rub keeps perfectly in the shaker for next time. Label it and keep it in your spice rack — this rub works on chicken thighs, wings, and even pork.
Make Ahead Instructions for Sticky Oven Baked BBQ Chicken Drumsticks
You can season the drumsticks with the dry rub up to 24 hours ahead. Pat them dry, apply the full spice rub, cover tightly, and refrigerate overnight. The longer the rub sits, the deeper the flavor penetrates. Overnight seasoned drumsticks have noticeably more depth than ones seasoned right before baking. Pull them from the fridge 20 to 30 minutes before baking so they are not ice cold going into the oven.
You can also mix the dry rub and store it in a spice shaker or sealed jar for up to 3 months, so it is ready to use any time the craving hits.
Alternate Cooking Methods: Grill and Air Fryer
If you want to switch things up, grilling these BBQ chicken legs is a great way to get that smoky flavor and crispy skin. I like to cook them over medium heat for about 30-35 minutes, turning often and brushing on BBQ sauce near the end.
For a quicker option, the air fryer works wonders! I usually cook the legs at 380°F for about 25-30 minutes, flipping halfway through and adding BBQ sauce in the last 5 minutes to get that sticky glaze. Both methods give me juicy, flavorful chicken with less mess!
Sticky Oven-Baked Chicken Leg Recipe Add-ins and Variations:
- Use chicken thighs or wings – Sometimes I switch it up with thighs or wings instead of legs, and they turn out just as juicy and delicious.
- Swap avocado oil with olive oil – If I’m out of avocado oil, I just use olive oil and it works great for crisping the skin.
- Change up the BBQ sauce – I like trying different sauces like honey BBQ, spicy chipotle, or even a homemade version for a fun twist.
- Make it spicy – When I want some heat, I add a pinch of cayenne or red chili flakes to the rub or mix a little into the BBQ sauce.
- Add a dry rub only – Sometimes I skip the BBQ sauce altogether and just stick with the dry rub for a crispy, seasoned finish.
- Bake with veggies – I toss some potatoes, carrots, or onions on the pan with the chicken for an easy one-pan dinner.
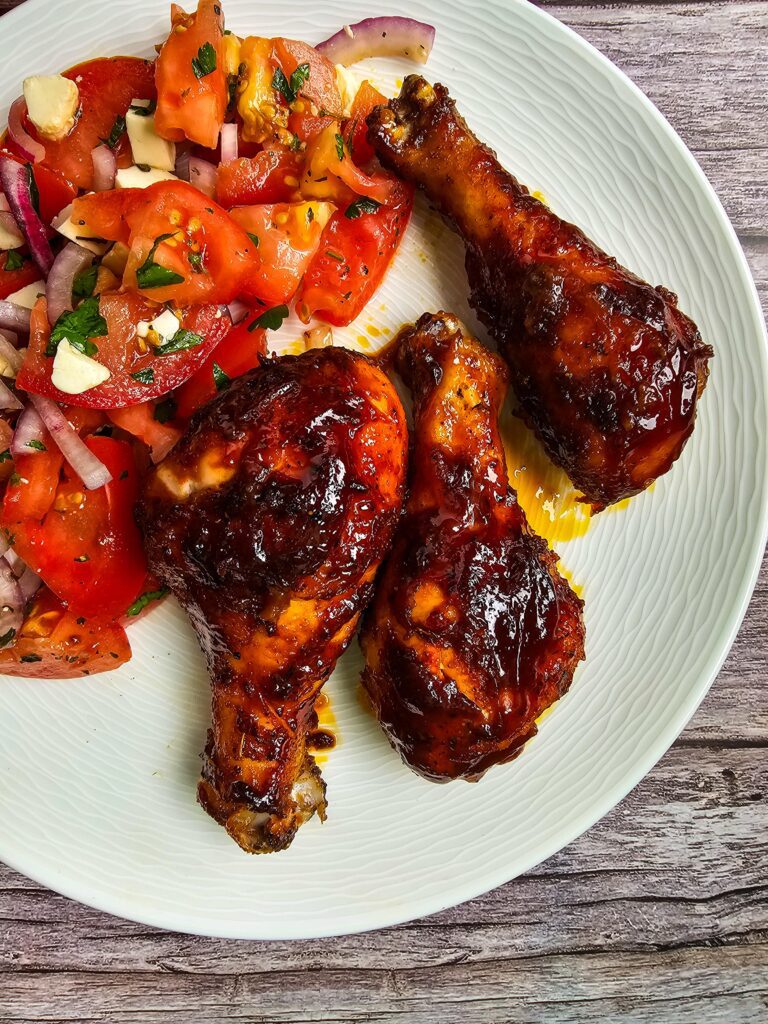
What to Serve With Oven-Baked BBQ Chicken Drumsticks?
These sticky drumsticks pair perfectly with classic cookout sides. Creamy coleslaw is the natural first choice — the cool, tangy crunch is the ideal contrast to the rich sticky glaze. Baked beans bring sweetness and heartiness that complement the smoky spice rub. Corn on the cob is a summer staple that works any time of year alongside these.
For something more filling, mac and cheese soaks up the sauce beautifully and is always a crowd-pleaser. Roasted potatoes or loaded mashed potatoes turn this into a complete dinner. A simple green salad with a light vinaigrette cuts through the richness if you want something fresh on the plate.
These drumsticks are perfect for casual family dinners, summer cookouts, game day spreads, or any night you need a budget-friendly meal that everyone will be excited about. Cold lemonade or iced tea is the natural drink pairing. Cold beer on the weekend is even better.
Storage and Reheating
Store leftover chicken drumsticks in an airtight container in the refrigerator for up to 3 days. The flavors deepen overnight and they are excellent cold straight from the fridge for lunch the next day.
To reheat and keep the skin crispy, place in a 375°F oven for 12 to 15 minutes rather than the microwave. The microwave softens the skin and makes the BBQ sauce rubbery. If you want extra caramelization on the reheat, brush on a fresh coat of BBQ sauce before putting them back in the oven.
Can These Be Frozen?
Yes. Let the cooked drumsticks cool completely then place them in a single layer on a baking sheet and freeze for one hour until solid. Transfer to a freezer-safe bag or airtight container and freeze for up to 3 months. Freezing them in a single layer first prevents them from sticking together so you can pull out individual pieces.
To reheat from frozen, thaw overnight in the refrigerator then bake at 375°F for 15 to 20 minutes. For best results brush with fresh BBQ sauce and finish under the broiler for 2 minutes to revive the glaze.
Looking For More Delicious Chicken Recipes? Try These!
Easy Fire-Grilled Hawaiian Chicken
Juicy chicken thighs soak up a sweet and savory marinade bursting with ginger, soy sauce, and a touch of garlic, then hit the grill for that irresistible smoky char.
Simple Savory Oven-Baked Chicken Drumsticks
This recipe is the perfect combination of crispy skin, juicy meat, and bold, savory flavors that will have your family asking for seconds.
Simple Honey Garlic Chicken Drumsticks
With tender, juicy chicken coated in a sticky, sweet, and savory honey garlic glaze, this recipe is not only easy to make but also packed with flavor.
Final Thoughts
These oven baked BBQ chicken legs with 7 spices are the kind of recipe that proves you do not need a grill to make incredible chicken at home. The blend of bold spices builds deep flavor from the inside out, while the oven creates juicy meat with perfectly caramelized, sticky barbecue skin on the outside. It is an easy dinner that feels like summer comfort food any time of year.
This recipe is perfect for busy weeknights, family dinners, game days, or anytime you need a budget-friendly meal that everyone will actually be excited to eat. Serve with coleslaw, baked beans, mac and cheese, roasted potatoes, or corn on the cob. It is a full plate that always satisfies.
Once you see how simple and flavorful these baked BBQ chicken legs are, they may become your new go-to chicken dinner. Big flavor, easy prep, and no grill required is hard to beat.
Sticky Oven Baked BBQ Chicken Drumsticks With a 7-Spice Rub
Equipment
- Large Baking Sheet Pan
- Wire Rack
- Sauce Brush
- Tongs
Ingredients
- 5 lbs Chicken Legs (chicken leg family pack 10-12 drumsticks)
- 3 tablespoons Avocado Oil (rub all over the chicken legs)
Chicken Rub Ingredients:
- 1 tablespoon Paprika
- 1 tablespoon Chili Powder
- 2 teaspoons Smoked Paprika
- 2 teaspoons Garlic Powder
- 2 teaspoons Onion Powder
- 2 teaspoons Dried Thyme
- Salt and Fresh Ground Black Pepper (to taste)
- 1 cup Barbecue Sauce ( I used Sweet Baby Rays)
Instructions
- Preheat the Oven: Preheat your oven to 400°F and line a large baking sheet with foil or parchment paper for easy cleanup. Place a wire rack on top if you want crispier skin.
- Prep the Chicken: Pat the 5 lbs. of chicken legs dry with paper towels to help the skin get crispy. Place them in a large bowl or on a tray.
- Rub with Oil: Drizzle 3 tablespoons of avocado oil over the chicken legs and rub it all over to coat them evenly.
- Mix the Rub: In a small bowl, mix together– 1 tbsp paprika, 1 tbsp chili powder, 2 tsp smoked paprika, 2 tsp garlic powder, 2 tsp onion powder, 2 tsp dried thyme, Salt and fresh ground black pepper to taste
- Season the Chicken: Sprinkle the seasoning mix all over the oiled chicken legs. Rub it in with your hands to make sure every piece is coated well.**Pro Tip: I like to pour the spices into an empty spice shaker. This way no spices are wasted and can be used another day if anything is left over.
- Bake the Chicken: Arrange the seasoned chicken legs on the prepared baking sheet. Bake in the oven at 400°F for 35–40 minutes, or until the chicken reaches 165°F inside and the skin is crisp.
- Add BBQ Sauce: Take the chicken out of the oven and brush each piece with Sweet Baby Ray’s BBQ sauce (or your favorite kind). Be generous—it should be nice and saucy!
- Return to the Oven: Pop the chicken back in the oven for 10 more minutes, or until the BBQ sauce is bubbly and caramelized.
- Rest and Serve: Let the chicken rest for a few minutes before serving. Grab some napkins and dig in—these are sticky, juicy, and packed with flavor!


Awesome spices added to the deeper and warm flavor of this oven baked chicken wings( I used) and drumsticks recipe. I used Sweet Baby Rays Sweet Teriyaki Sauce and Marinade instead of barbecue sauce. It was awesome!!! This recipe is a keeper!
Love It! I am glad you enjoyed the recipe. Thanks for the comment.