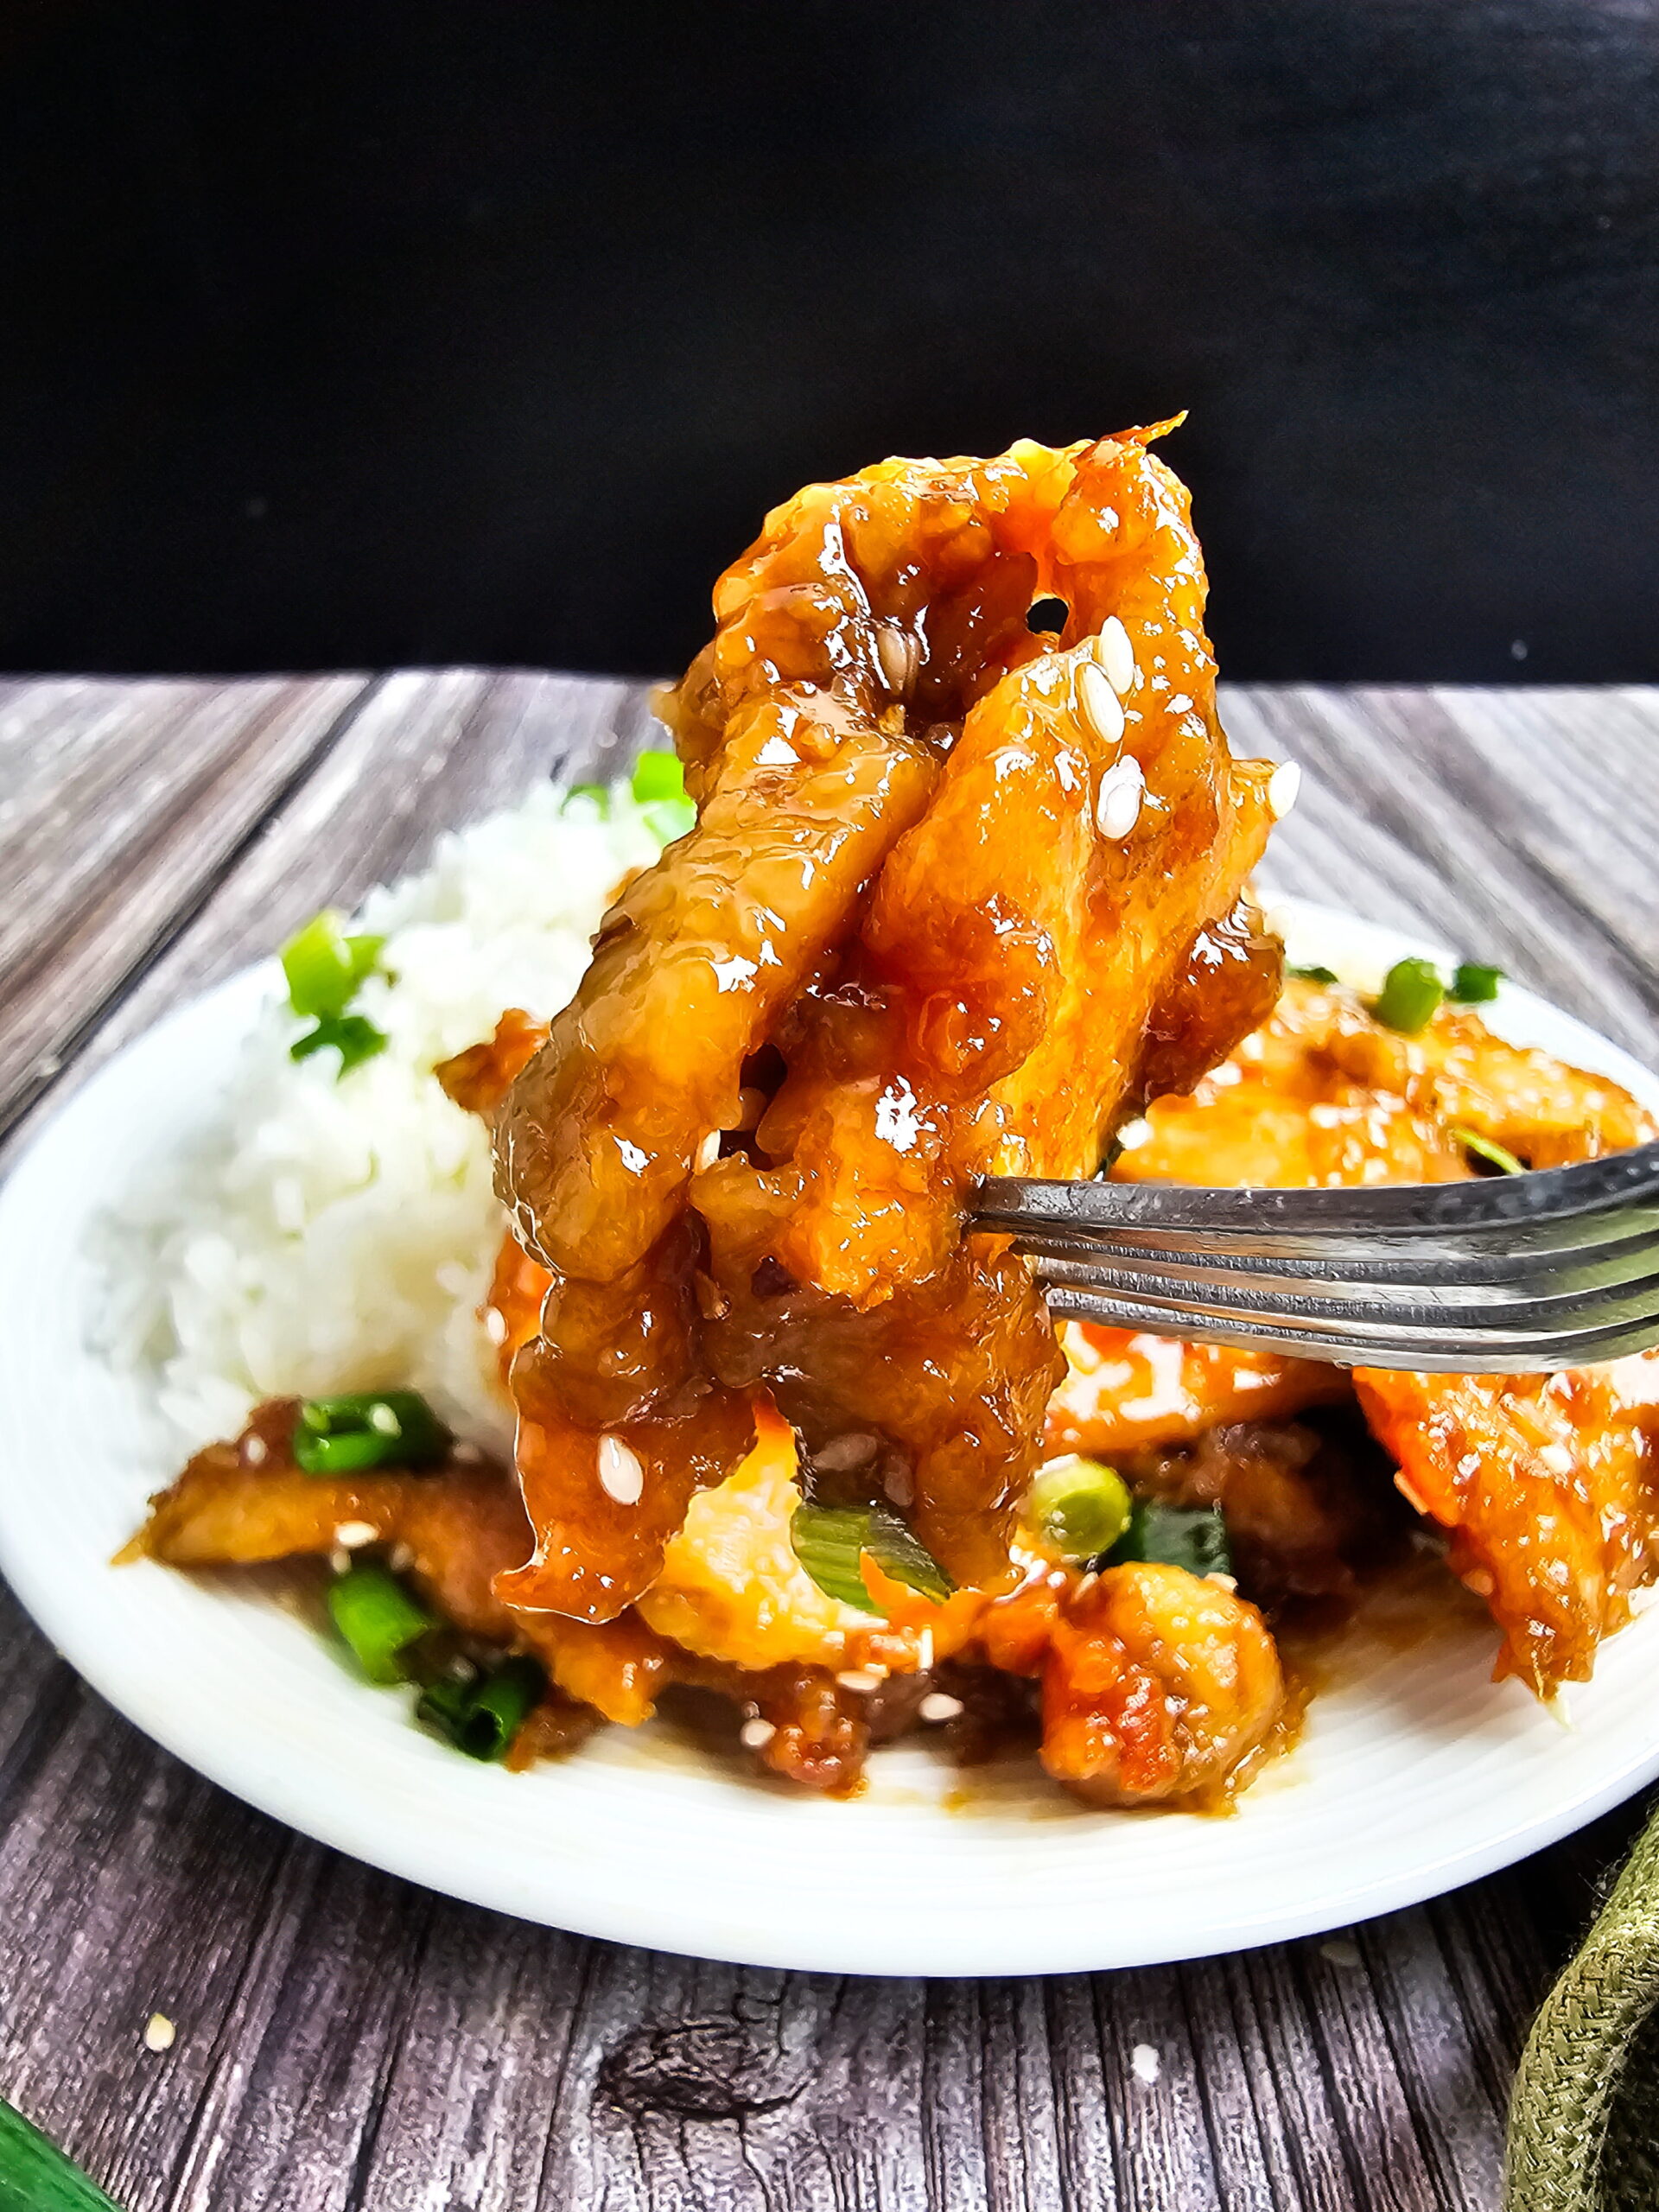
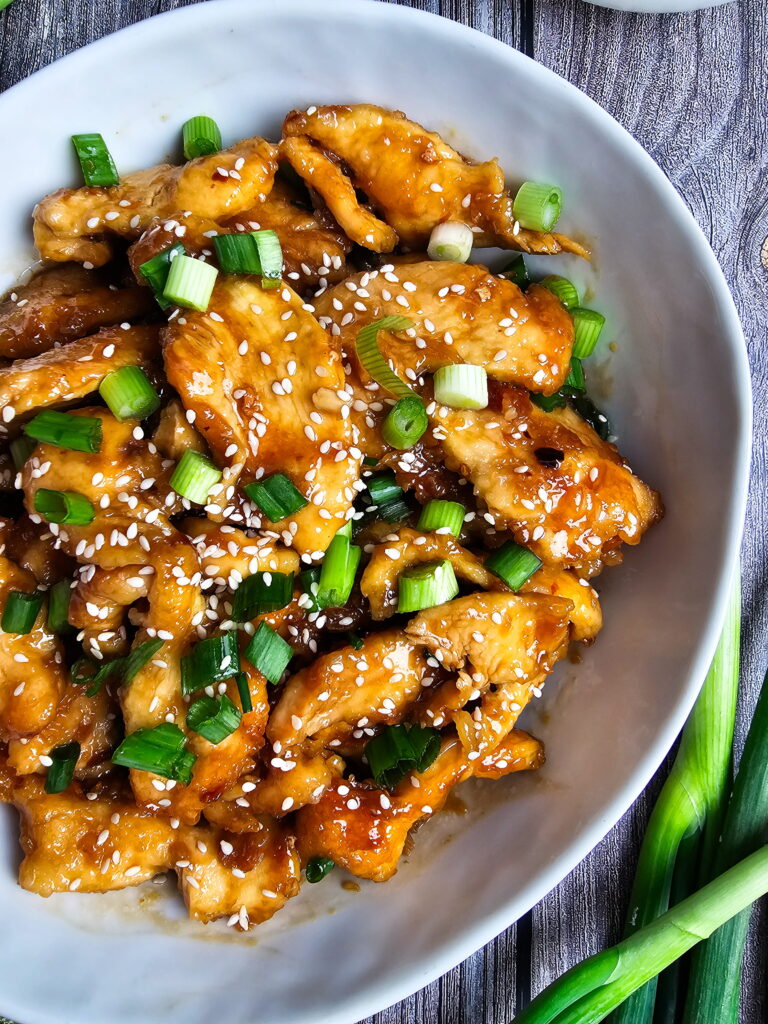
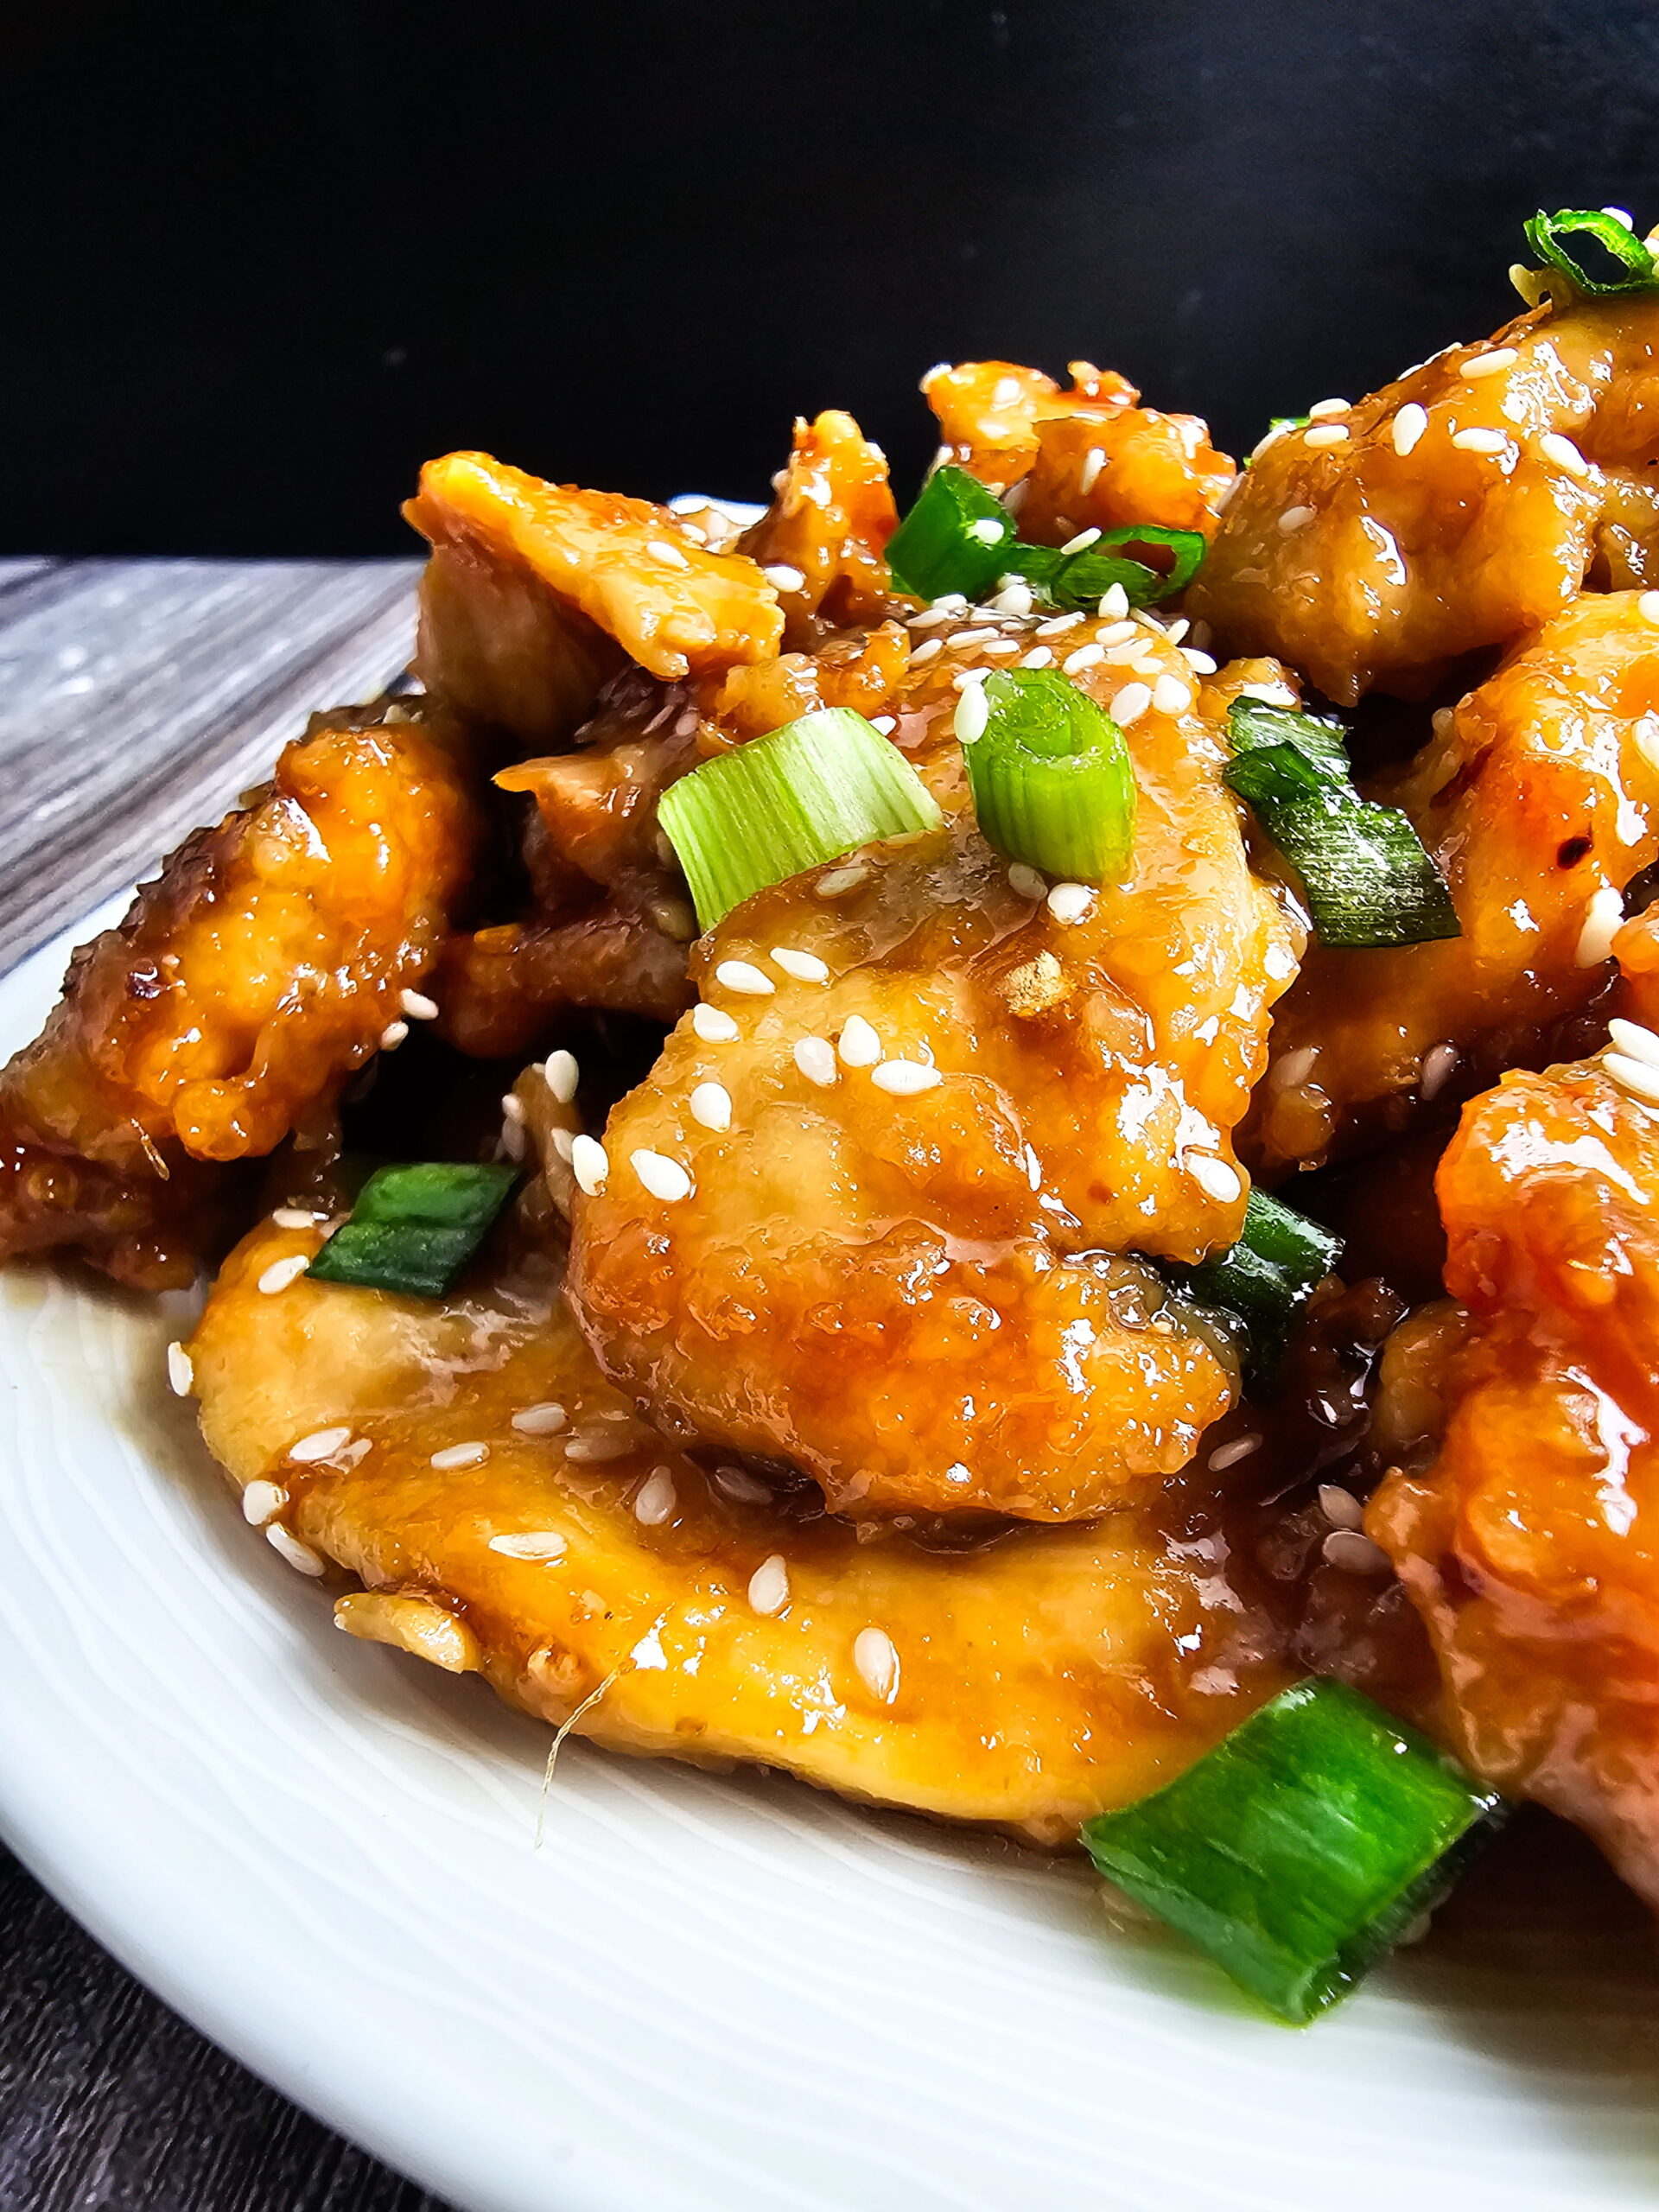
Mongolian chicken is a quick stir-fry dish featuring crispy seared chicken coated in a sticky, savory-sweet sauce made with soy sauce, brown sugar, garlic, and ginger. This version beats takeout because the chicken is velveted before cooking for guaranteed tenderness, and the sauce is balanced with rice vinegar and hoisin — the two ingredients most homemade versions skip. It comes together in about 30 minutes and tastes better than anything from a takeout container.
If you have been searching for a Mongolian chicken recipe that actually tastes like the real thing — glossy, sticky sauce, crispy edges, and that unmistakable savory-sweet depth — you just found it. Most homemade versions get the basic idea right but miss a few critical details that separate a good attempt from something that genuinely beats takeout. This easy Mongolian chicken recipe fixes all of that, and it is ready in about 30 minutes on a single pan.
I have made this more times than I can count on a Tuesday night when the craving hit hard and delivery was not happening. The version I am sharing now is the result of figuring out exactly what was wrong with the recipes I kept trying — too sweet, too thin, too dry — and rebuilding it from the ground up with the specific upgrades that actually move the needle.

What Is Mongolian Chicken?
Mongolian chicken is a quick stir-fry dish featuring crispy seared chicken coated in a sticky, savory-sweet sauce made with soy sauce, brown sugar, garlic, and ginger. This version beats takeout because the chicken is velveted before cooking for guaranteed tenderness, and the sauce is balanced with rice vinegar and hoisin — the two ingredients most homemade versions skip. It comes together in about 30 minutes and tastes better than anything from a takeout container.
Why This Easy Mongolian Chicken Recipe Actually Works
Most recipes for Mongolian chicken are missing two things: a balanced sauce and properly textured chicken. When the sauce is nothing but soy sauce, water, and a pile of brown sugar, you end up with something that tastes flat and cloying — sweet up front with no finish. And when the chicken gets dumped straight into a pan with no preparation, it turns into rubbery, dry strips that no amount of sauce can save.
This recipe fixes both problems at once:
Velveting step: Marinating the chicken briefly in cornstarch, a splash of soy sauce, and oil — is borrowed directly from Chinese restaurant technique. It creates a thin, protective coating on each piece of chicken that locks in moisture during the high-heat sear. The result is chicken that stays genuinely tender inside while developing real crispy edges on the outside. It takes ten to fifteen minutes of resting time and it is the single most important upgrade you can make.
Sauce upgrade: Swapping water for chicken broth adds a layer of savory depth that water simply cannot provide. Rice vinegar is the secret weapon — just a teaspoon or two cuts through the sweetness and creates a sauce that tastes bright and complex instead of heavy. Hoisin sauce adds that rich, slightly fermented, slightly smoky background note that you taste in good takeout Mongolian dishes and always wonder what it is. Together these adjustments turn a one-note sauce into something that makes you scrape the pan.
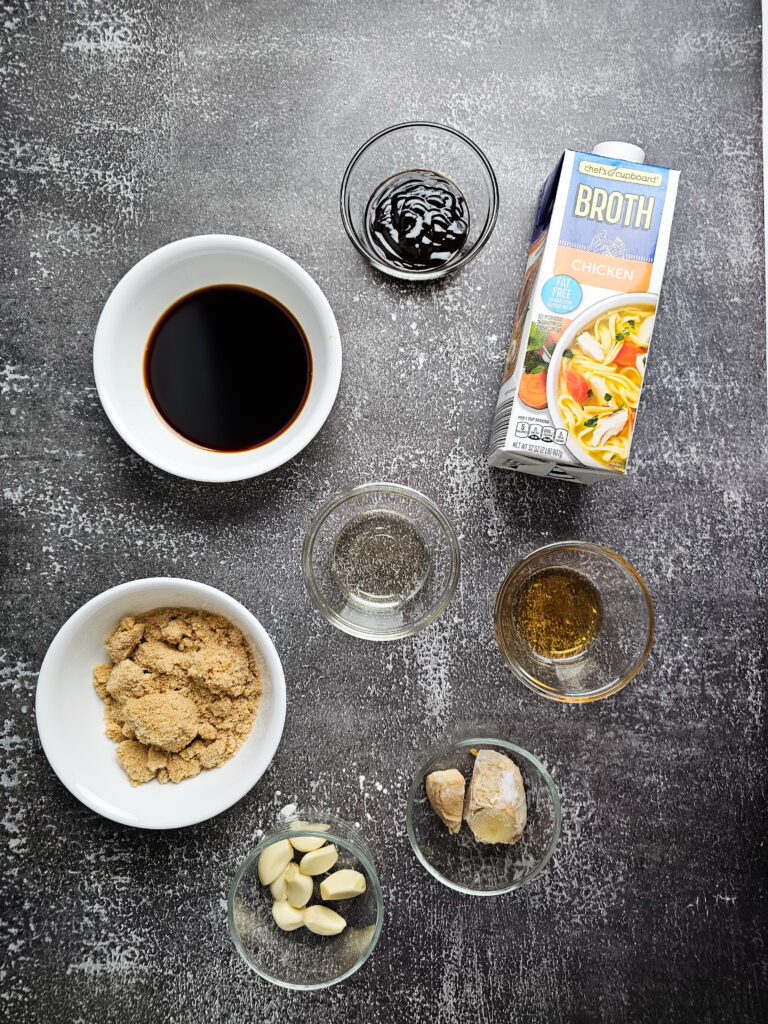
Ingredients for Crispy Mongolian Chicken:
- Chicken Ingredients: 1¼ pounds boneless, skinless chicken breast, thinly sliced ¼ cup cornstarch 1 tablespoon soy sauce 1 tablespoon vegetable oil Salt and pepper to taste
- Sauce Ingredients: ½ cup low-sodium soy sauce, ⅓ cup dark brown sugar, ⅓ cup chicken broth, 1 to 2 teaspoons rice vinegar, 1 tablespoon hoisin sauce, 1 teaspoon toasted sesame oil
- Aromatics: 1½ teaspoons minced garlic, 1 teaspoon minced ginger, ½ teaspoon red pepper flakes (optional but strongly recommended)
- For Cooking: 3 tablespoons vegetable oil
- Finish: ½ cup green onions, cut into 1-inch pieces sesame seeds, optional
How to Make Mongolian Chicken Better Than Takeout?
Time needed: 30 minutes
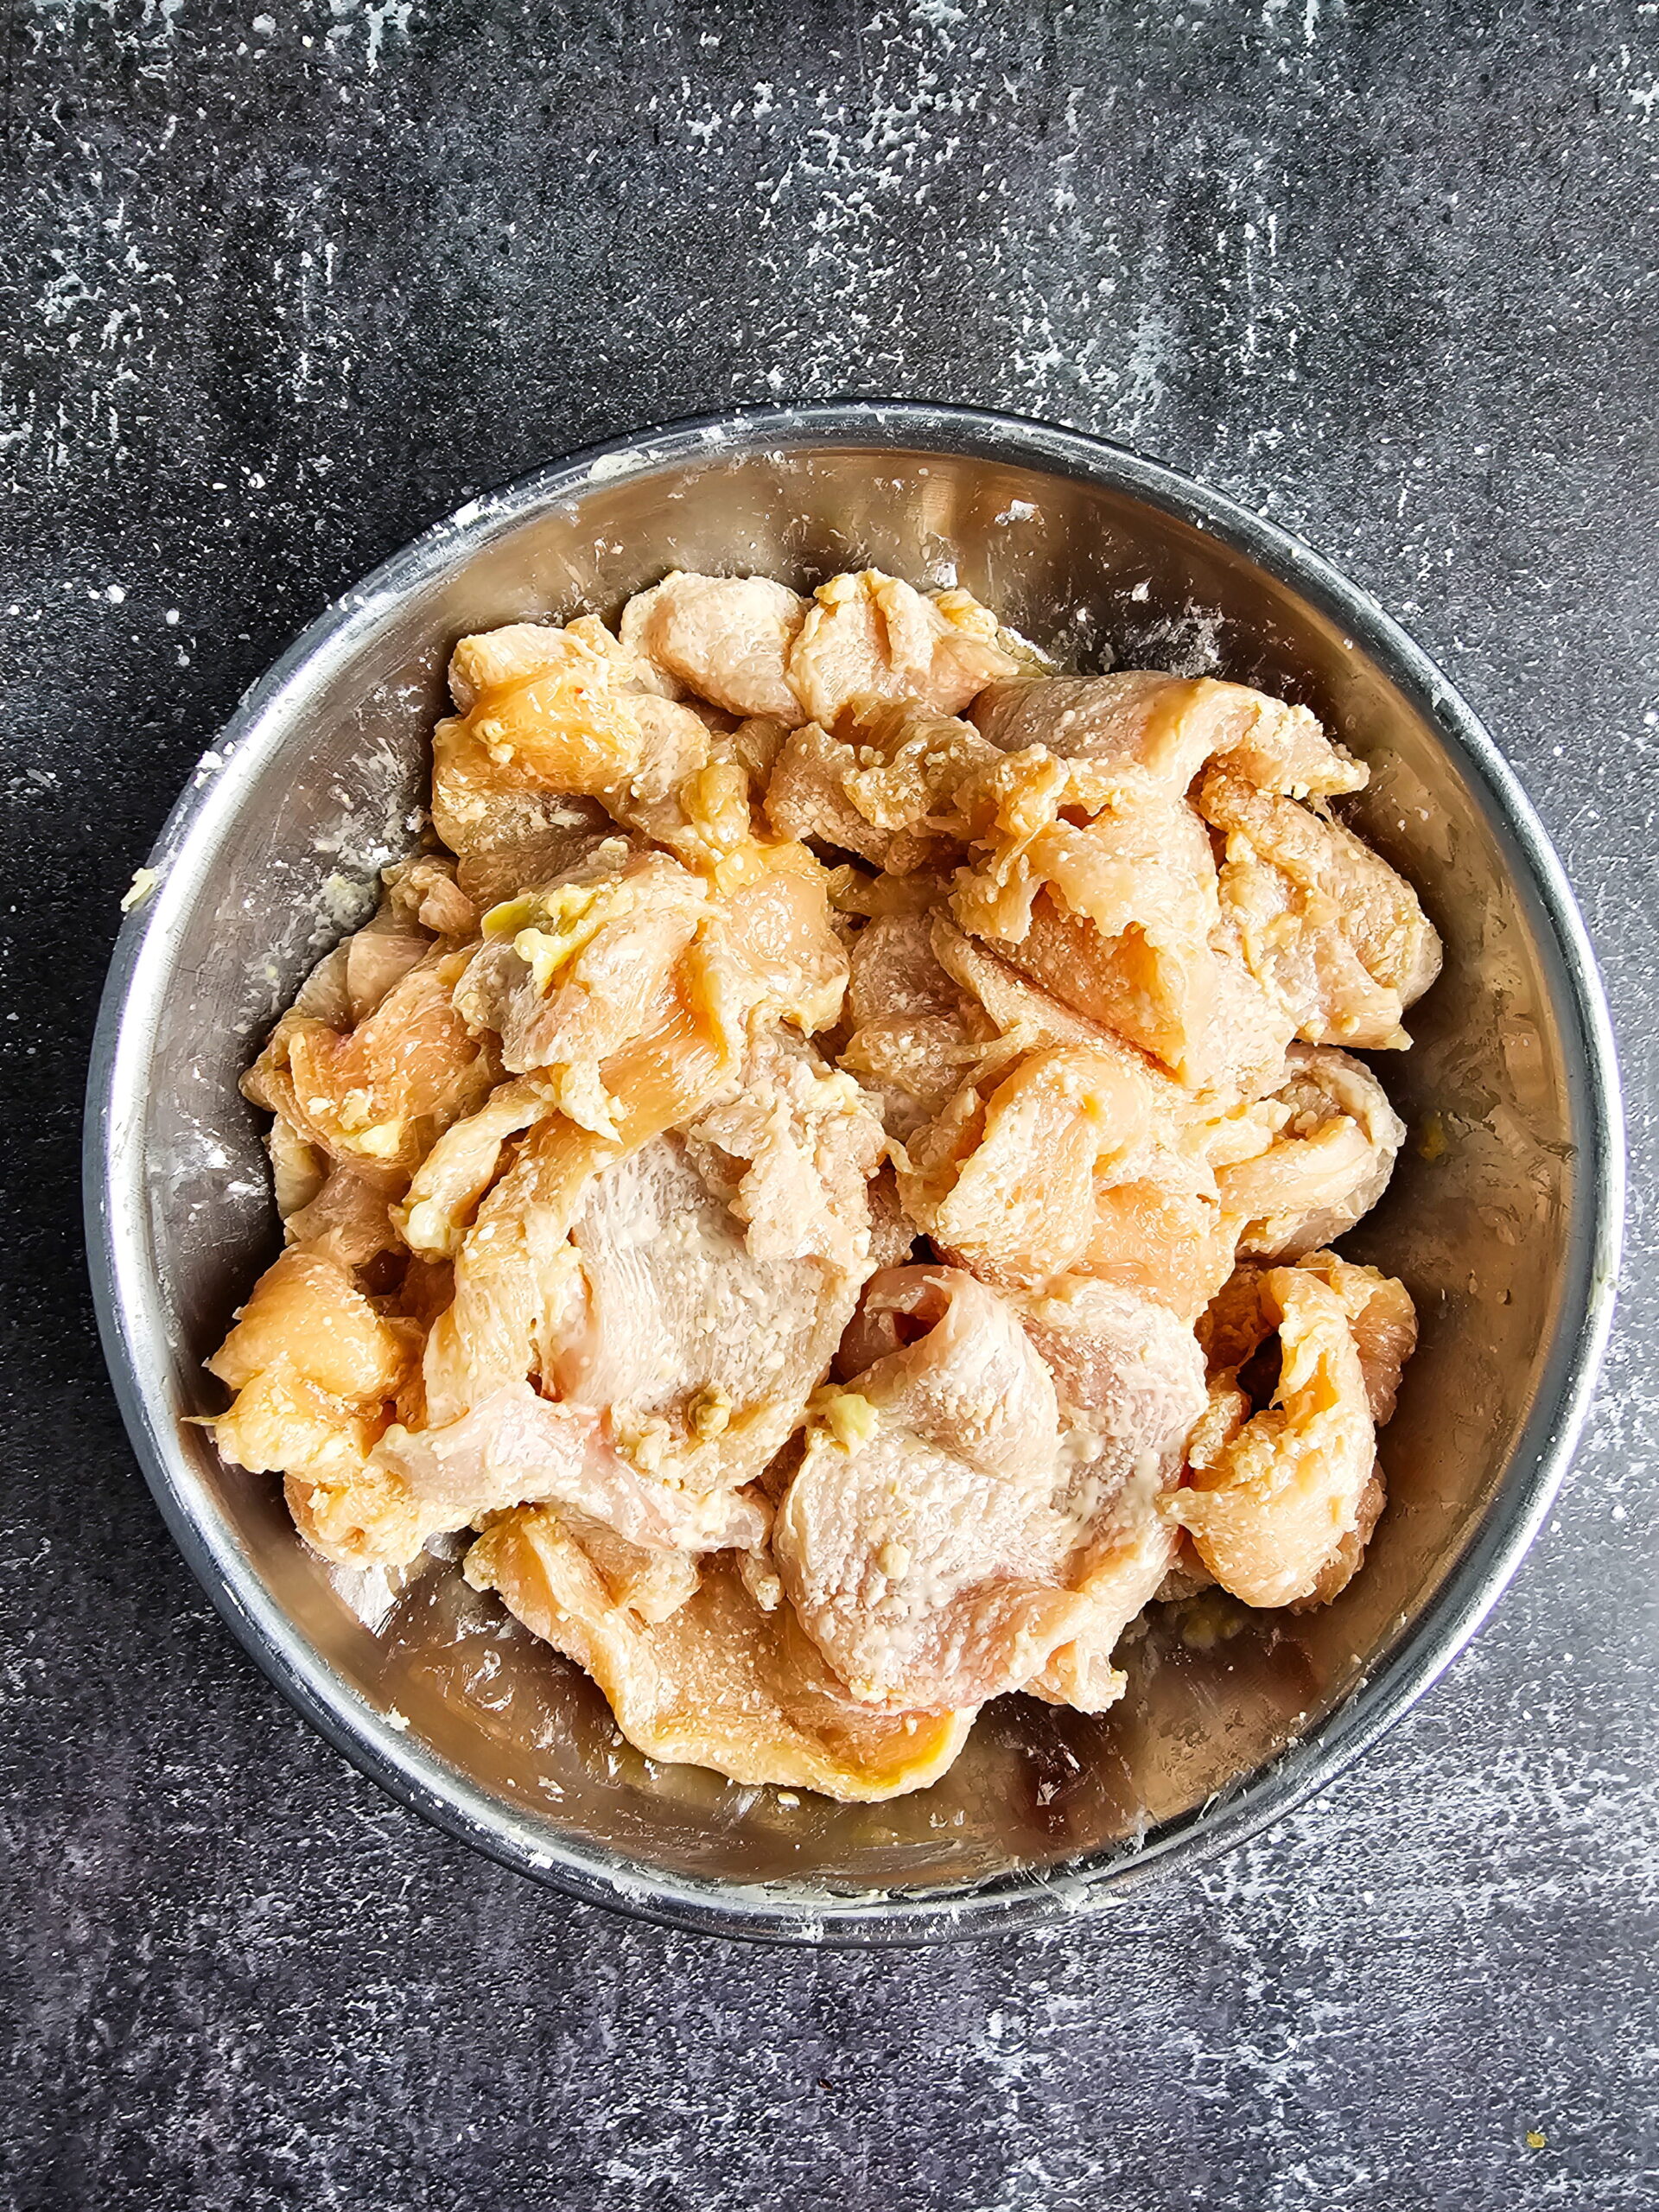
- Velvet the Chicken:
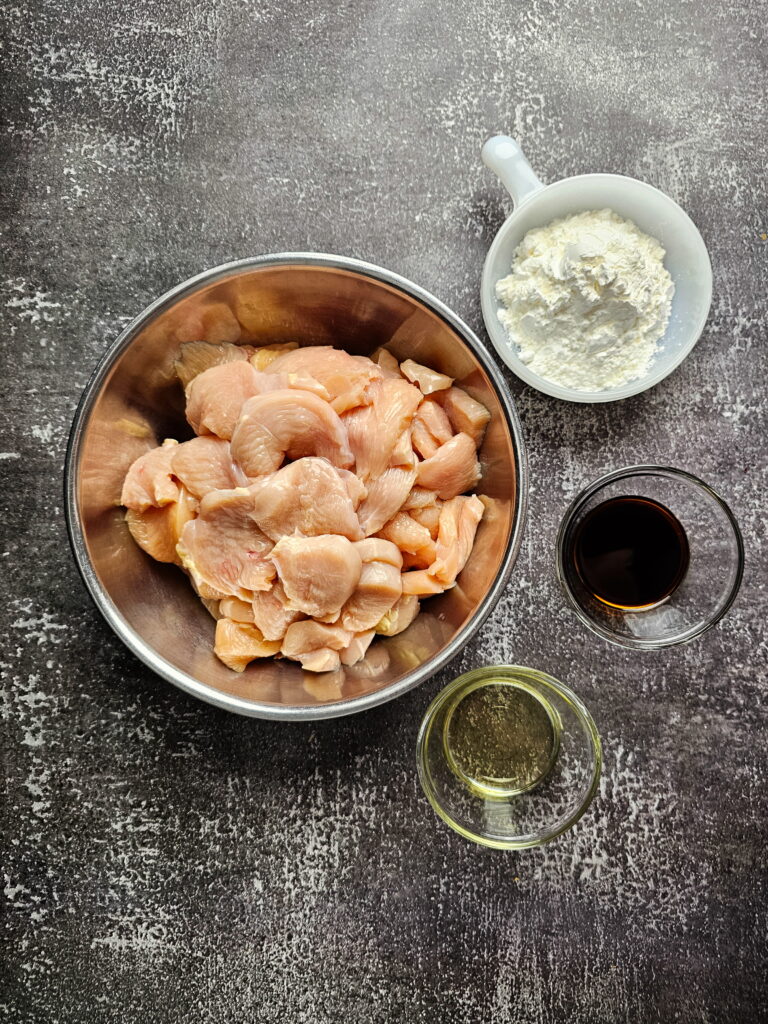
In a bowl, combine the sliced chicken with cornstarch, 1 tablespoon soy sauce, 1 tablespoon oil, and a pinch of salt and pepper. Toss until everything is evenly coated and let it sit for 10 to 15 minutes at room temperature.
Do not skip this step. The cornstarch gives the chicken its coating and helps the sauce cling later. The soy and oil start building flavor from the inside out. The resting time lets the coating adhere and the muscle fibers relax slightly, which is what gives you juicy chicken instead of dry chicken. This is the same technique Chinese restaurant kitchens use, and it works.
- Make the Sauce:
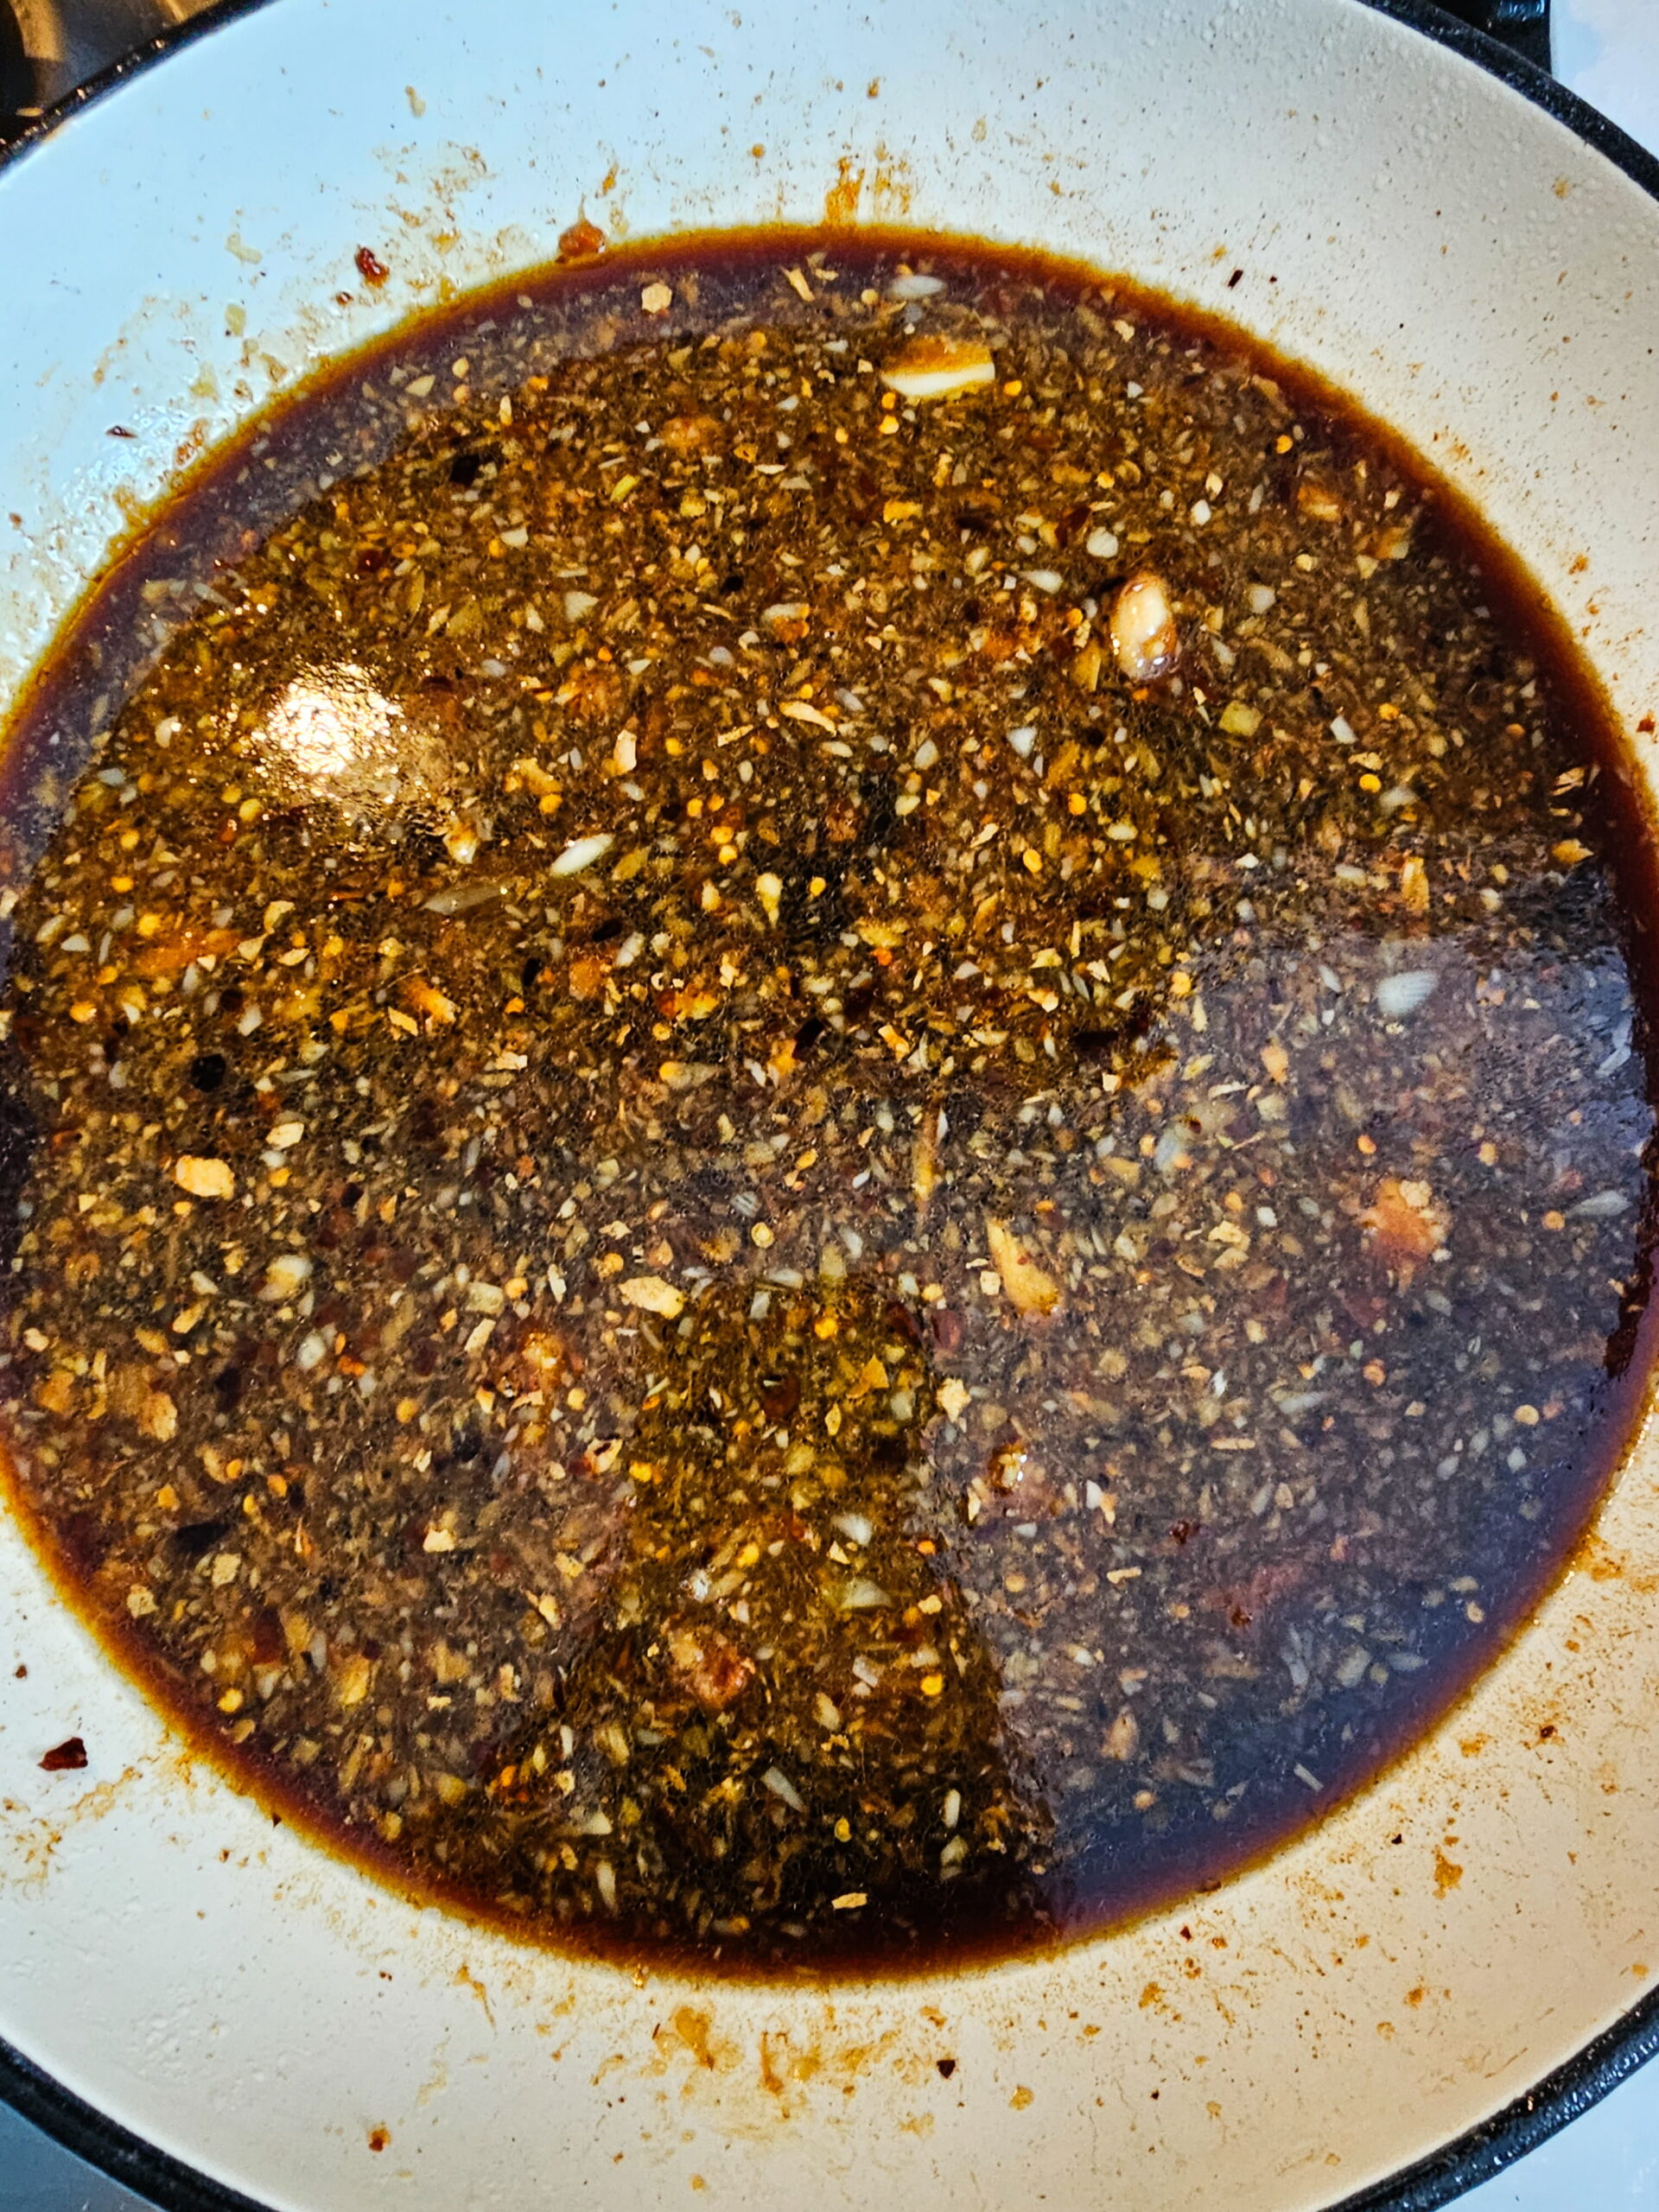
In a small bowl or measuring cup, whisk together the low-sodium soy sauce, dark brown sugar, chicken broth, rice vinegar, hoisin sauce, and sesame oil until the sugar is dissolved and everything is combined. Set it aside.
Having the sauce ready before you start cooking is important because once the pan gets hot, things move fast.
The dark brown sugar instead of light brown sugar gives the sauce a deeper, more molasses-forward sweetness that reads as more complex and less candy-like. The rice vinegar amount is adjustable — start with one teaspoon and taste it after the sauce simmers if you want to add more. - Sear the Chicken:
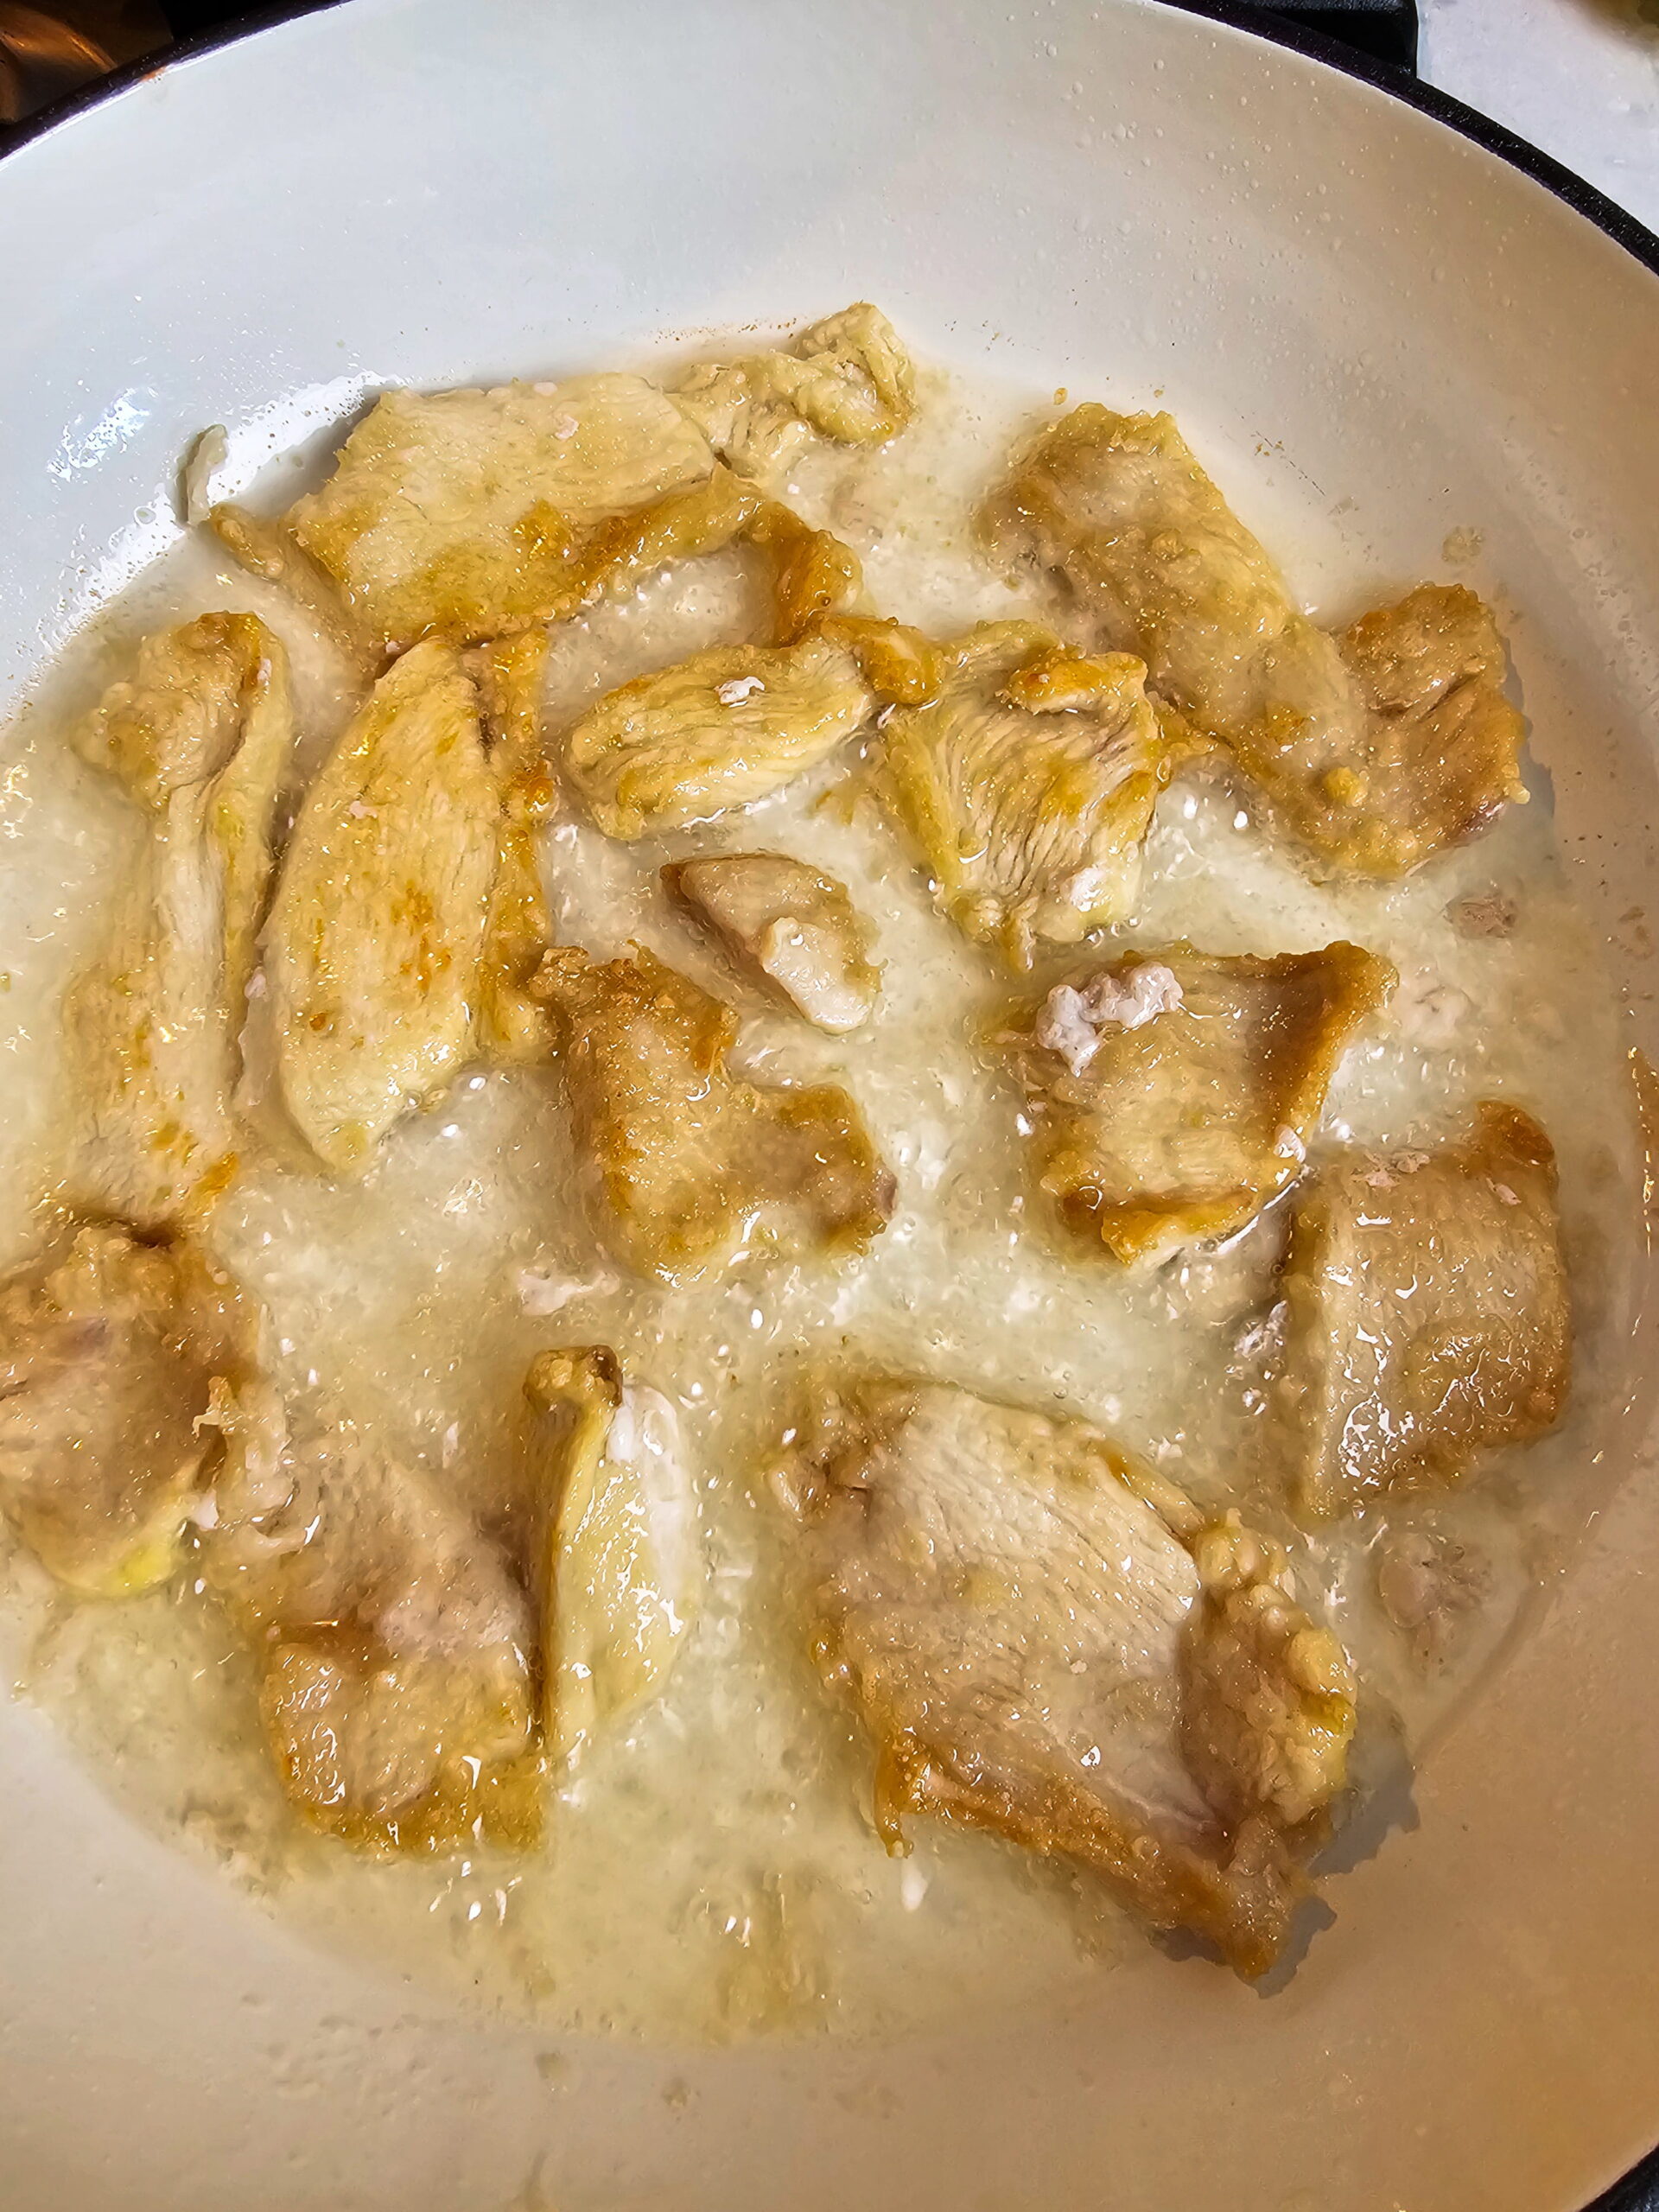
Heat 3 tablespoons of vegetable oil in a large skillet or wok over medium-high heat until the oil is shimmering. Add the chicken in a single layer, working in batches if needed. This is where most people make a critical mistake — overcrowding the pan drops the temperature and causes the chicken to steam instead of sear. You want space between the pieces.
Let the chicken cook undisturbed for about 2 to 3 minutes until the bottom is golden and crispy. Flip and cook another 2 to 3 minutes until cooked through. Remove the chicken and set it on a plate. Do not cover it or the crust will steam off. - Build the Aromatic Base:
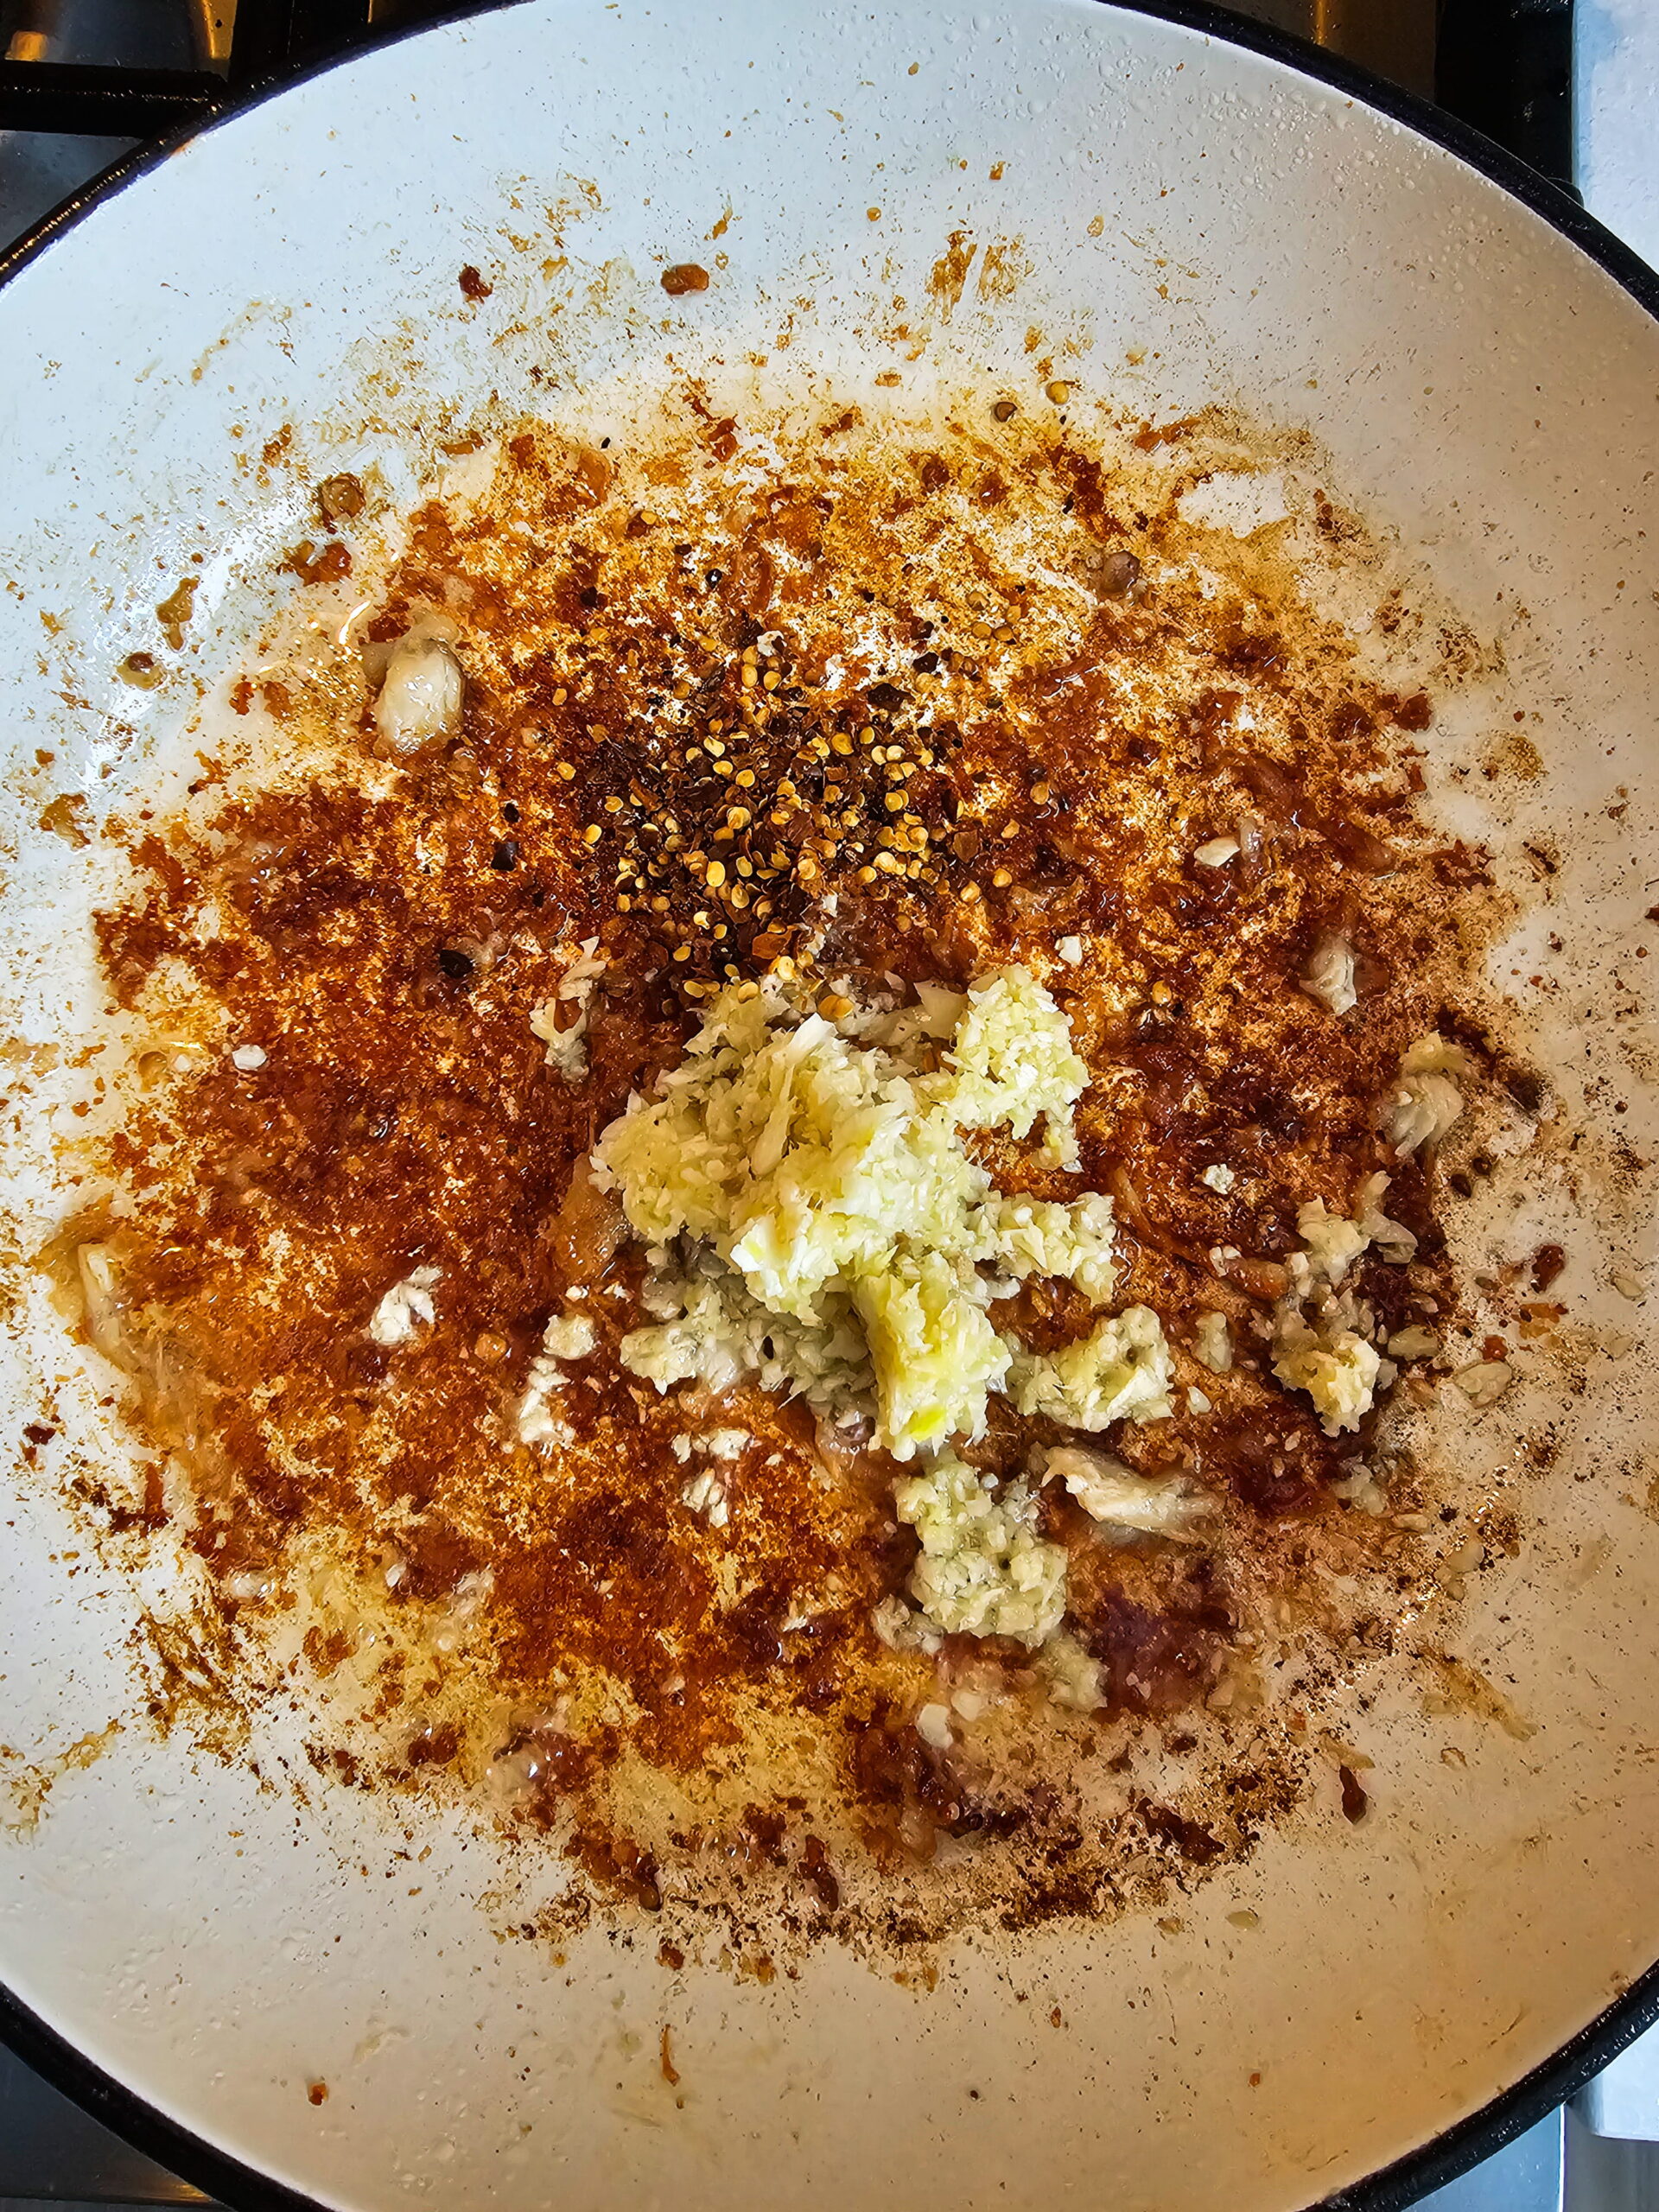
Reduce the heat slightly. In the same pan, add the minced garlic, ginger, and red pepper flakes. Cook for 30 to 45 seconds, stirring constantly. You want them fragrant and just starting to color — not brown and bitter. The rendered chicken drippings left in the pan add flavor here that you would lose if you started fresh.
- Add the Sauce and Simmer:
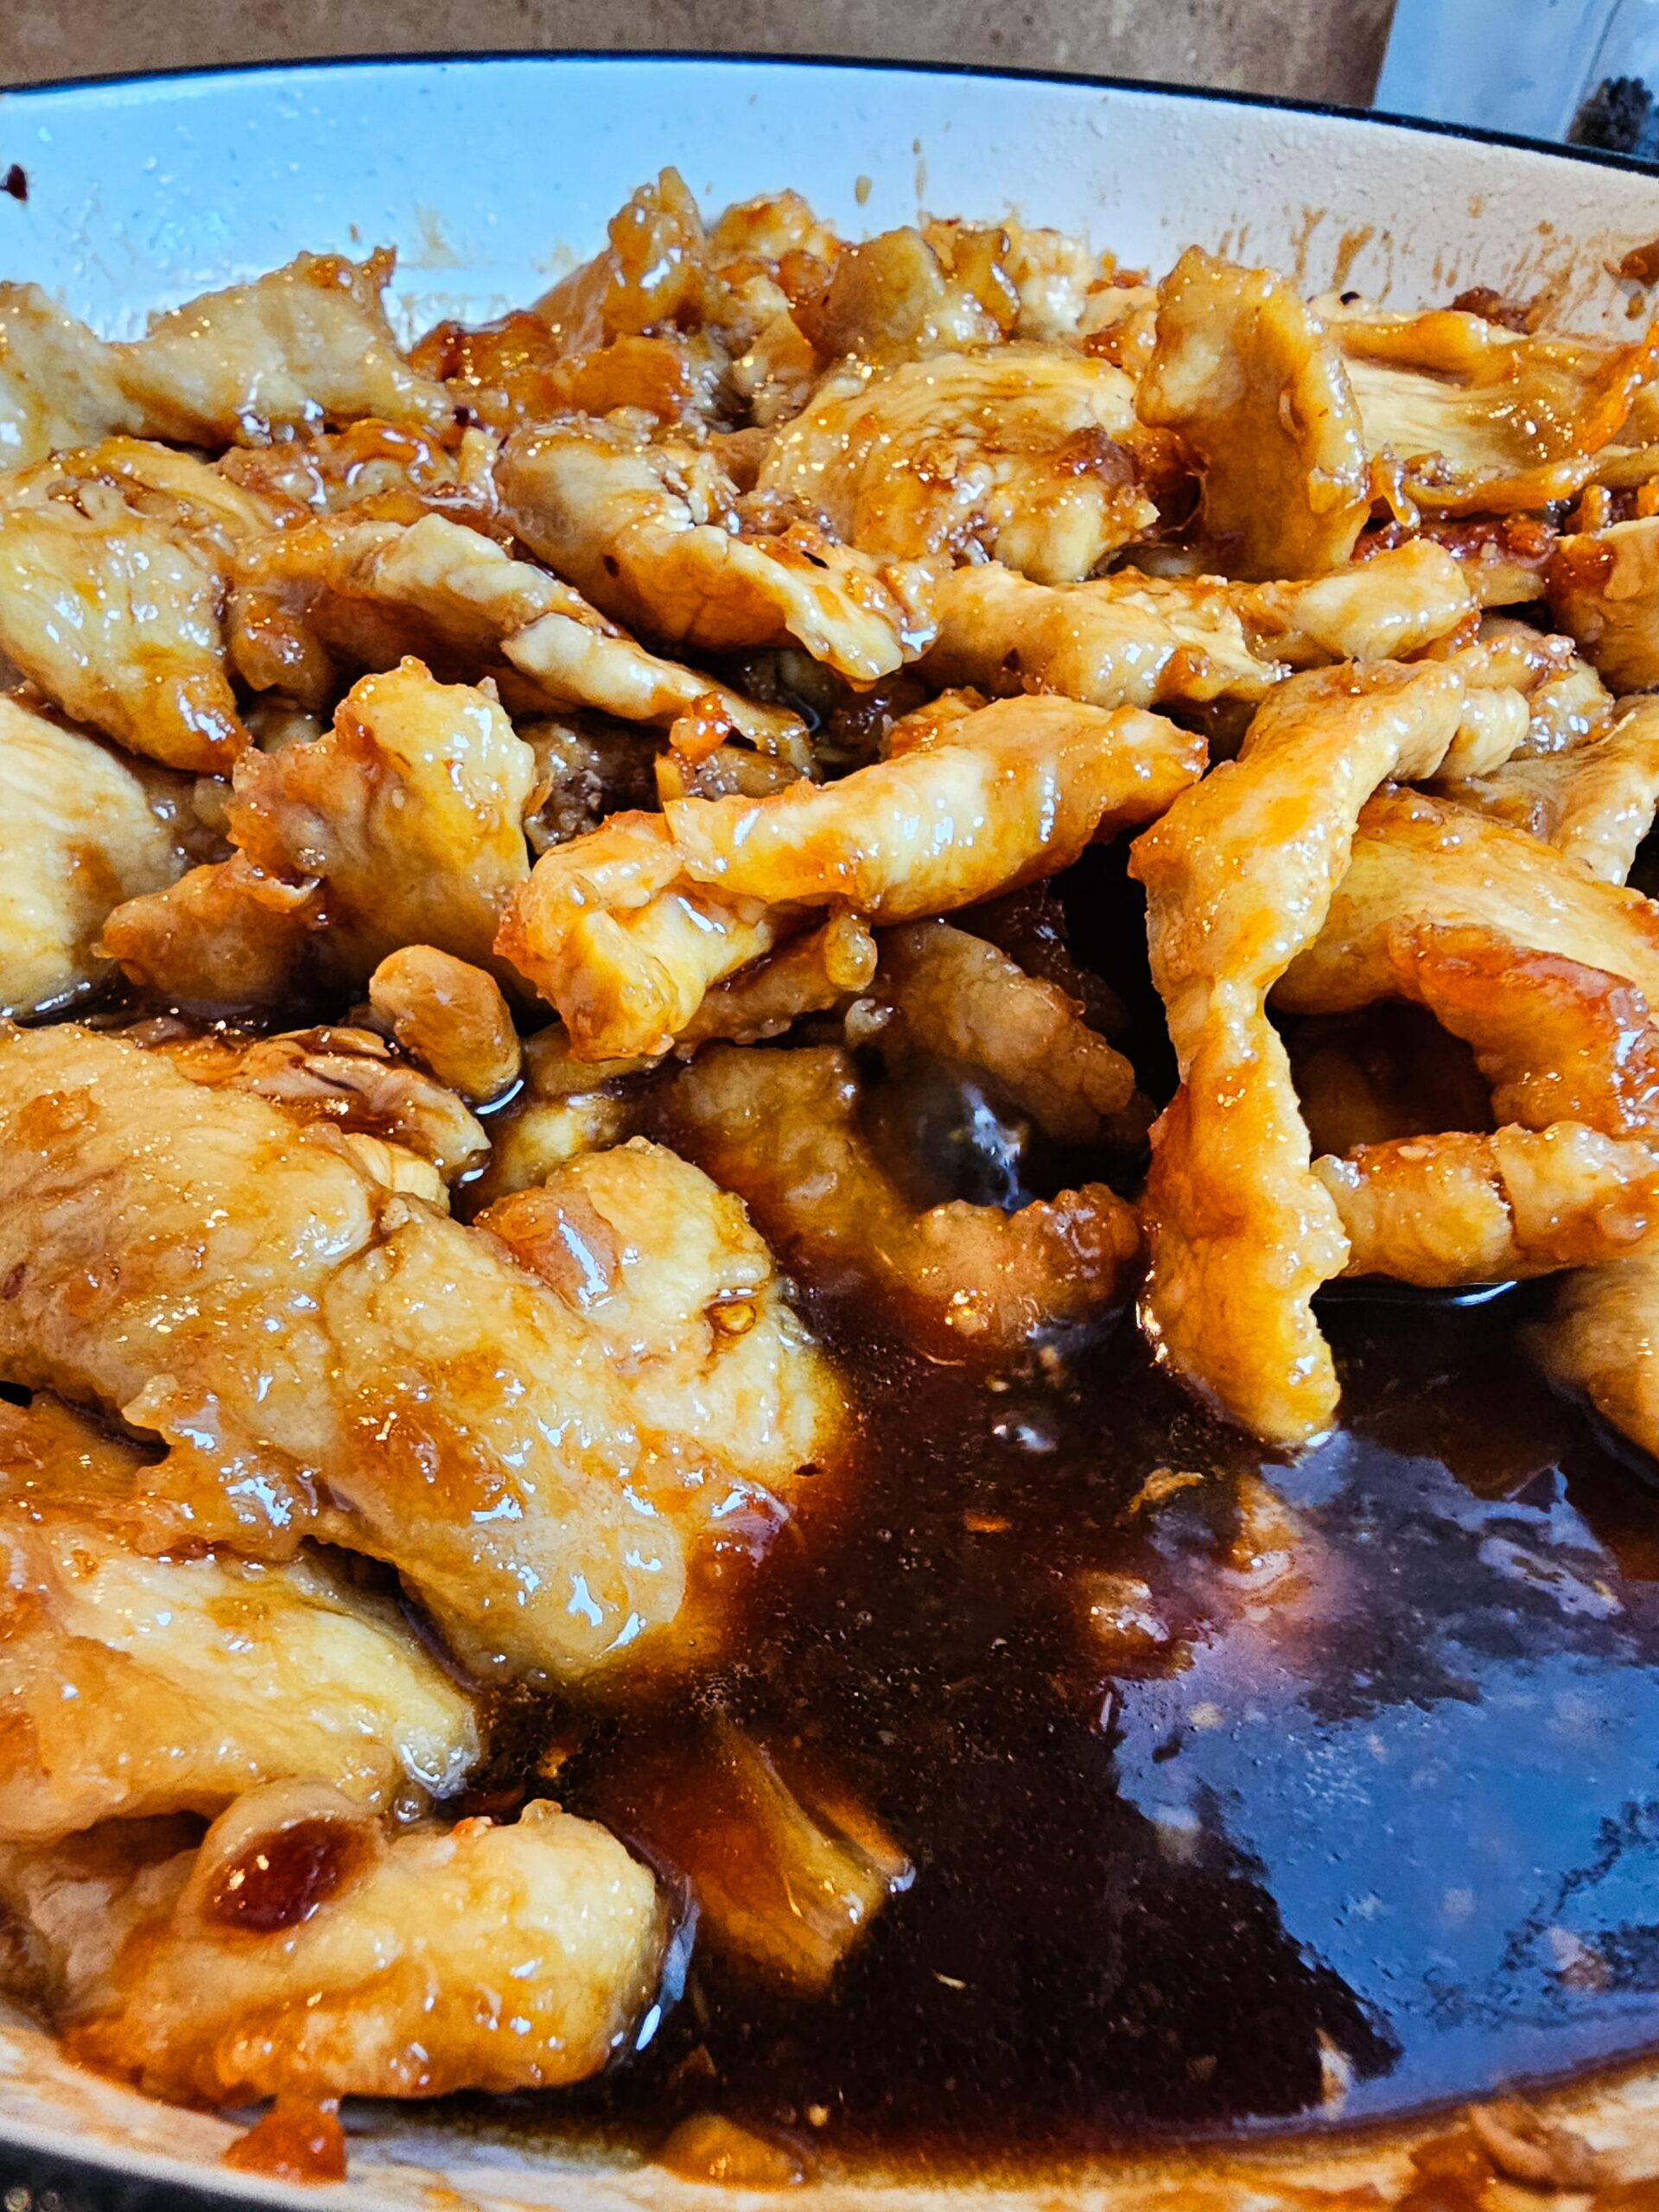
Pour in the prepared sauce and bring it to a simmer over medium heat. Let it cook for 2 to 3 minutes, stirring occasionally. The sauce will begin to thicken and reduce. You will notice it starts to look glossy rather than thin and watery — that is the signal you want.
Unlike other recipes, this version does not require a cornstarch slurry because the velveting coating on the chicken provides enough starch to help thicken the sauce naturally as the chicken is added back in. If your sauce is thinner than you like after the chicken goes back in, let it cook an extra minute or two before serving. - Add the Chicken and Finish the Sauce:
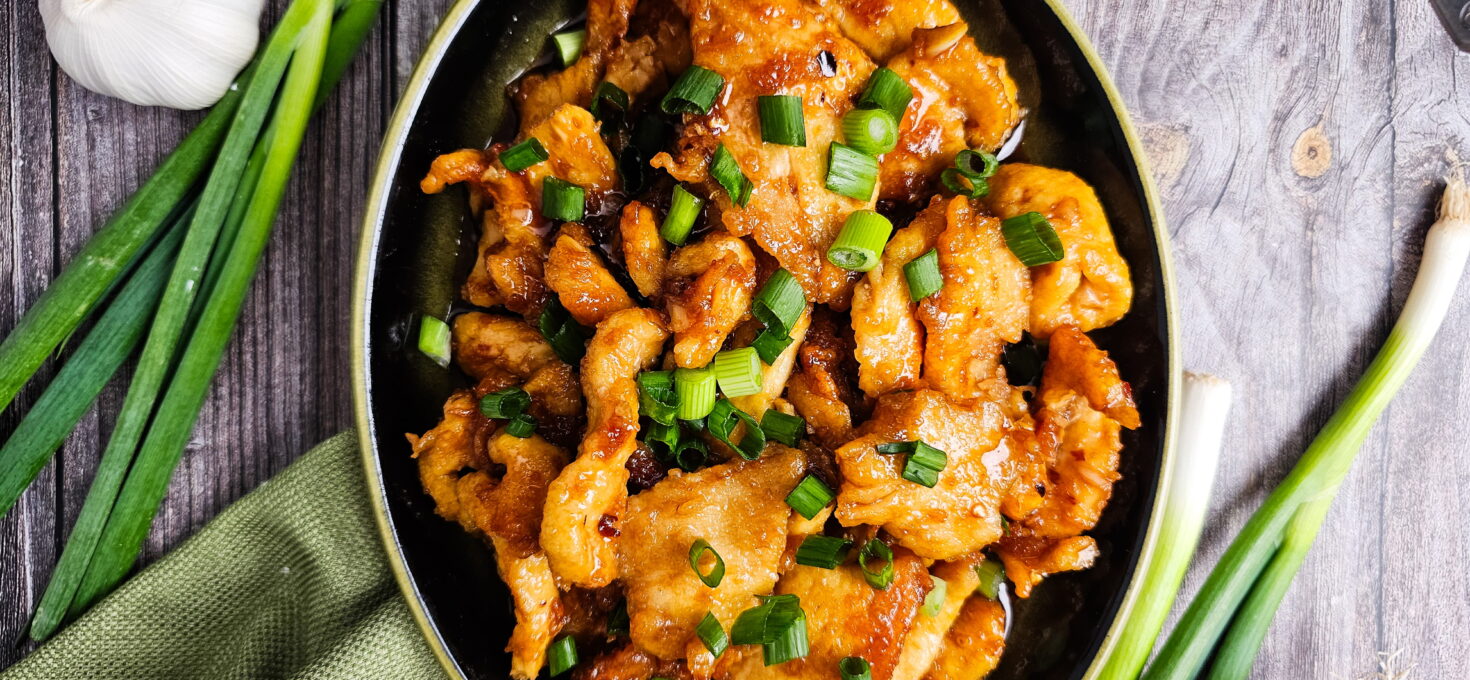
Return the seared chicken to the pan and toss to coat everything evenly. Cook for 2 to 3 more minutes, stirring occasionally, until the sauce is thick, sticky, and clings to every piece. This is the moment the dish becomes what it is supposed to be — not chicken with sauce poured over it, but chicken that has become part of the sauce.
- Finish and Serve:
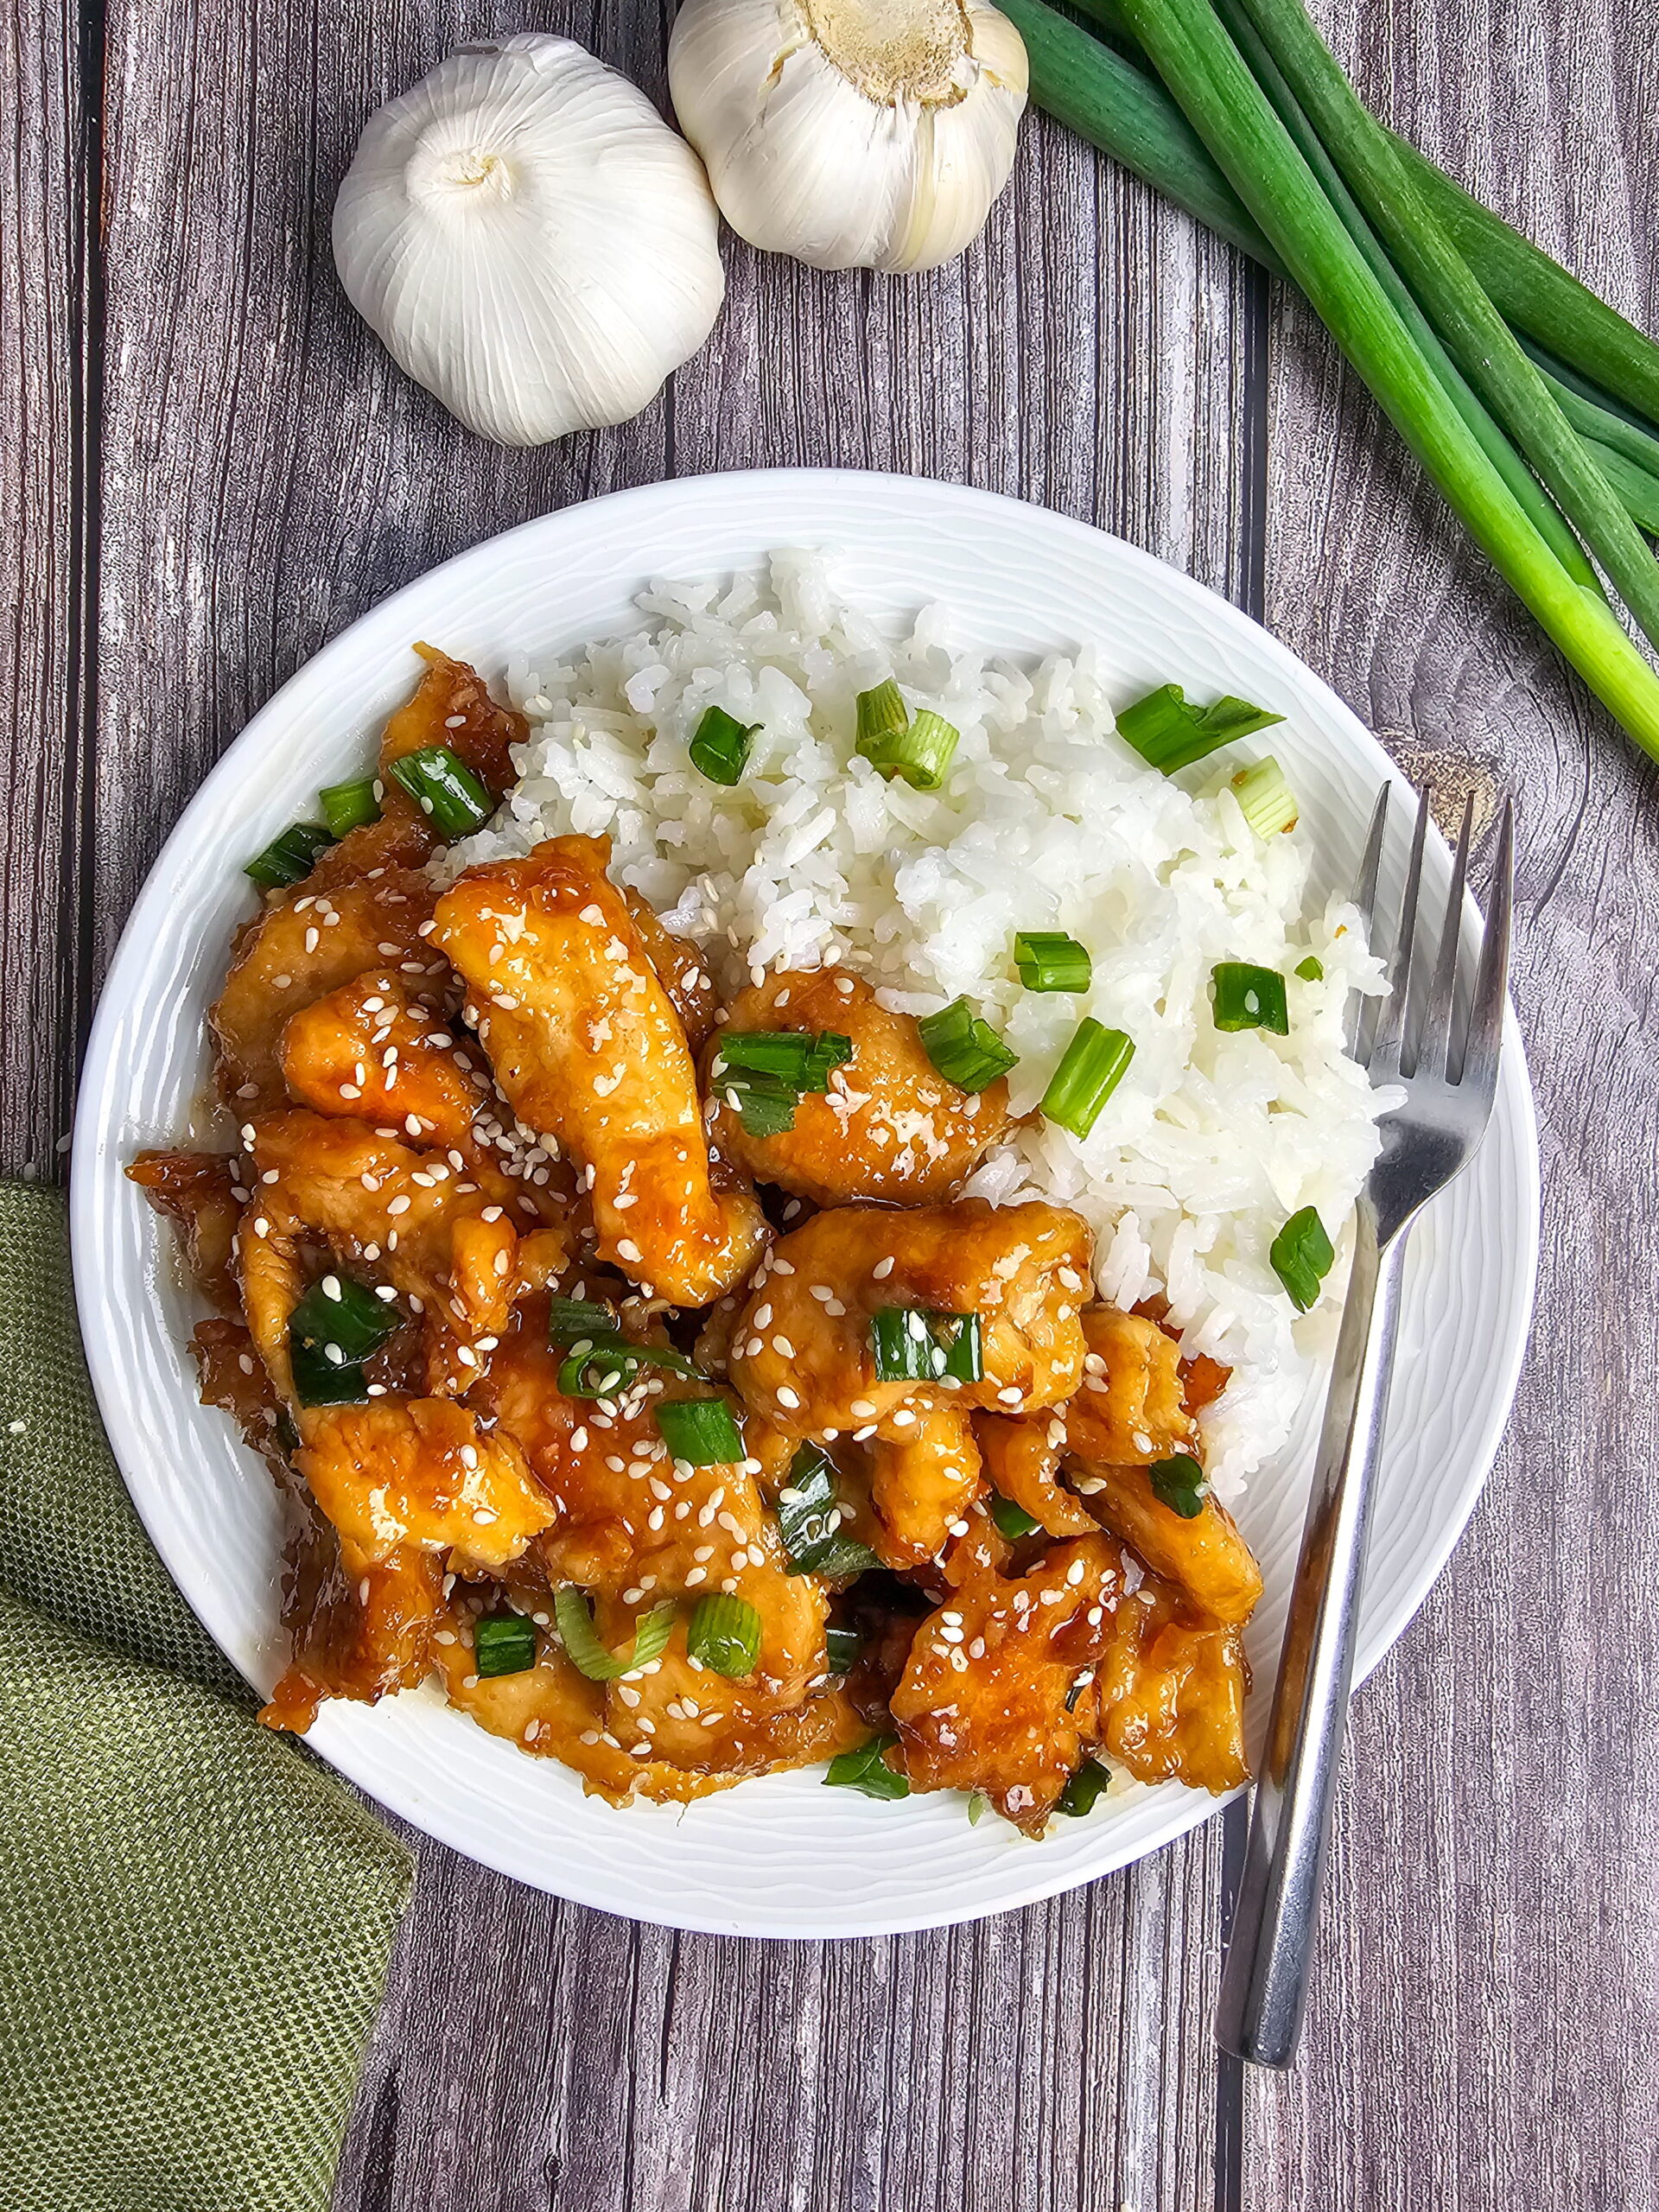
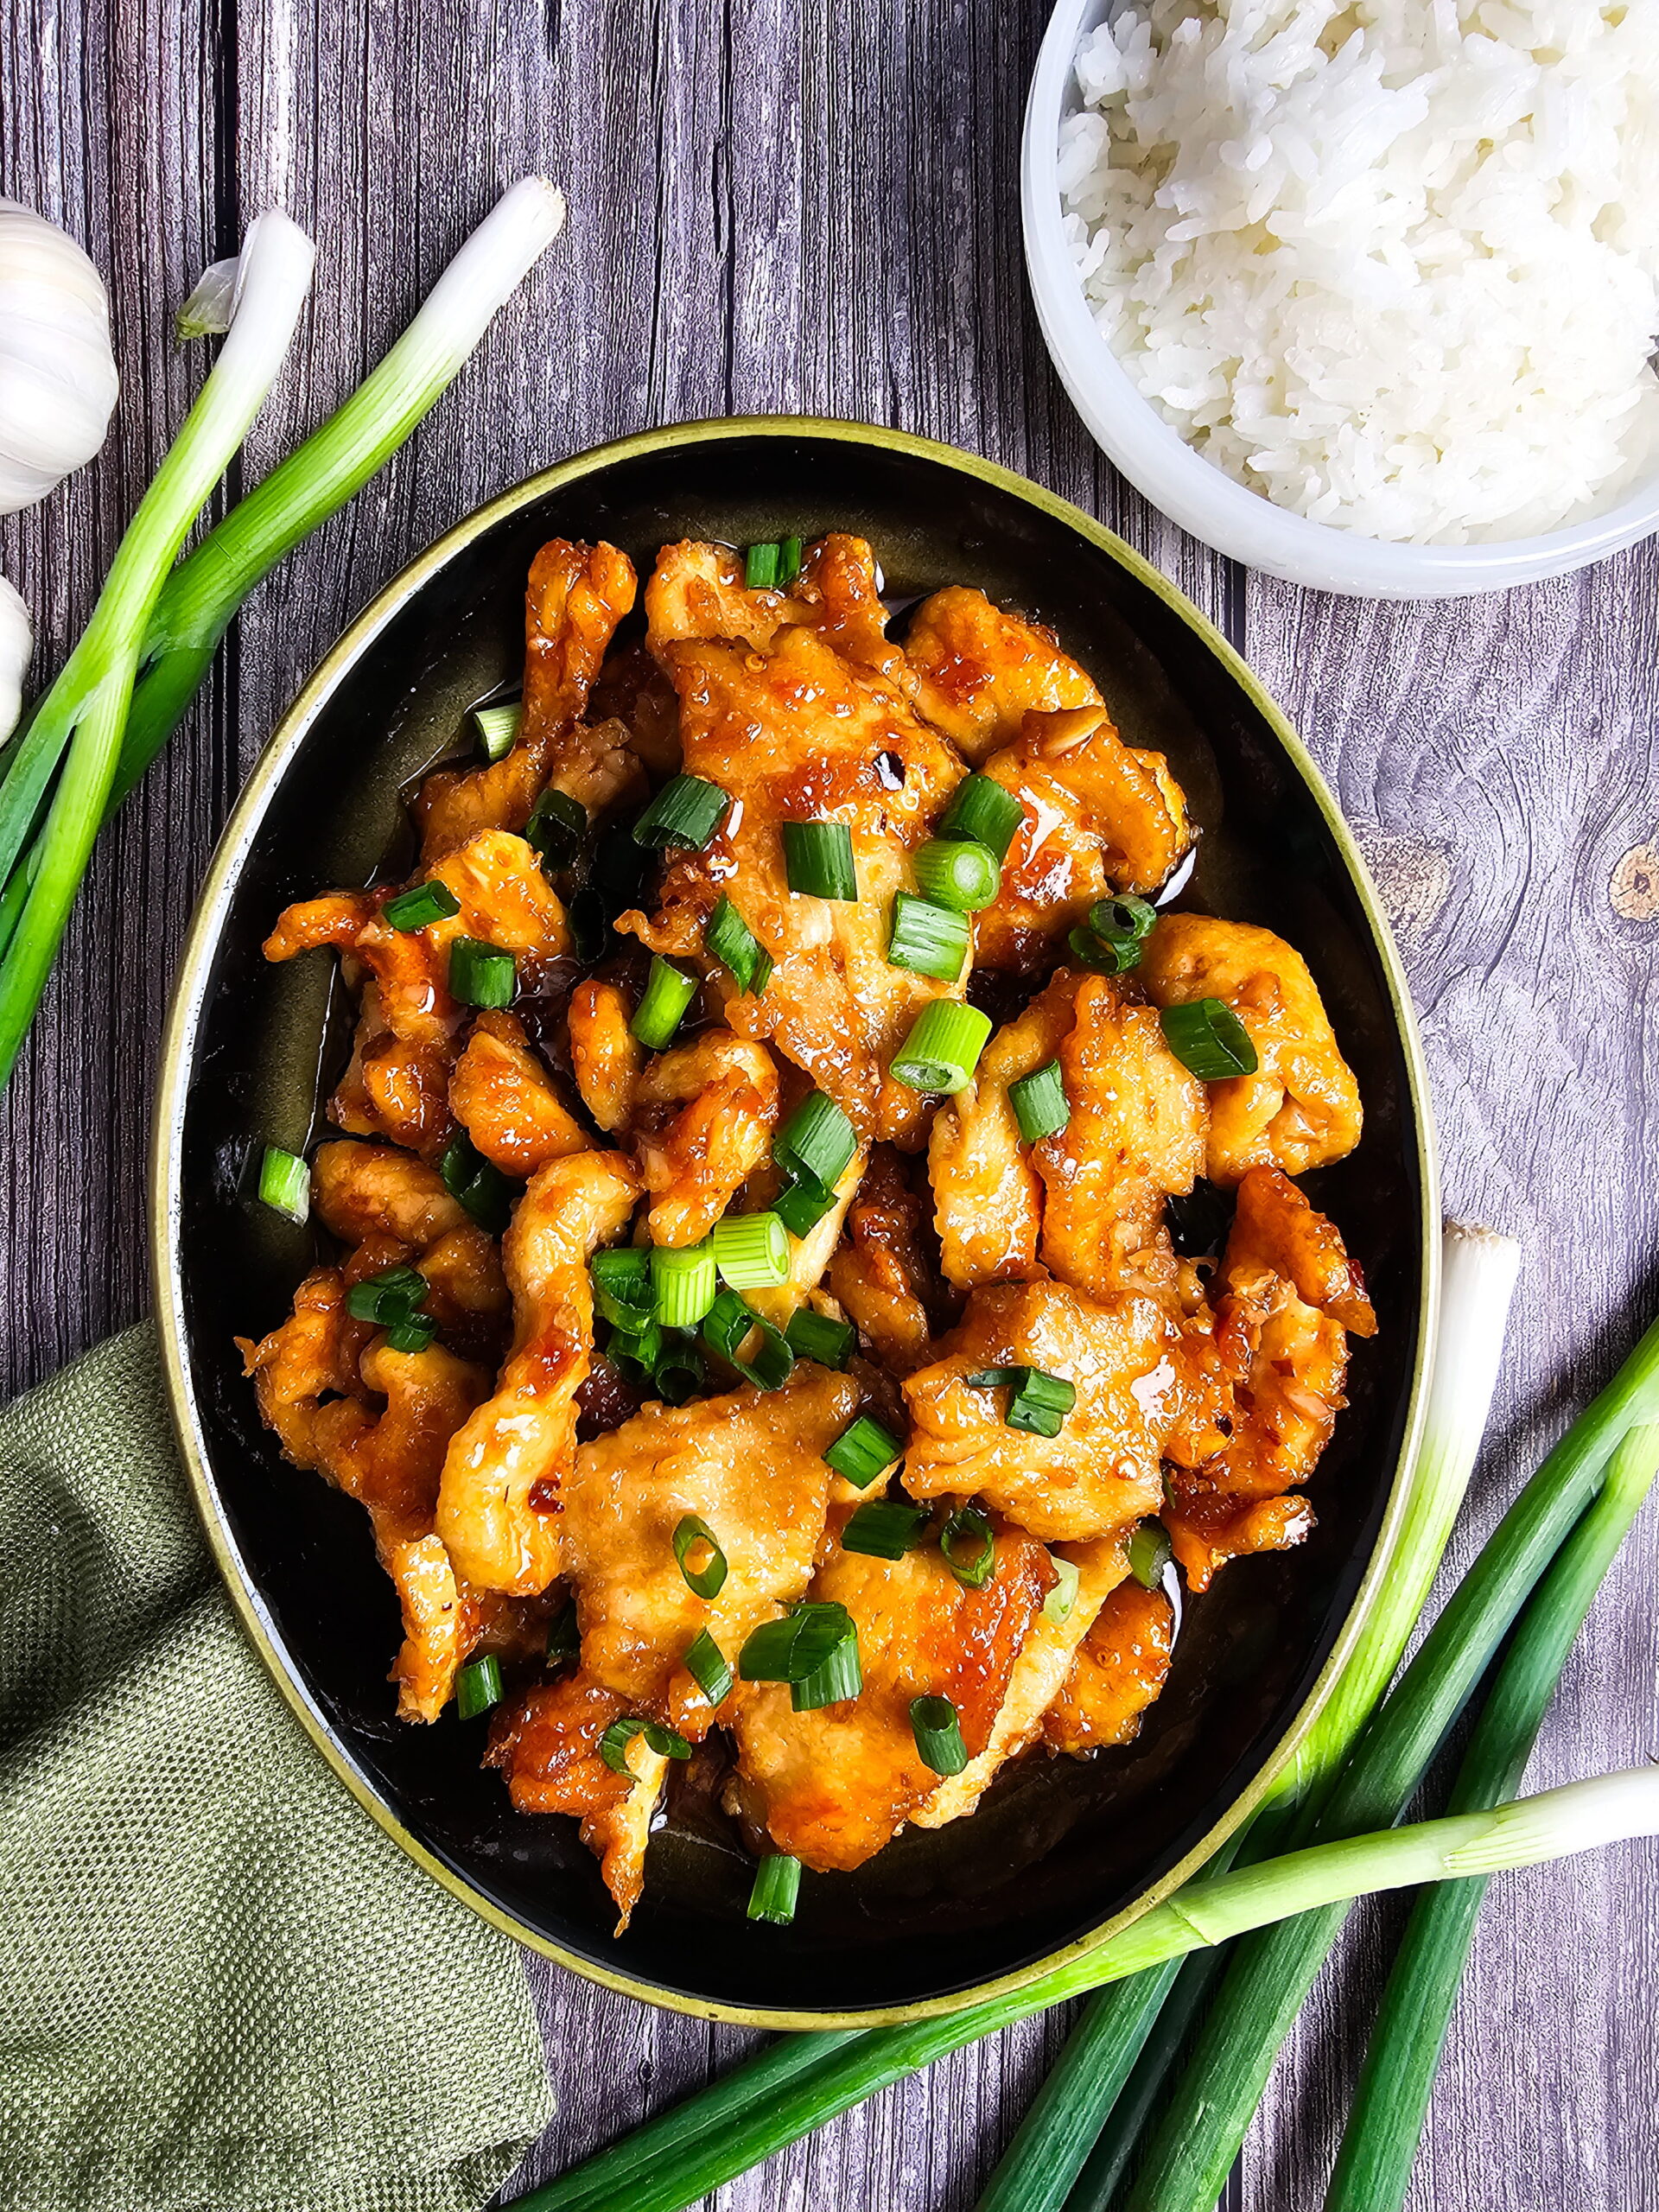
Stir in the green onions and cook for one minute. The green onions should retain some crunch — they are not meant to wilt completely. Taste and adjust seasoning. If it needs more brightness, add a small splash more rice vinegar. If it needs more heat, add a pinch more red pepper flakes.
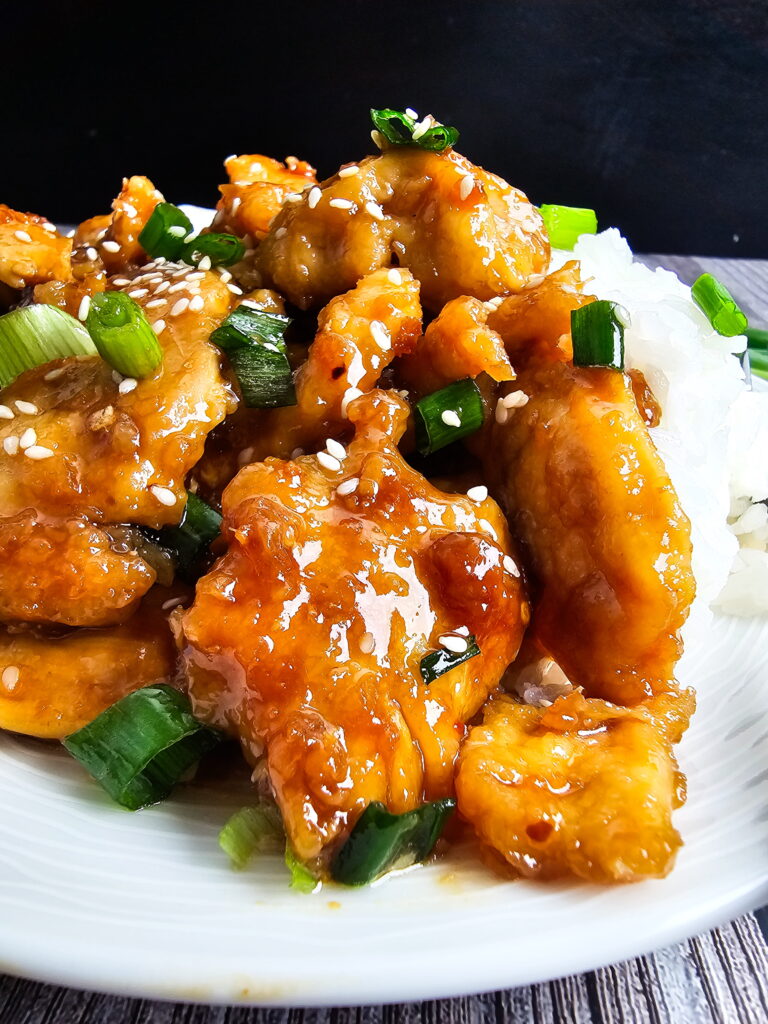
Scatter sesame seeds over the top if using, and a tiny drizzle of fresh sesame oil right before serving will make the whole dish smell incredible.
Serve immediately over steamed white rice, jasmine rice, or noodles.
FAQ — Mongolian Chicken Questions People Actually Ask
The most common reason is using too much brown sugar or not using rice vinegar to balance it. Most basic recipes use ¾ cup or more of brown sugar, which overwhelms the soy sauce base. This recipe reduces that to ⅓ cup of dark brown sugar and adds rice vinegar specifically to cut through the sweetness. If you try this recipe and still find it too sweet, reduce the brown sugar to ¼ cup and add an extra half teaspoon of rice vinegar.
Almost always an overcrowding issue. When pieces of chicken are too close together in the pan, moisture builds up and the chicken steams rather than sears. Make sure you are working in batches with space between each piece, that your oil is properly hot before the chicken goes in (it should shimmer and a test piece should sizzle immediately on contact), and that you are not moving the chicken around too much while it sears. Let it sit
Yes, and many people prefer them. Thighs are fattier, which means they stay juicier and are more forgiving if slightly overcooked. Slice them the same way, velvet them the same way, and add about a minute to the cooking time per side.autee them to soften them before adding to the sauce for added flavor and texture.
Both are American Chinese takeout-style dishes, but General Tso’s is typically battered and deep-fried with a spicier, more acidic sauce that often includes rice vinegar and dried chilies as prominent flavors. Mongolian chicken is pan-seared (not deep-fried), and the sauce is sweeter and milder with garlic and ginger as the primary aromatics. General Tso’s has more heat and tang; Mongolian chicken has more sweet savory depth.
Not as written, since standard soy sauce contains wheat. To make it gluten-free, substitute tamari or certified gluten-free soy sauce for the regular soy sauce, and verify that your hoisin sauce is gluten-free. Several brands make gluten-free hoisin.
You can, but the depth of flavor will be noticeably different. Hoisin adds a rich, slightly sweet, fermented complexity that is hard to replicate exactly. The closest substitutes are a teaspoon of oyster sauce (which is saltier and less sweet) or a small amount of dark soy sauce plus a pinch of five-spice powder. Neither is a perfect replacement but both work better than just leaving it out.
Mongolian chicken sauce thickens as it cooks from the starch coating on the chicken. If it gets thicker than you want, add chicken broth or water a tablespoon at a time, stirring over medium heat until you reach the right consistency. Do not add too much liquid at once or you will dilute the flavor.
This recipe is already completely dairy-free as written.
Substitutions and Variations:
- Chicken thighs work well in this recipe and produce an even juicier result because of their higher fat content. They will take slightly longer to cook through — add about a minute per side during the sear. Boneless skinless thighs, sliced the same way as the breast, are an excellent swap.
- For a gluten-free version, replace the soy sauce with tamari or coconut aminos in equal amounts. Coconut aminos are slightly sweeter and less salty, so reduce the brown sugar by about a tablespoon and taste as you go. Check that your hoisin sauce is gluten-free as well, since some brands use wheat.
- To make this spicier, add 1 to 2 teaspoons of chili garlic sauce to the sauce mixture before cooking. This adds heat and a garlicky brightness that is different from just adding extra pepper flakes. Sambal oelek also works.
- For a lower-sugar version, reduce the brown sugar to ¼ cup. The sauce will be noticeably less sweet and more savory-forward. Some people actually prefer this balance, especially if serving over plain rice where the sweetness can amplify.
- To add vegetables, broccoli florets, bell pepper strips, snap peas, and thinly sliced carrots all work. Add them after the aromatics step and before the sauce goes in, cooking them for 2 to 3 minutes until just tender-crisp so they keep their texture and color.
What to Serve With Mongolian Chicken?
Steamed jasmine rice is the most natural pairing — the neutral fragrant rice absorbs the sauce beautifully and provides the perfect contrast to the bold flavors of the chicken. Plain white rice works just as well if that is what you have.
For a lower-carb option, cauliflower rice is an excellent substitute that holds up well under a saucy dish like this.
Lo mein noodles or rice noodles turn this into a heartier meal and are especially good if you are feeding a crowd. Cook the noodles separately and toss them directly in the pan with the finished chicken and sauce before serving.
Stir-fried vegetables make a natural side — broccoli, bok choy, and snap peas all complement the flavors without competing with them. A simple cucumber salad with rice vinegar, sesame oil, and a pinch of sugar cuts through the richness and cleanses the palate between bites.
Make-Ahead and Storage?
The sauce can be mixed and stored in a sealed jar in the refrigerator for up to a week. Having the sauce pre-made reduces the total cooking time to about 15 minutes on a weeknight.
The chicken can also be velveted and refrigerated for up to 24 hours before cooking. Keep it covered and bring it closer to room temperature before it goes into the hot pan.
Leftover Mongolian chicken stores well in an airtight container in the refrigerator for 3 to 4 days. The sauce will thicken considerably as it cools. When reheating, add a tablespoon or two of water or chicken broth to the pan along with the chicken and heat over medium, stirring until loosened and hot. The microwave works too — cover it loosely and heat on 70% power to avoid overcooking the chicken.
For freezing, let the dish cool completely, portion into freezer-safe containers, and freeze for up to 3 months. Thaw overnight in the refrigerator before reheating.
Final Thoughts
This easy Mongolian chicken recipe is one of those weeknight dishes that once you make it the upgraded way, you genuinely cannot go back to the stripped-down version. The velveting step is five minutes of prep that pays off in an entirely different texture. The balanced sauce — broth instead of water, vinegar to cut the sweet, hoisin for depth — produces something that tastes like it came from a good restaurant instead of a recipe that just approximated the idea of one.
Make it once and you will understand why delivery is optional.
LOOKING FOR MORE DINNER RECIPES? TRY THESE!
Best Air Fryer Crispy Teriyaki Chicken Breast Bites
Better Than Panda Express Air Fryer Orange Chicken
20-Minute Easy Chicken Teriyaki Noodles
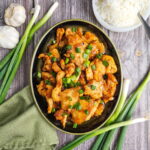
Easy Mongolian Chicken Recipe Better Than Takeout (Crispy + Balanced Sauce)
Equipment
Ingredients
- 1¼ pounds boneless skinless chicken breast, thinly sliced
- ¼ cup cornstarch
- 1 tablespoon soy sauce
- 1 tablespoon vegetable oil
- Salt and pepper (keep in mind the sauce has plenty of salt)
Sauce
- ½ cup low sodium soy sauce
- ⅓ cup dark brown sugar reduced for balance
- ⅓ cup chicken broth instead of water for depth
- 2 teaspoons rice vinegar key for cutting sweetness
- 1 tablespoon hoisin sauce adds rich takeout flavor
- 1 teaspoon sesame oil (toasted)
Aromatics
- 1½ teaspoons garlic minced
- 1 teaspoon ginger minced, fresh
- ½ teaspoon red pepper flakes optional but recommended
For Cooking
- 3 tablespoons vegetable oil
Finish
- ½ cup green onions cut into 1-inch pieces
- Optional: sesame seeds
Instructions
- Velvet the Chicken: In a bowl, combine the sliced chicken with cornstarch, 1 tablespoon soy sauce, 1 tablespoon oil, and a pinch of salt and pepper. Toss until everything is evenly coated and let it sit for 10 to 15 minutes at room temperature.
- Do not skip this step. The cornstarch gives the chicken its coating and helps the sauce cling later. The soy and oil start building flavor from the inside out. The resting time lets the coating adhere and the muscle fibers relax slightly, which is what gives you juicy chicken instead of dry chicken. This is the same technique Chinese restaurant kitchens use, and it works.
- Make the Sauce: In a small bowl or measuring cup, whisk together the low sodium soy sauce, dark brown sugar, chicken broth, rice vinegar, hoisin sauce, and sesame oil until the sugar is dissolved and everything is combined. Set it aside. Having the sauce ready before you start cooking is important because once the pan gets hot, things move fast.
- The dark brown sugar instead of light brown sugar gives the sauce a deeper, more molasses-forward sweetness that reads as more complex and less candy-like. The rice vinegar amount is adjustable — start with one teaspoon and taste it after the sauce simmers if you want to add more.
- Sear the Chicken: Heat 3 tablespoons of vegetable oil in a large skillet or wok over medium-high heat until the oil is shimmering. Add the chicken in a single layer, working in batches if needed. This is where most people make a critical mistake — overcrowding the pan drops the temperature and causes the chicken to steam instead of sear. You want space between the pieces.
- Let the chicken cook undisturbed for about 2 to 3 minutes until the bottom is golden and crispy. Flip and cook another 2 to 3 minutes until cooked through. Remove the chicken and set it on a plate. Do not cover it or the crust will steam off.
- Build the Aromatic Base: Reduce the heat slightly. In the same pan, add the minced garlic, ginger, and red pepper flakes. Cook for 30 to 45 seconds, stirring constantly. You want them fragrant and just starting to color — not brown and bitter. The rendered chicken drippings left in the pan add flavor here that you would lose if you started fresh.
- Add the Sauce and Simmer: Pour in the prepared sauce and bring it to a simmer over medium heat. Let it cook for 2 to 3 minutes, stirring occasionally. The sauce will begin to thicken and reduce. You will notice it start to look glossy rather than thin and watery — that is the signal you want. Unlike the original recipe, this version does not require a cornstarch slurry because the velveting coating on the chicken provides enough starch to help thicken the sauce naturally as the chicken is added back in. If your sauce is thinner than you like after the chicken goes back in, let it cook an extra minute or two before serving.
- Add the Chicken and Finish the Sauce: Return the seared chicken to the pan and toss to coat everything evenly. Cook for 2 to 3 more minutes, stirring occasionally, until the sauce is thick, sticky, and clings to every piece. This is the moment the dish becomes what it is supposed to be — not chicken with sauce poured over it, but chicken that has become part of the sauce.
- Finish and Serve: Stir in the green onions and cook for one minute. The green onions should retain some crunch — they are not meant to wilt completely. Taste and adjust seasoning. If it needs more brightness, add a small splash more rice vinegar. If it needs more heat, add a pinch more red pepper flakes.
- Scatter sesame seeds over the top if using, and a tiny drizzle of fresh sesame oil right before serving will make the whole dish smell incredible. Serve immediately over steamed white rice, jasmine rice, or noodles.